
BLOG
The Domke F-3x One Year On
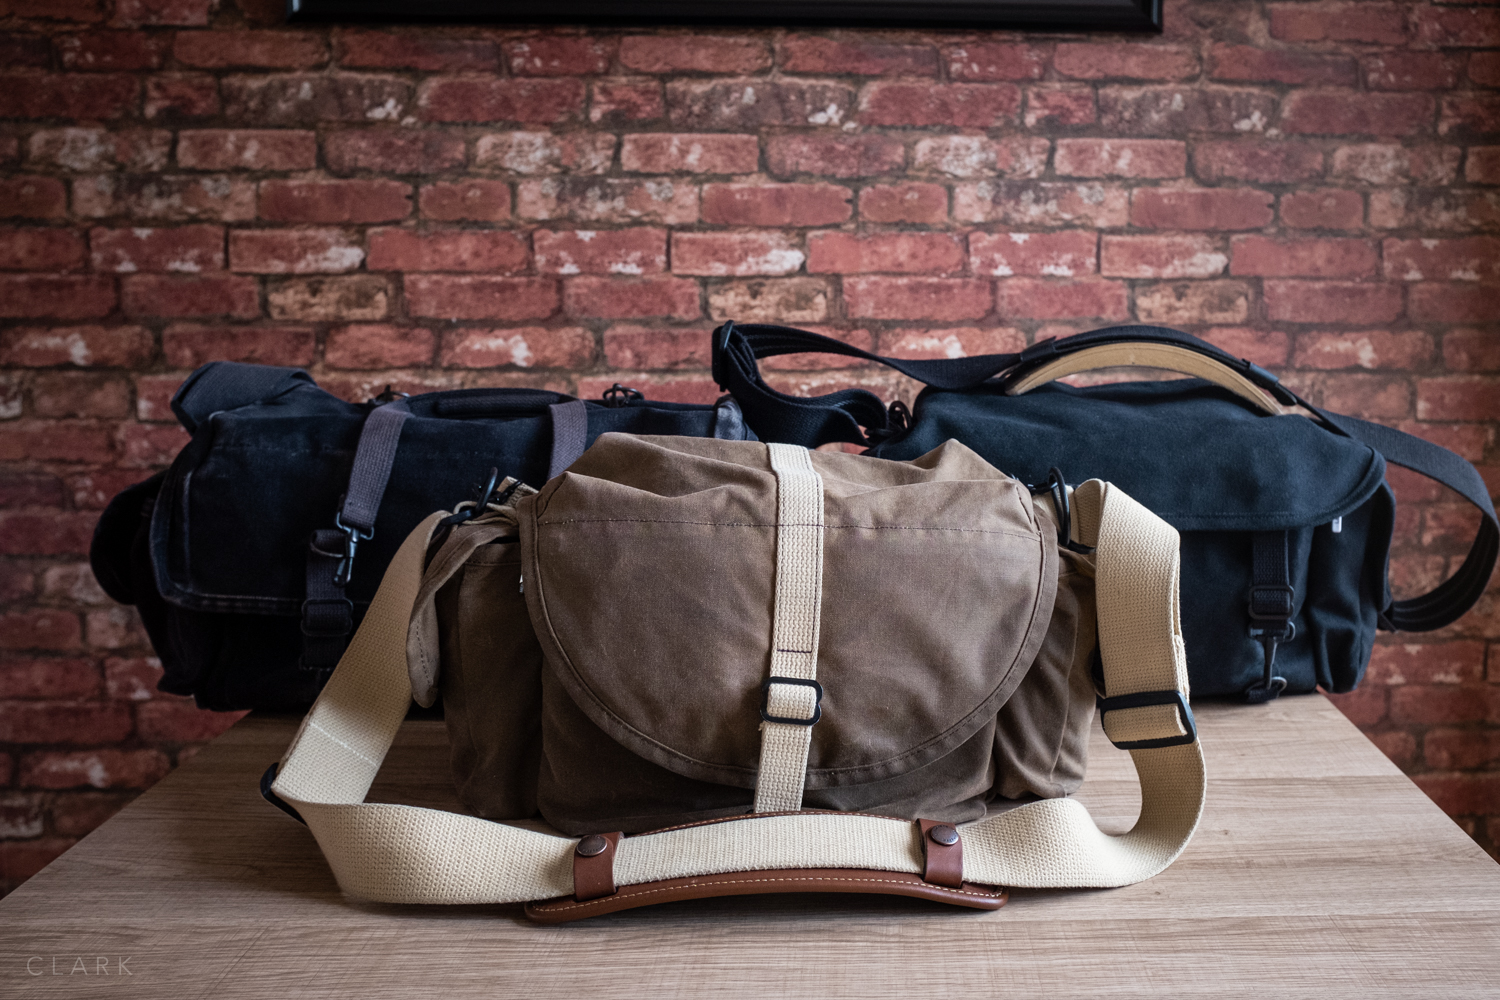
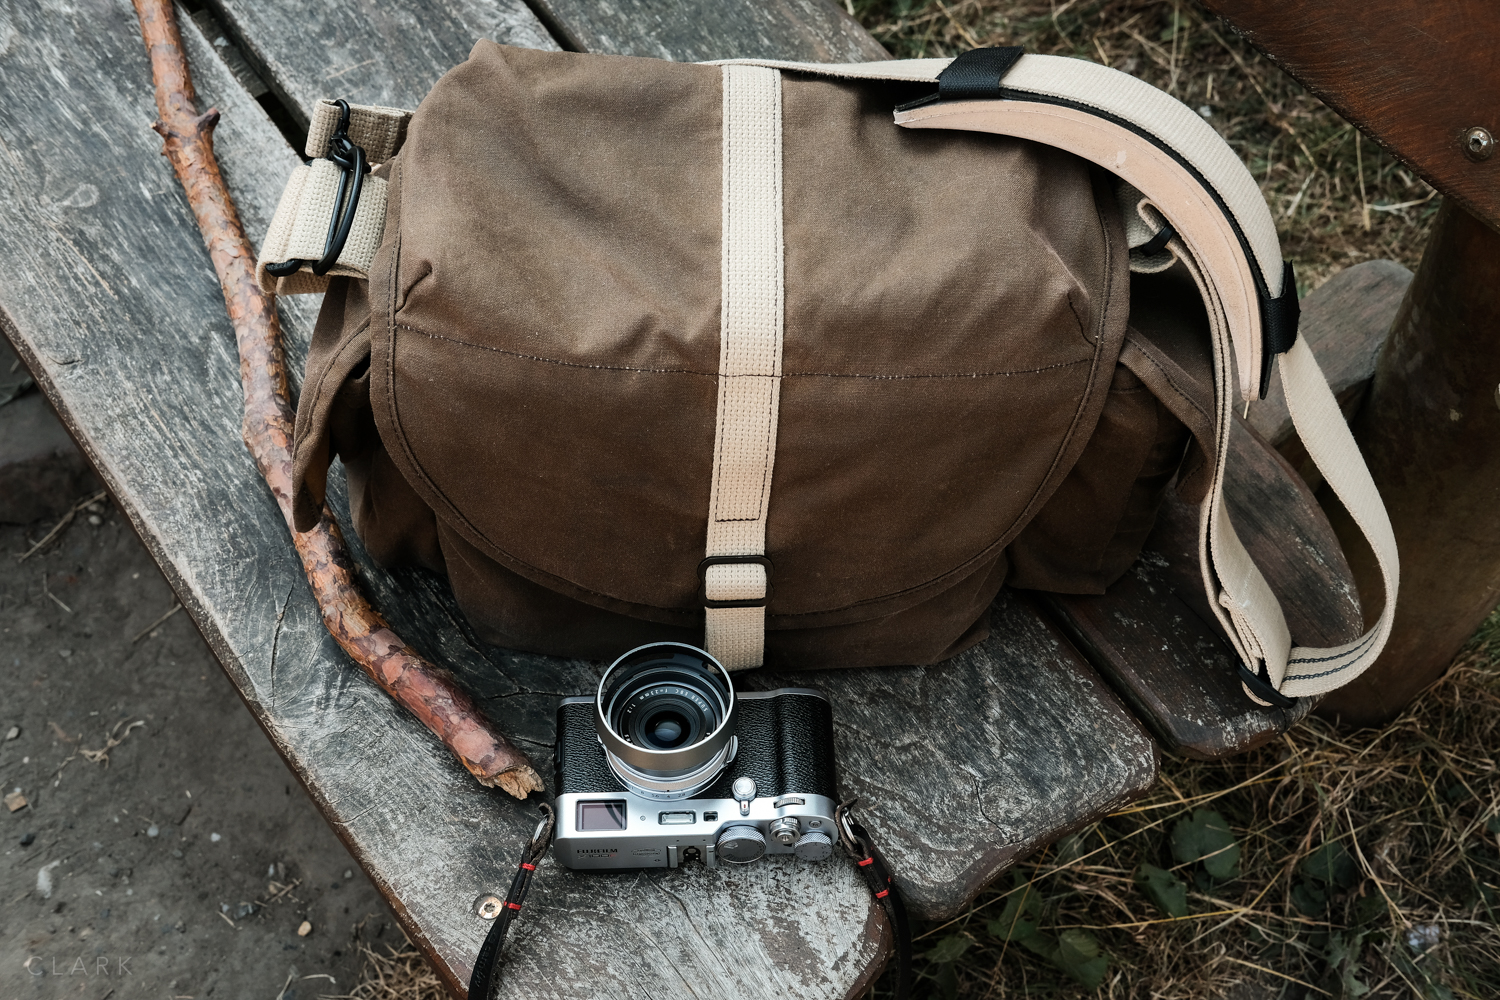
I wanted to do a follow-up to my review of the Domke F-3x that I wrote back in August 2018 called Domke Or An Ass. There’s so much more you pick up on a bag (or any product for that matter) after using it over a long period of time. Those things tend to be both good and bad. Probably the biggest thing I’ve realised about the F-3x (which would apply to a lot of Domke bags) is that it’s a blank canvas and should be adapted to the individual.
Top row (left to right) Fujifilm X70, X-Pro2 & X100F. Bottom row (left to right) Fujinon 50mm f2 & 16mm f2.8 lenses stacked, GoPro Hero 7, Fuji WCL-X100 lens & wallet.
BILLINGHAM SUPERFLEX INSERTS
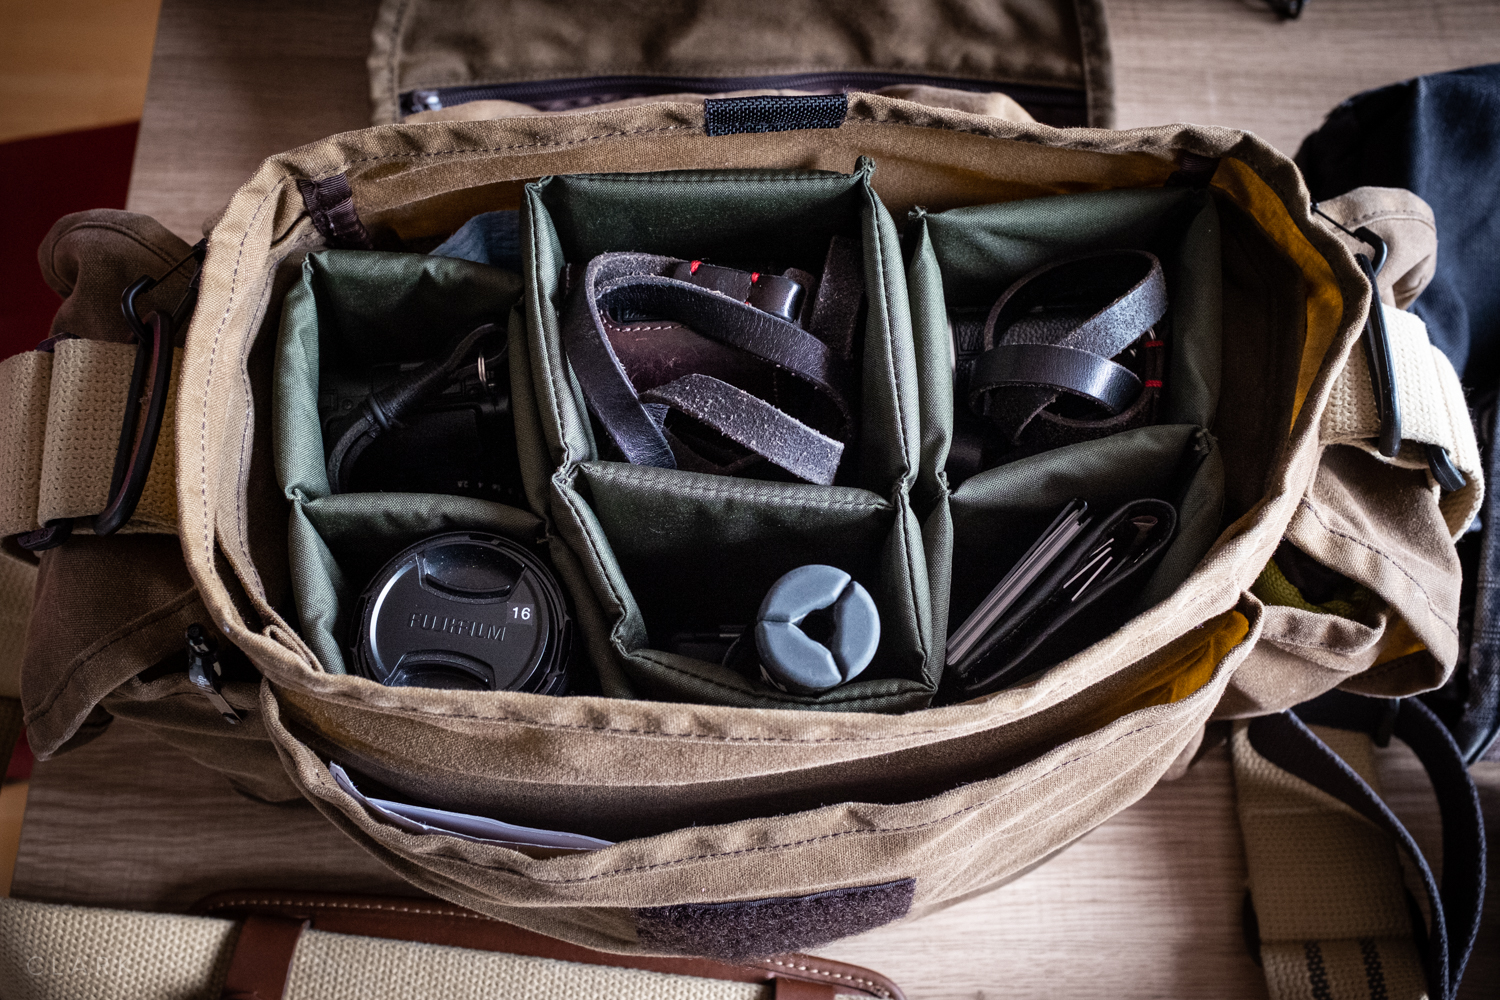
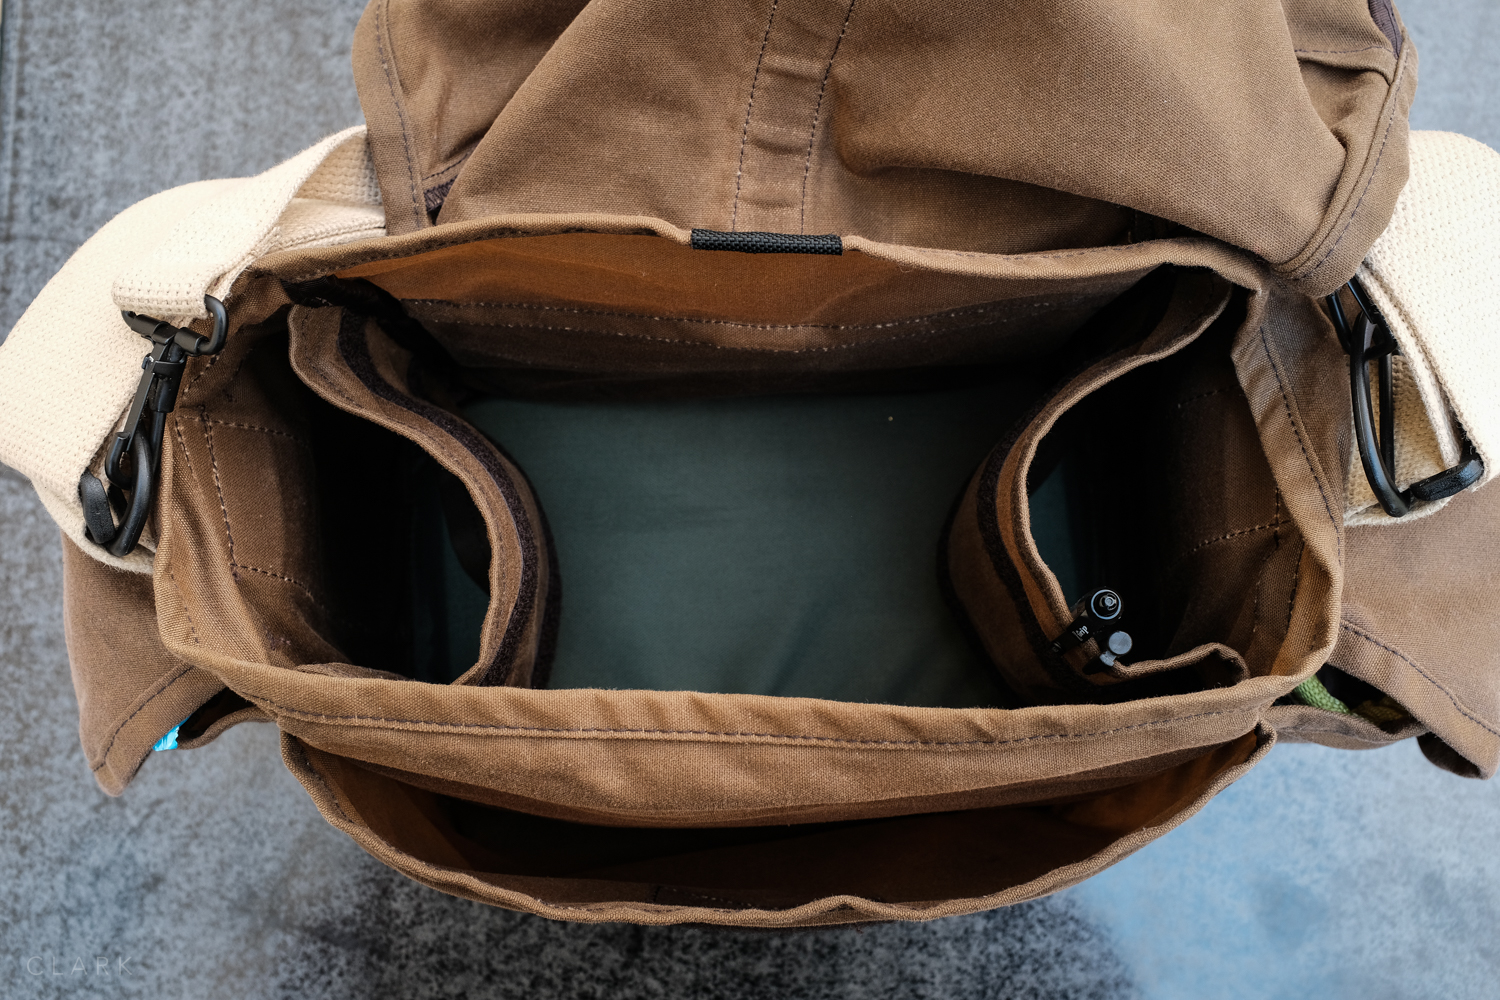
I wasn’t keen on the setup of the F-3x main compartment as it had very little protection for my gear. Two very thin canvas loops (designed for lenses and a single piece of padding to keep two bodies apart is just not enough (for me at least). Smaller lenses can get under those bottomless canvas loops and go on a tour of the bag, visiting the rest of the gear inside with nasty results. So in my review, I used two different inserts. The Billingham Hadley Small is narrow, doesn’t really utilise the space of the F-3x that well, but is a good insert for the bag and provides a great amount of protection for the equipment inside. The Koolertron (seen in my review), although a great insert with good protection, didn’t really make use of the amount of space it took up, which was all of the main compartment. It also made the F-3x very boxy due to its tight fit and is the full height of the bag. Domke dividers didn’t give me the sizes I was looking for.
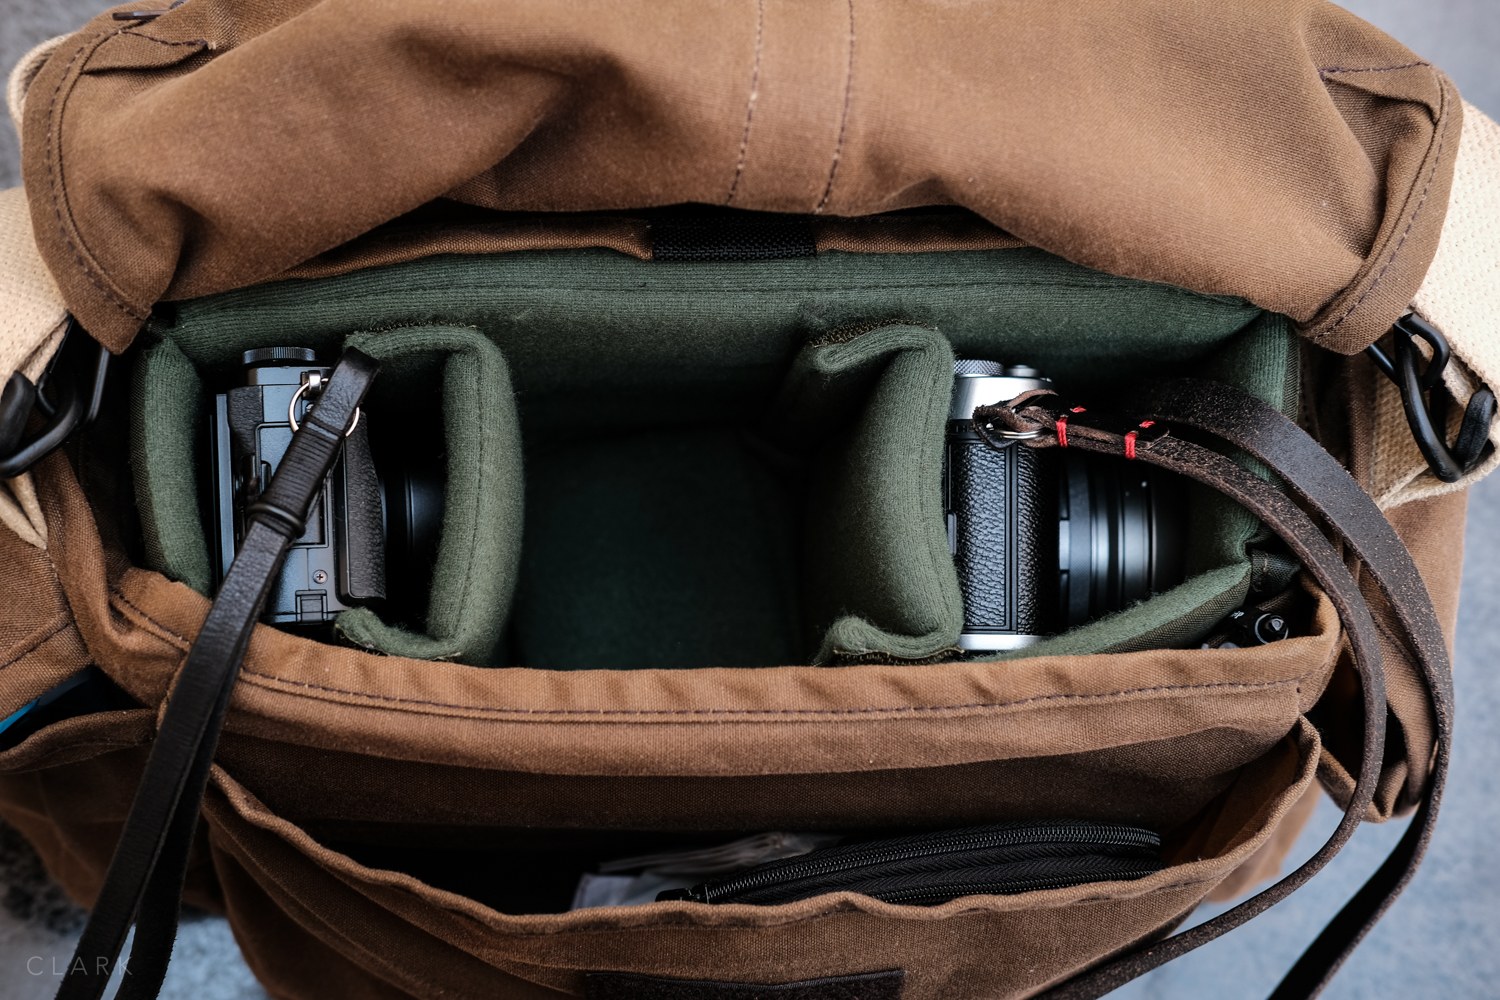
But then I came across the Billingham Superflex Partitions, a full range of fold-flat bottomless inserts that allow me to use the space in my F-3x more efficiently. The Superflex series are all 15cm in depth (back to front), which is almost perfect for the base of the F-3x (just overhanging slightly). The height and width of these dividers are in the names, with the last number always being the height. So a 9-15 is 9cm wide and 15cm tall (remember the depth is always 15cm across the range. A 10-18 is 10cm wide and 18cm tall. The F-3x can take the 18cm range comfortably, but I opted for the 15cm high ones as it provided a good depth for my cameras and lenses without having to dig down to reach my gear. It also leaves some room on the top for a scarf or a book if required, and lets the lid of the bag be a little more loose and floppy, which I like about the F-3x.

A view with the content pulled out slightly.
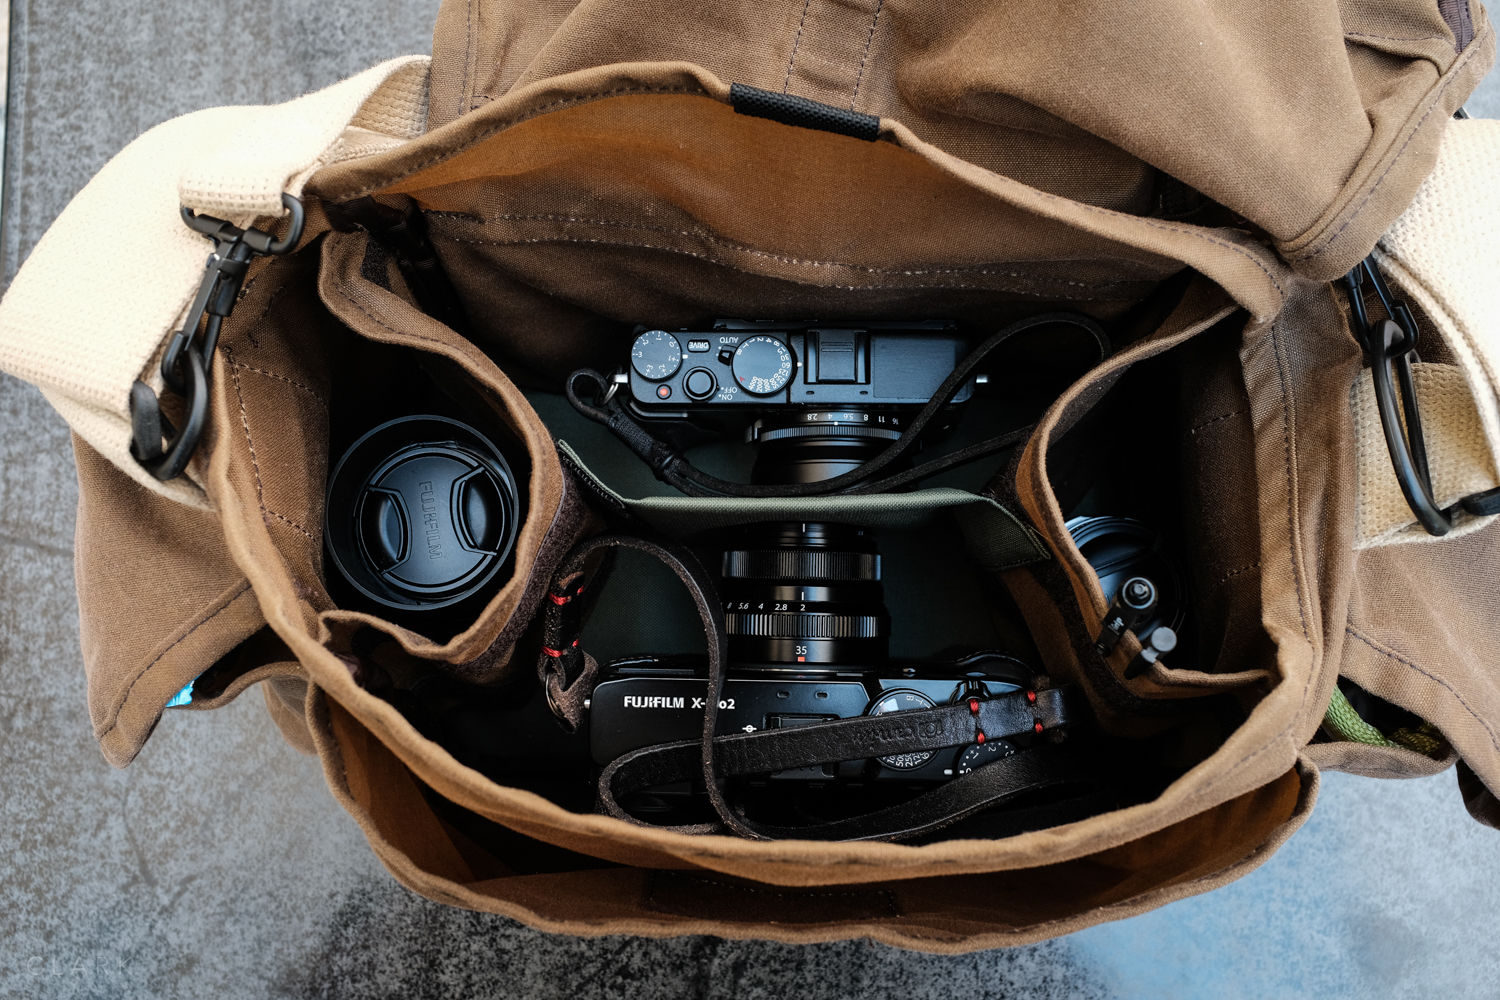
All of the Superflex inserts are divided into two compartments and there is a good amount of variation from size to size. The 9-15 is divided up into two sections of 9cm and 6cm, which is ideal for my X-Pro2 with a Gariz leather half case and either a 16/2.8, 18/2, or 35/2 lens attached in the 9x9cm part and then I can fit an X70 without a hood, or more small lenses. It’s worth pointing out that one compartment on each insert is always a square. So the first number of the name has that many centimetres square. 9-15 has a 9x9cm compartment, 12-21 has a 12x12cm compartment and so on (see diagram below).
My X100F sits nicely in the 8-15, which is divided up into 8cm and a 7cm compartments. So the X100F can fit in the 8cm space with lens hood attached and the X70 can fit in the 7cm space with lens hood attached too. My third and last Superflex divider is the 7-15, which like the 8-15 is divided up into 8cm and 7cm compartments. This one is ideal for lenses and accessories. Here is Billingham’s chart for the various sizes of Superflex inserts (the 9-21 to 12-21 won’t fit the F-3x, they are too tall). You can also find my review of the excellent Billingham Hadley Small Pro HERE.

These are the sizes available of the Billingham Superflex Inserts
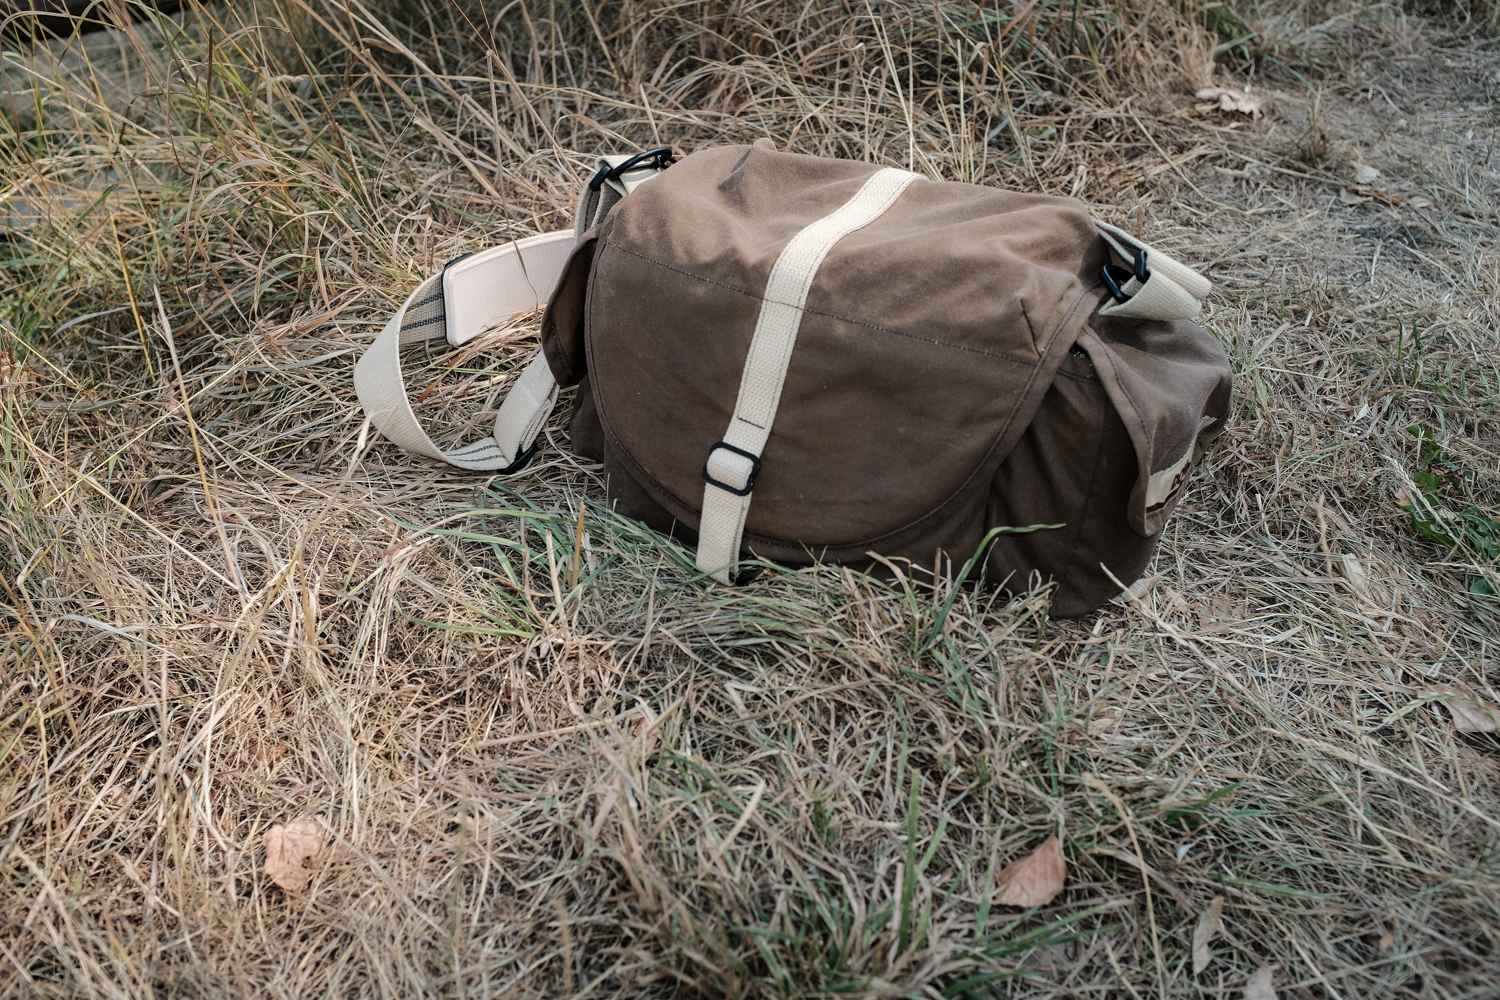
THE WAX OF THE RUGGED WEAR BAGS
You can sit at a computer for days reading about all that has been written about the wax coating of these Rugged Wear Domke bags. In my opinion, they look good, but no-one wants to get wax on their hands that then gets transferred on to cameras and lenses. So I went through a phase at the beginning of leaving my F-3x outside in the sun and wiping the wax off with a towel as much as possible. Waterproofing is nice, but it’s not a massive deal for me, and if I really did get caught in a massive downpour I know that most of my kit is weather sealed. So one year in and the wax has been removed quite a bit by me and by natural use.

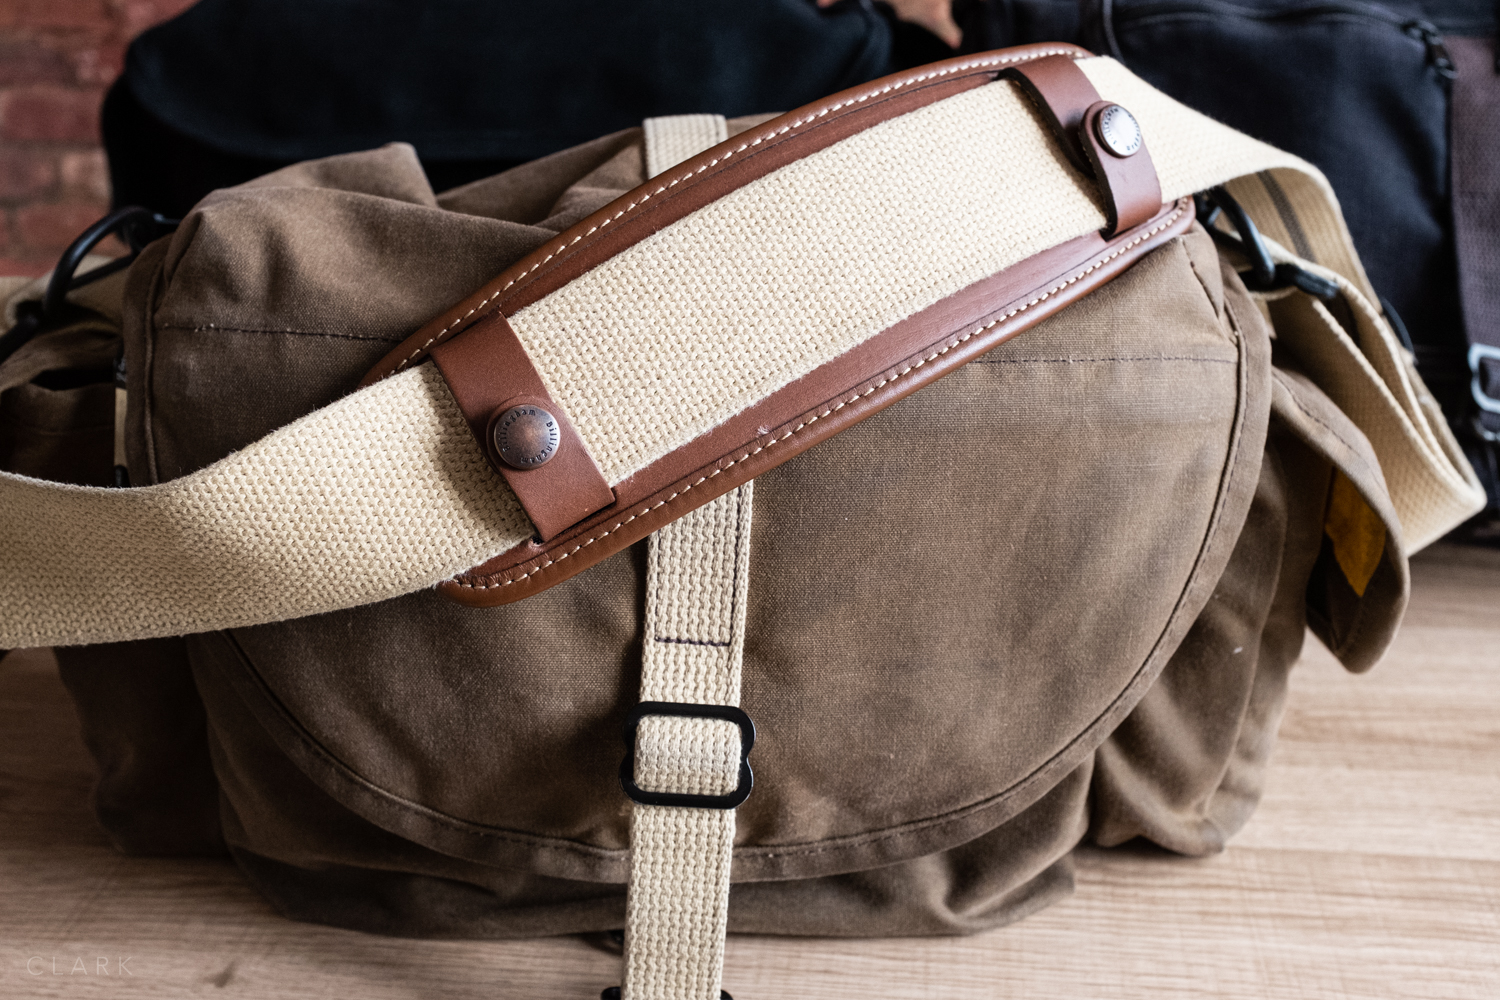
Domke Post Office Pad on the F2 Shooters Bag. The most comfortable shoulder pad I’ve used.
DOMKE POST OFFICE PAD
Domke’s Post Office Pad is an optional accessory that I bought at the same time as the F-3x. It can make a huge difference in the comfort of the shoulder strap when carrying a lot of heavy gear. I was very grateful for it on days when I had my Hasselblad system (500c/m, two lenses, two backs and a light meter) and the Fuji system together. But around the six-month mark I started to notice the glue that held the rubber padding to the plastic shoulder plate (that attached to the strap) was breaking down.

BILLINGHAM SP50 LEATHER SHOULDER PAD
Another option for a shoulder pad on Domke bags with a 2” strap is the Billingham SP50. These pads are well made and come in either Tan, Chocolate or Black leather. They have a decent amount of padding and look great, but the Domke Post Office Pad wins for comfort.
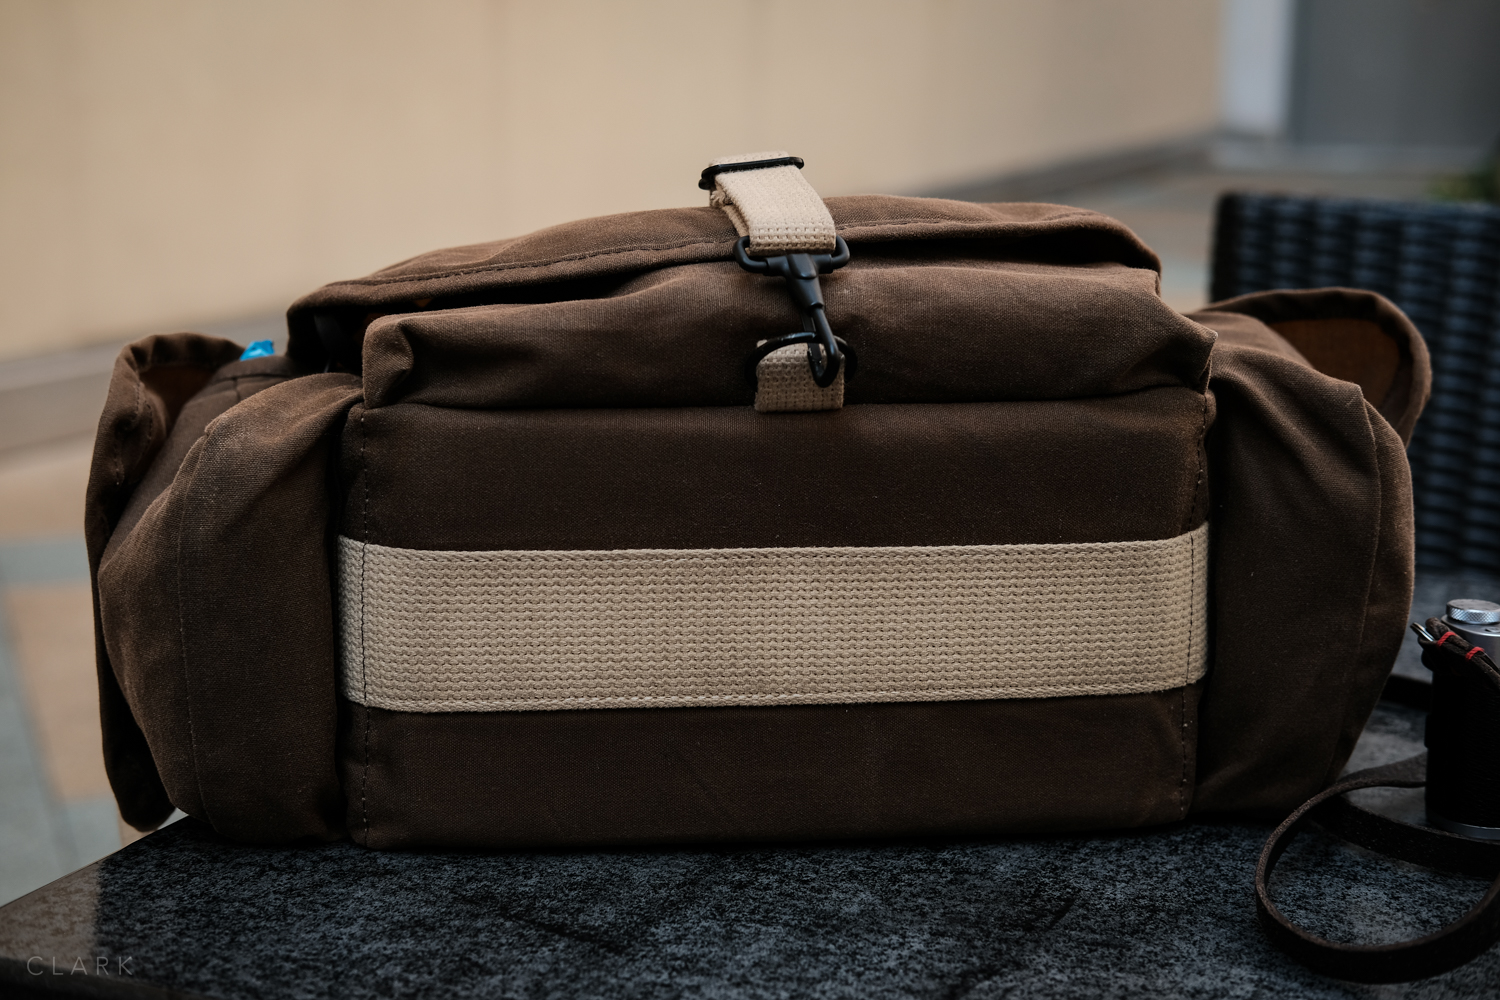
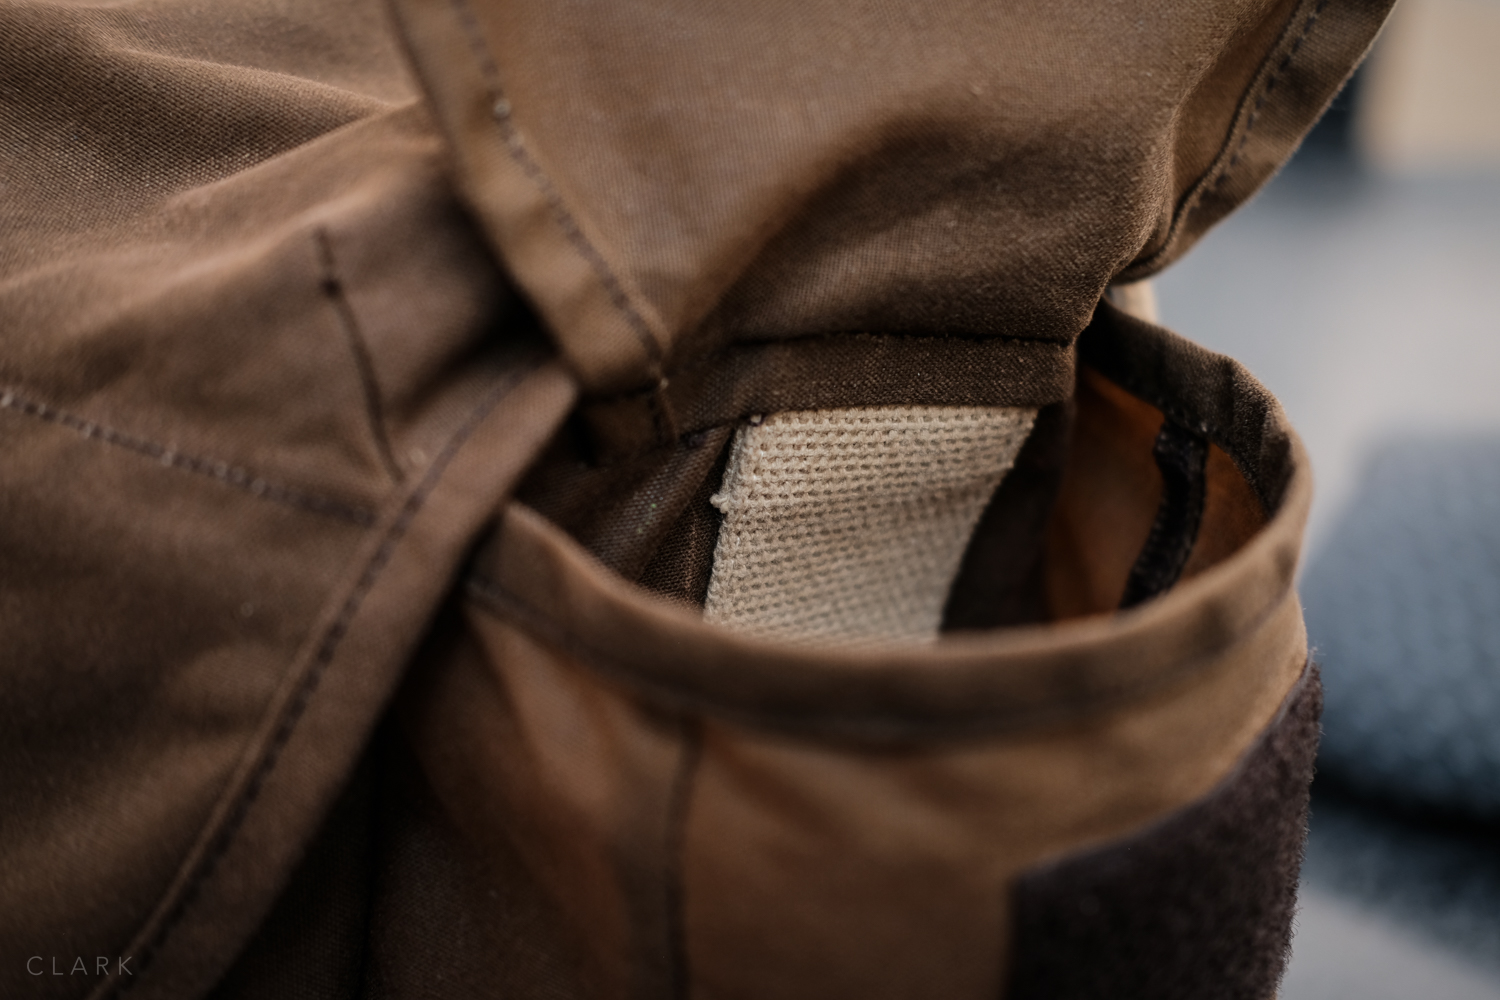
VELCRO ON THE MAIN FLAP
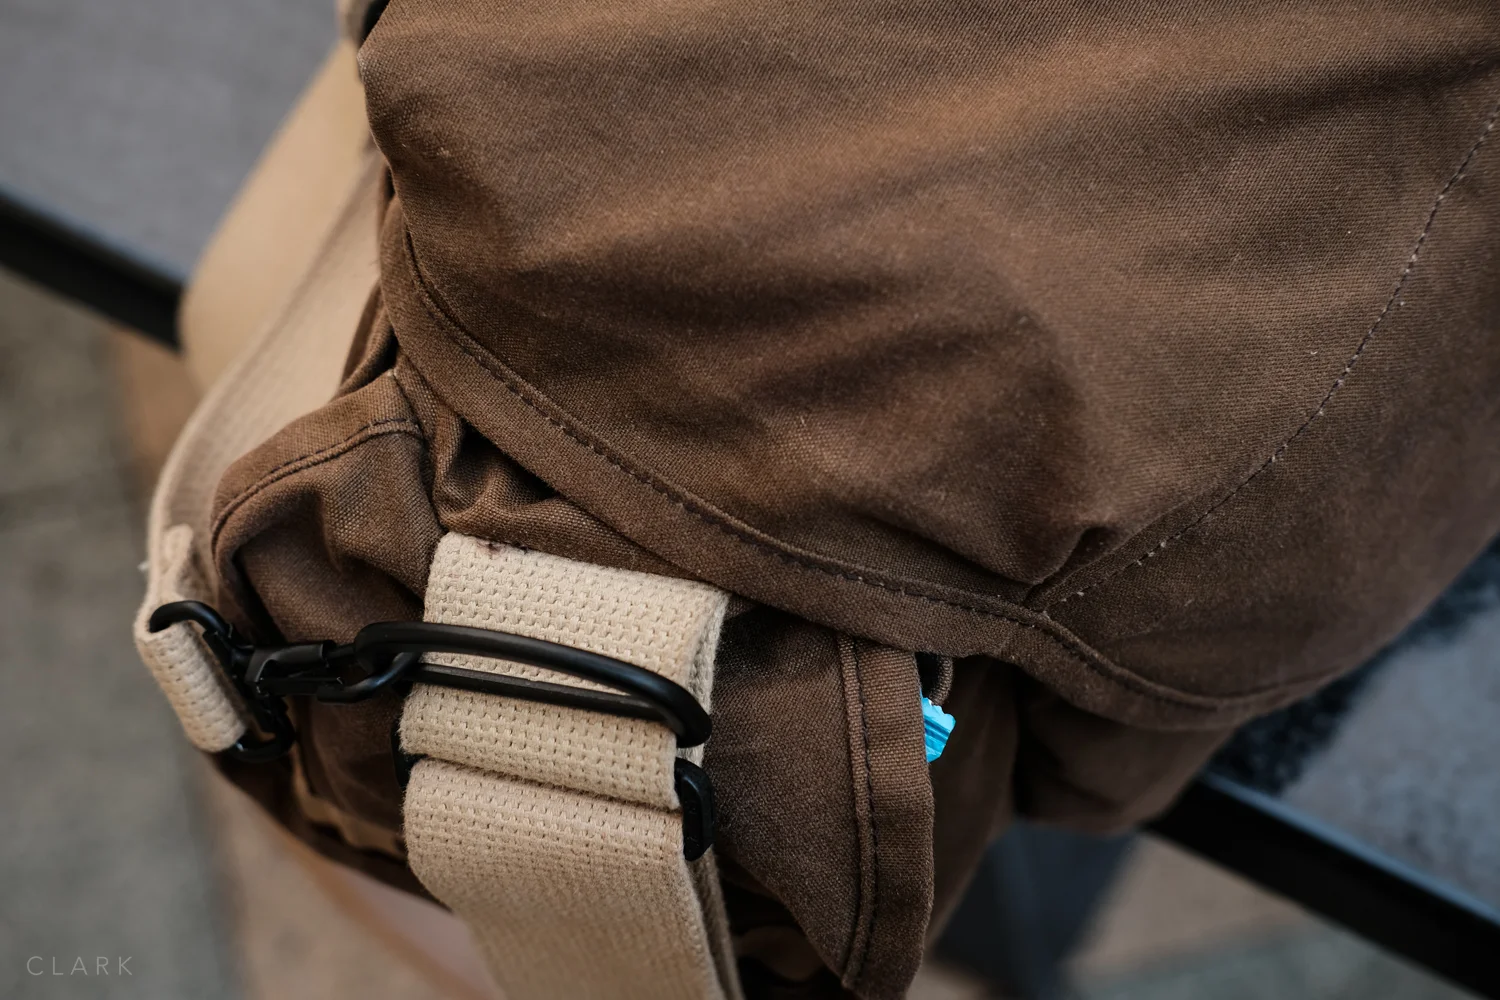
This is a negative point I’m afraid, but not a deal-breaker. The velcro on the main lid of the bag should have been twice the height that it is because unless the bag is stuffed full, the two pieces of velcro can miss each-other completely and be useless at holding the bag shut. This is a problem because Domke users tend to only fasten the metal clamps when in transit but rely on the velcro while working out of the bag.
One other slight annoyance is that the ring to attach the main clasp at the front of the bag seems to be under the bag rather than on the front. The clasps themselves tend to get a bad right-up, but I don’t find them to be a problem and I can easily undo the one on my F-3x one-handed while the bag is on my shoulder.
SLEEPING WITH THIEVES
After using the F-3x for a good length of time, I have found that they are pretty good for sleeping on while sitting in a chair at airports and hospital waiting rooms. I have my Shemagh scarf sitting on the top of my bag (between the cameras and the lid), so it’s quite comfortable to put both arms over the top of the bag and lay my head on my arms. This also ensures your bag will still be there when you wake-up. So I’ll admit it; I love my Domke so much I’ve slept with it :o)
Domke F2 (top left), F-1x (top right), F-3x (bottom left and the F-803 (bottom right). All three black bags are canvas but the F2 is new.
DOMKE BAGS ARE MOREISH
Domke bags can get a little addictive once you have used one. It’s even worse in, like me, you have a natural affinity for really worn and even abused bags. Domke is sort of the Leica of camera bags. Just like an old M3 looks better with plenty of brass showing through the black paint, Domke bags look better the more scuffed and faded they become. I for one have spent far too many hours trolling Ebay for used and abused Domke’s.
Ruggerwear waxed canvas bags are sort new as they are made from a cloth material. The standard canvas bags are less pliable and take a while to break in but become soft like denin as time goes by.


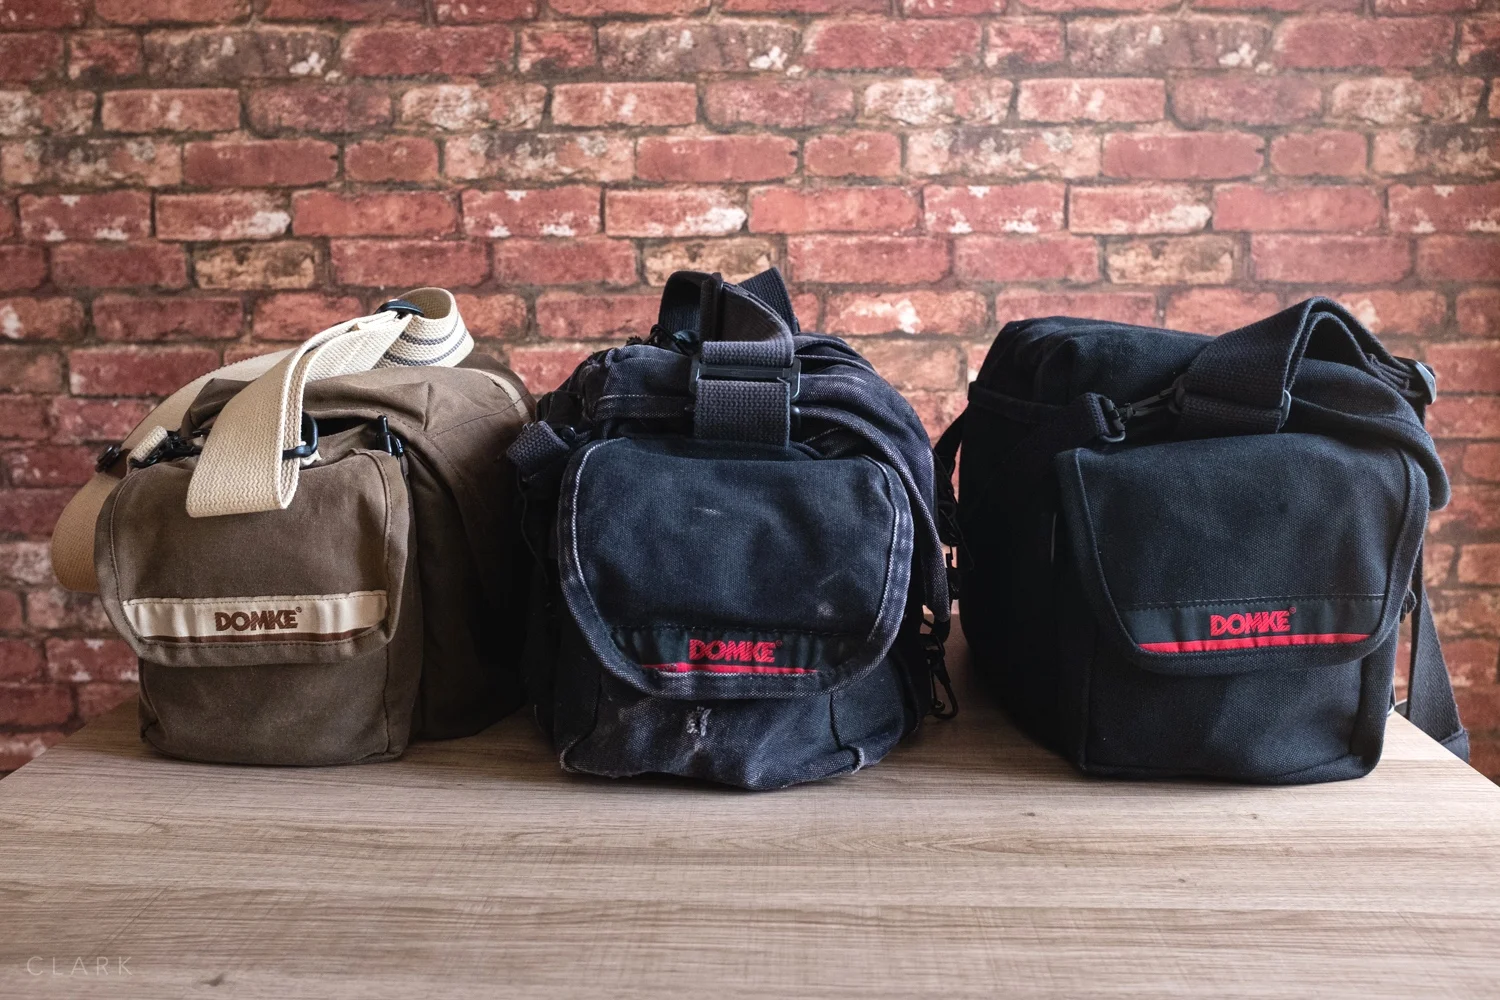
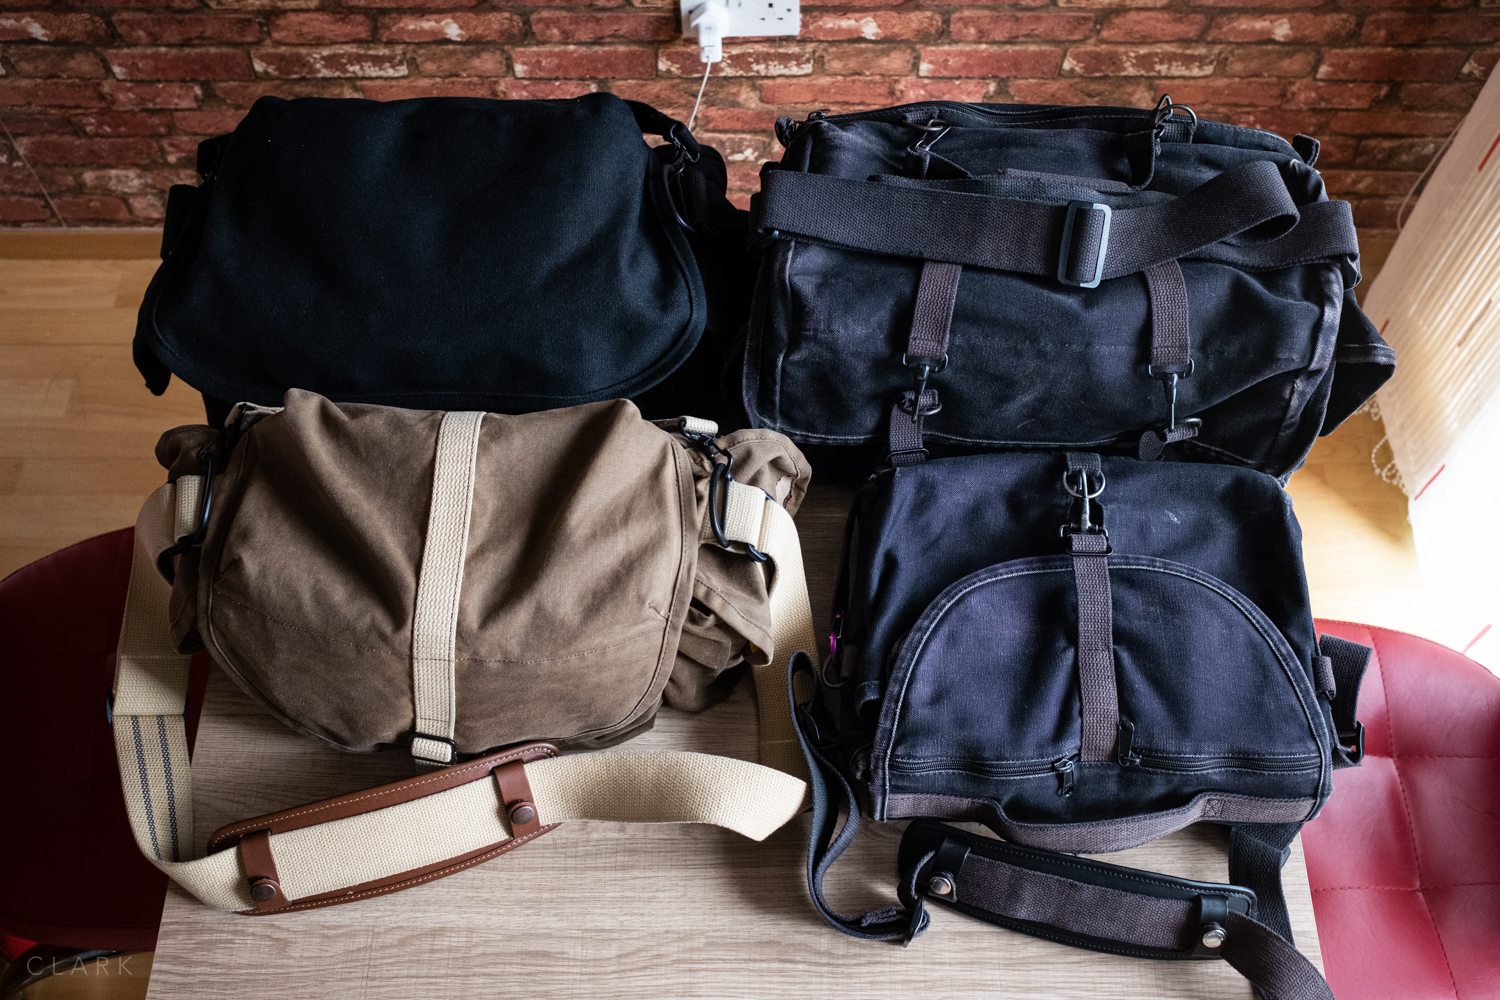
SIZE COMPARISON
There can often be some confusion over the size of Domke bags, so hopefully, the pictures above will help if you are considering one of these camera bags. The F2 is my work bag and holds a lot of kit, but it has to be packed in a specific way to fit in everything needed for a music shoot with an X-T3 & X-T2 kit. I will get round to doing a post about the F2 soon. In the meantime, leave any questions in the comments below and I’ll try to hep if I can.
You can buy the F-3X at Amazon UK
I also have a review of the small Domke F-5xb
Meike 25mm F1.8 - A £65 Lens Review

£65 for a lens. I know what you’re thinking. But if you really are thinking what I think you’re thinking…think again.
During a recent trip to Milan where I shot with an X100F, X-Pro2 and X70, the latter of which I was zone focusing for street photography. I started thinking I would like a manual focus lens for the X-Pro2. I have the 16mm and 23mm, which along with the 14mm are the best manual focus x-series lenses available, but I wanted an old school manual focus lens. I wanted something small with depth of field markings. I also wanted something around a full-frame equivalent to a 35mm, but I wasn’t really interested in using a lens mount adapter. So a quick search on the web, a few YouTube videos later and I had settled on the Meike 25mm f1.8. It was a bonus that it was available for just £65 on Amazon.
A picture of my son after a paint ball session on a grey November day. A few small adjustments in Lightroom
BUILD QUALITY
Build quality on this multi-coated lens is fantastic. All metal construction with 7 elements in 5 groups and smooth aperture and focus rings. The lens feels solid and has a bit of weight to it. It actually looks and feels like a vintage lens in so many ways, helped I’m sure by the Voightlander style focus ring.
WHY BUY THE MEIKE 25mm v THE FUJIFILM 23mm?
Fujifilm lenses are fantastic but they are all, focus by wire, which basically is an electronic sensor, rather than a mechanical focus ring. So the focus rings continuously turn with no hard stop at either end. Sure the 14mm, 16mm and 23mm all have a clutch mechanism and have a definite stop at either end of the range, but they are not linear (except when using X-T3 or X-Pro3 linear focusing mode). The Meike 25/1.8 is just like a vintage lens in that the focus mechanism is mechanical and has hard stops at either end of the focusing range. I wish Fujifilm would make a full-frame equivalent 28mm & 35mm lenses that are not focus by wire. Proper street lenses similar to the Leica Sumicrone 28 & 35mm. Let’s hope they replace the current 18mm f2 with something like this, with hyperfocal distance markings. That would be worthy of a mkII version.


IMAGE QUALITY
The picture on the left (finger in the earhole) is straight out of camera (SOOC) and the one on the right has the following adjustments in Lightroom Classic.
+0.20 Exposure
+15 Contrast
-20 Highlights
+48 Shadows
+15 Clarity
+15 Texture
Adjusting contrast etc has pushed the saturation a little, and looking at it hear, I wish I had dropped it back down again. I’m too lazy to go back and fix it, so the yellows are a bit strong on this one. But I like the tones from this lens. These are the tones I always wanted when I used to shoot with Nikon DSLR’s, but I could never quite get there, even in post.

I’m impressed with how the Meike lens renders colour. It’s rich and warm, plus there seems to be an earthy brown tone, which I really like. There is a difference in exposure by around -1/3 of a stop from what you see in the EVF to the darker image captured, but you get used to that and compensate as you shoot.
LIKES
Great build quality
Small size
Multi-coated
Smooth aperture and focus rings
Depth of field markings
DISLIKES
The centre markings are not quite in the centre
I wish the markings for feet or metres were in a different colour
Clickless aperture (It’s ok but I prefer clicks)
This one was shot using the Acros film simulation. It’s been given a bit more punch in LR, but the JPEG was nice too.

CONCLUSION
I’m really enjoying using this lens. My X-Pro2 suddenly feels like an old rangefinder film camera. It slows the process down and that can be a good thing. Colours are also nice and it’s sharp enough (especially at street photography apertures such as f8 or f11. At £65 it is a no brainer to pick one of these lenses up and give it a try.
Fujifilm XF16mm F2.8
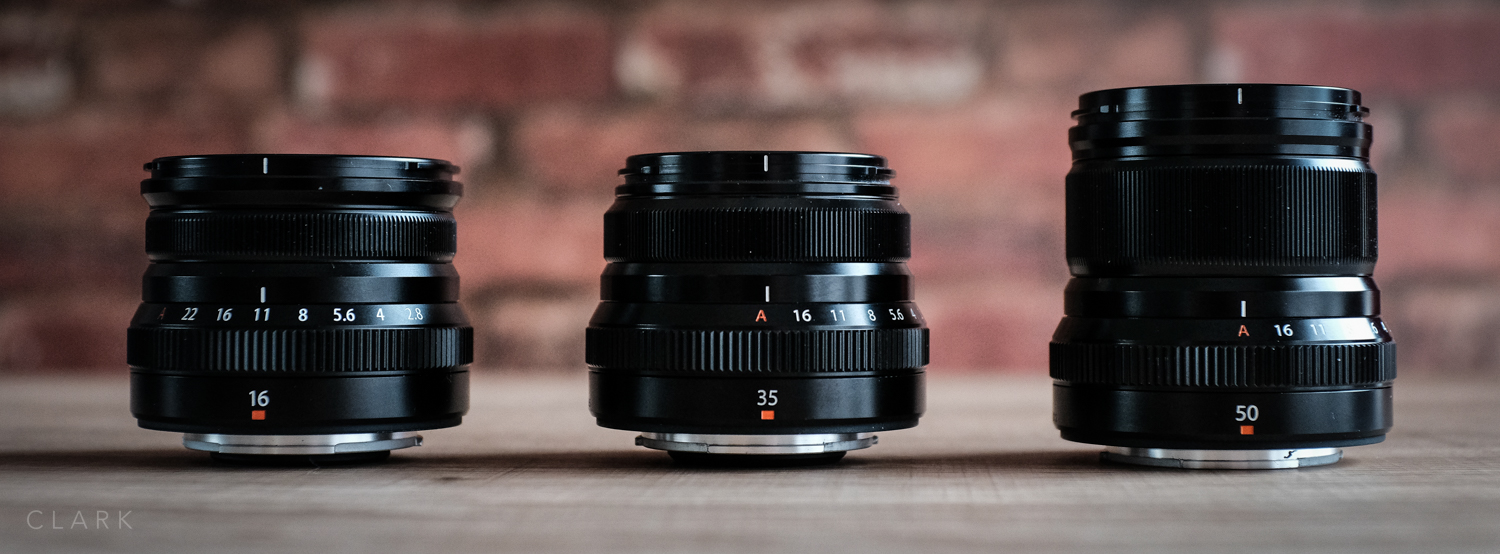
AND THEN THERE WERE 4 (or is it 5?)
So the 16/2.8 has arrived and it joins the Fujicron trio of 35, 23 & 50mm f2's (that's if we don't count the original small 18/2. More on that lens later). These three lenses were a runaway success for Fujifilm and the quality is stunning. They are small, well priced and so much easier to carry around than the larger f1.4 or f1.2 versions. People often question whether you should buy the f1.4 over the f2, shallow depth of field over size and weight, or even why Fuji should make two versions of the same focal length blah blah blah blah blah. But I think the great thing about these small lenses are that not everybody can afford to shell out loads of money on the bigger faster glass. These Fujicron lenses might be the only way someone on a tighter budget can own the equivalent to a wide angle 24mm or a decent 75mm portrait lens, and that's good enough reason for their existence in my book.
WHY BUY THE 16/2.8 IF I ALREADY OWN THE 16/1.4 VERSION?
I have a couple of setups. One is all about widest apertures and quality over size, which has my X-T3 & X-T2 bodies, plus all the best glass. There'e the 50-14/2.8, 16-55/2.8, 90/2, 56/1.2, 35/1.4, 23/1.4 and of course the 16/1.4. My other setup is my everyday carry around and street photography bag, which is my favourite because it's the one that is all about personal photography, rather than work. This small setup can change now and then, but it's basically an X100F, X70 and X-Pro2 with the Fujicron lenses. I have the 35/2 and the 50/2. I don't own a 23/2 because my X100F is pretty much always with me. So by adding the 16/2.8, I will have a full frame range from 24mm to 75mm. Or to break it down, with the 1.5 crop on the Fuji X sensor, my 16, 18.5 (X70), 23 (X100F), 35, and 50mm lenses will give me 24, 28, 35, 50, & 75mm in full frame terms. All of this fits in a Billingham Hadley Small Pro or an ONA Bowery. Not only am I keeping this setup as small and lightweight as possible; I also know that when I grab my backpack for a shoot that all my working lenses are in there and not in some other bag.
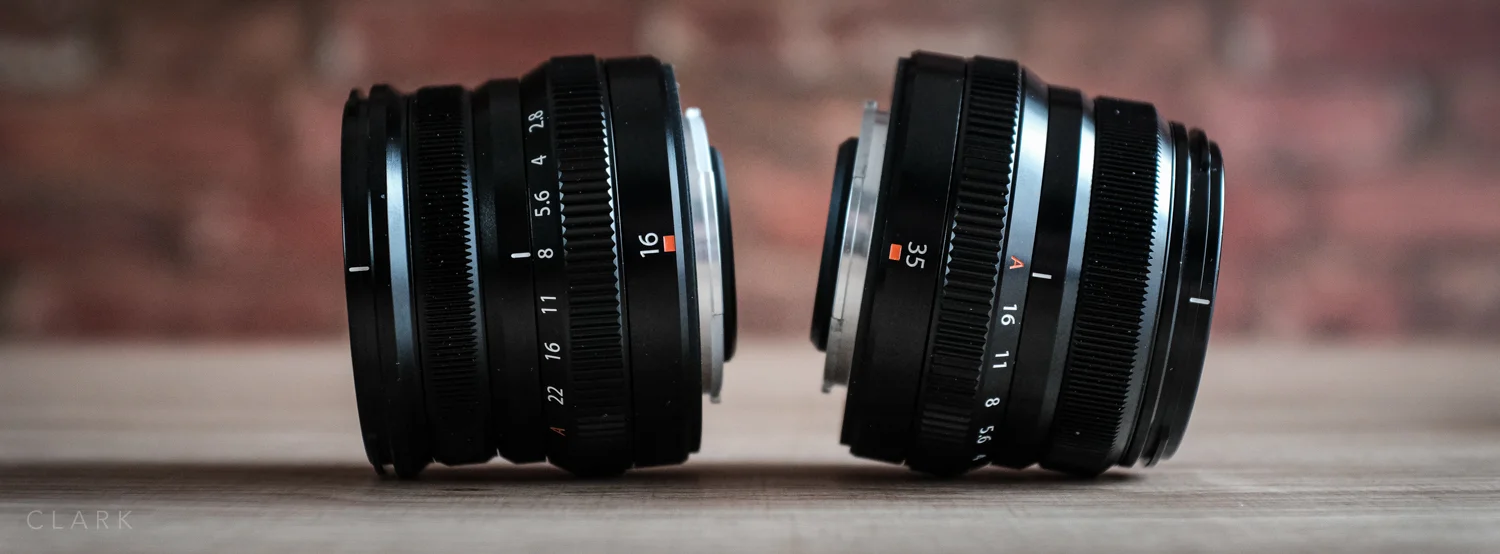
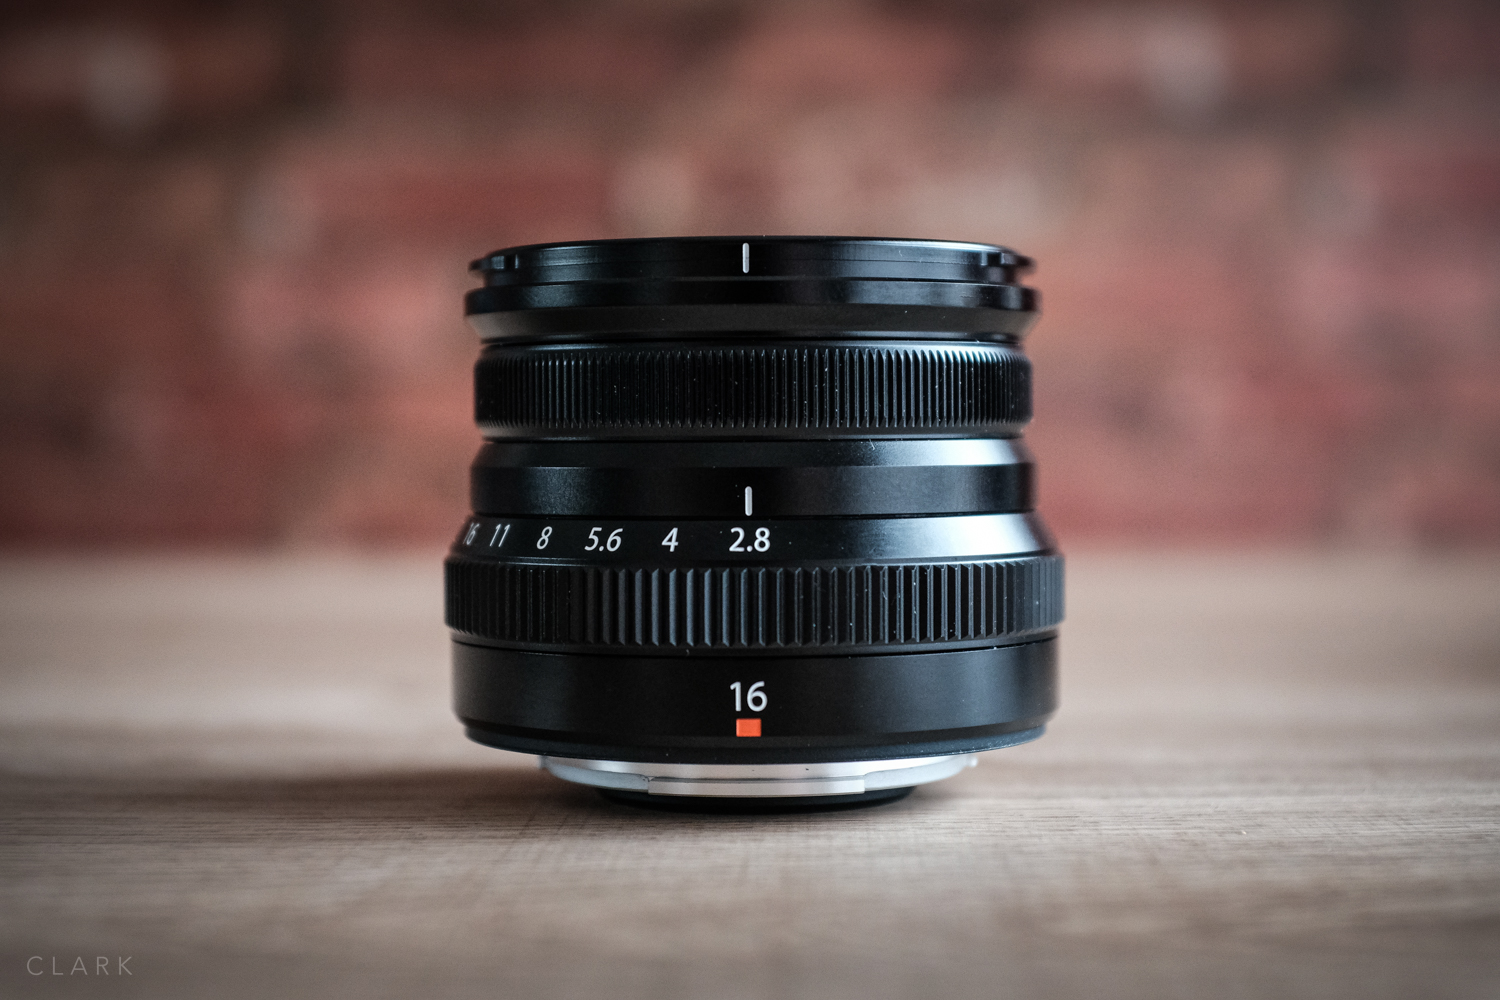
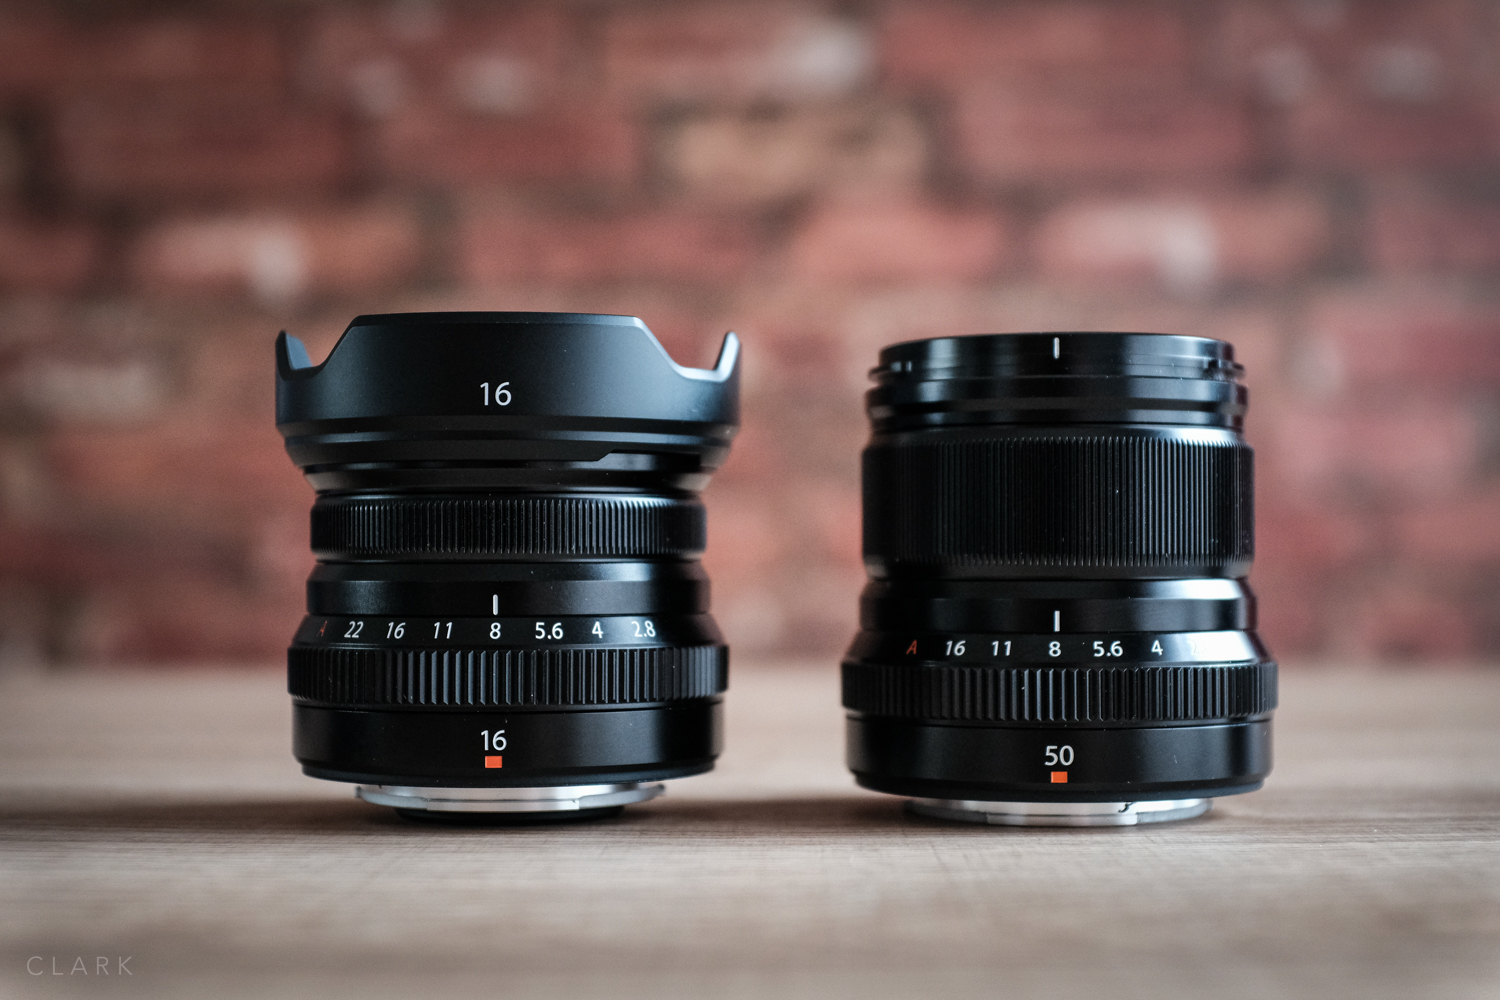
PHYSICAL SIZE OF THIS LENS
The 16/2.8 is tiny, even (slightly) smaller in height than the 35/2. But compared to the 35/2's 43mm filter size, the 16/2.8 has a 49mm. This makes the front end wider than all the other Fujicron's, and in my opinion, the best looking of this range of inexpensive primes. Let's face it, they are not the best looking bunch, mostly due to that weird tapered design (which helps not to obstruct the optical view finder of the X-Pro2). The 35/2 is passable, the 23/2 is fugly, the 50/2 would be just as ugly, but gets saved by the wider lens hood. But the 16/2.8 is actually quite attractive due to it's dumpy design with a wide front, which means less taper.

BUT WHAT ABOUT THE 18/2?
So the 18/2 was one of the three original XF lenses back when the first Fuji ICLC (the X-Pro1) came out. Some people knock it, but it's actually a great little lens, even though it's getting a bit long in the tooth. The 18/2 is as near as damn it a 28mm lens in full frame speak. 28mm is fantastic for street photography, and I think Fuji should take this opportunity to go full Tonto. Get right off the reservation by making an all metal, non fly-by-wire lens with a proper depth of field scale that is easy to read. So basically a small lens that has hard stops at either end of the focus range (not a continuous wheel).
A focus ring that has hard stops at either end of the focus range (preferably not fly-by-wire.
a focus tab to allow guessing focus without looking at the lens or through the viewfinder.
A proper depth of field scale that is wide enough to read (the 14, 16 & 23mm lenses DOF scale is too cramped).
Depth of field scale would be nice in orange
A clutch would be nice for selecting AF or manual focus, but not if it makes the lens too large.
I suppose what I’m looking for is something as close to a Leica Summicron 28mm f2.


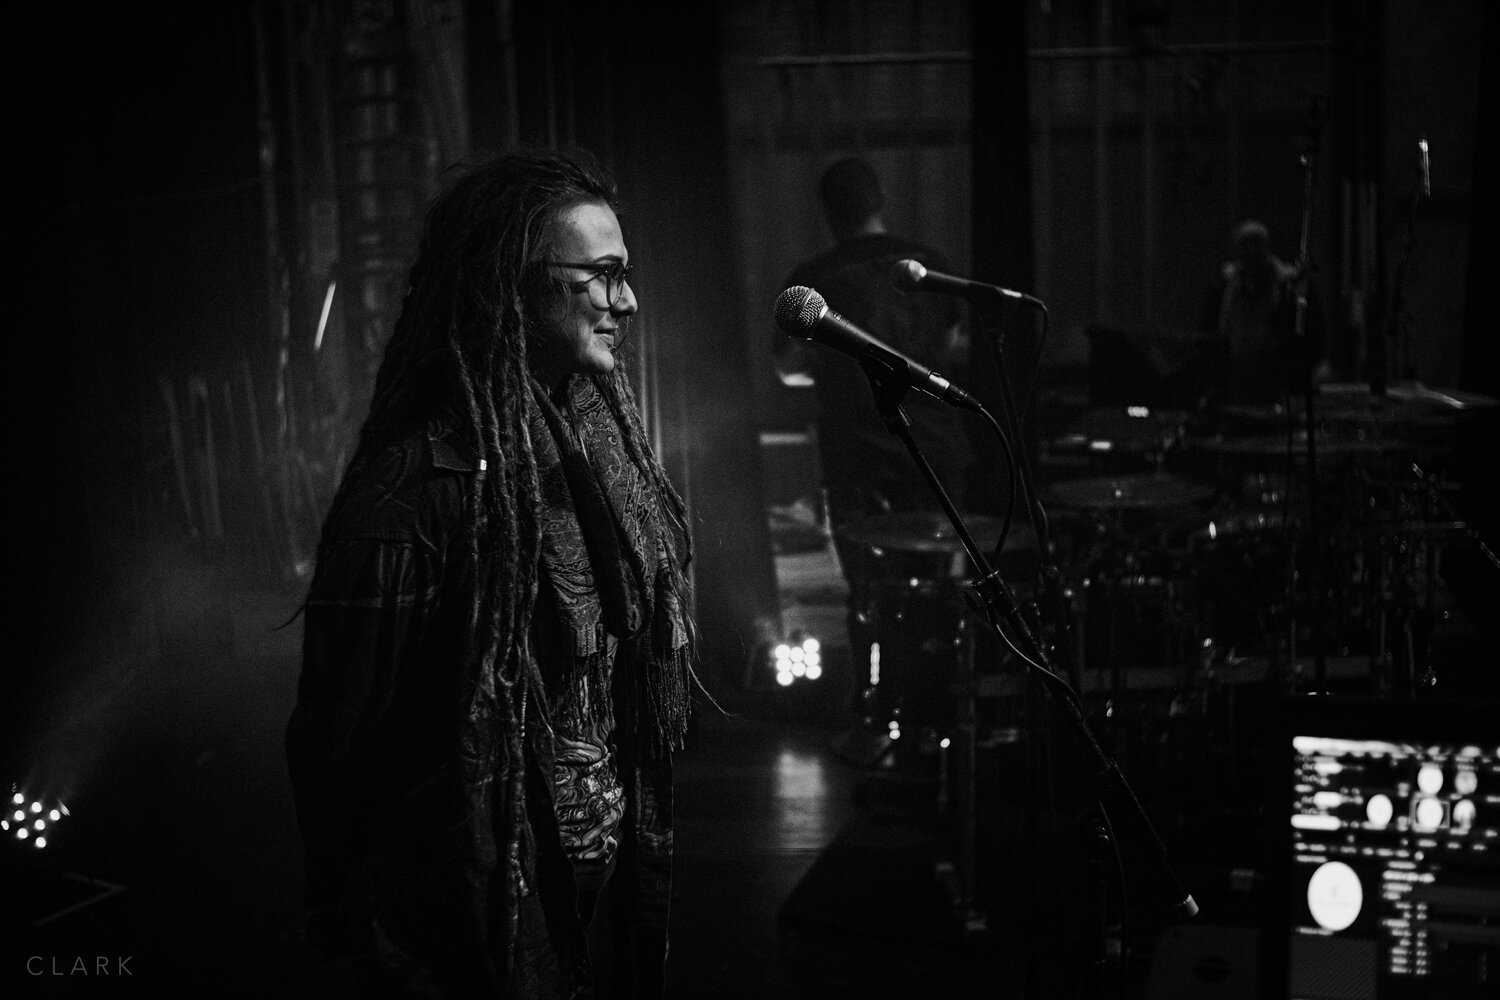
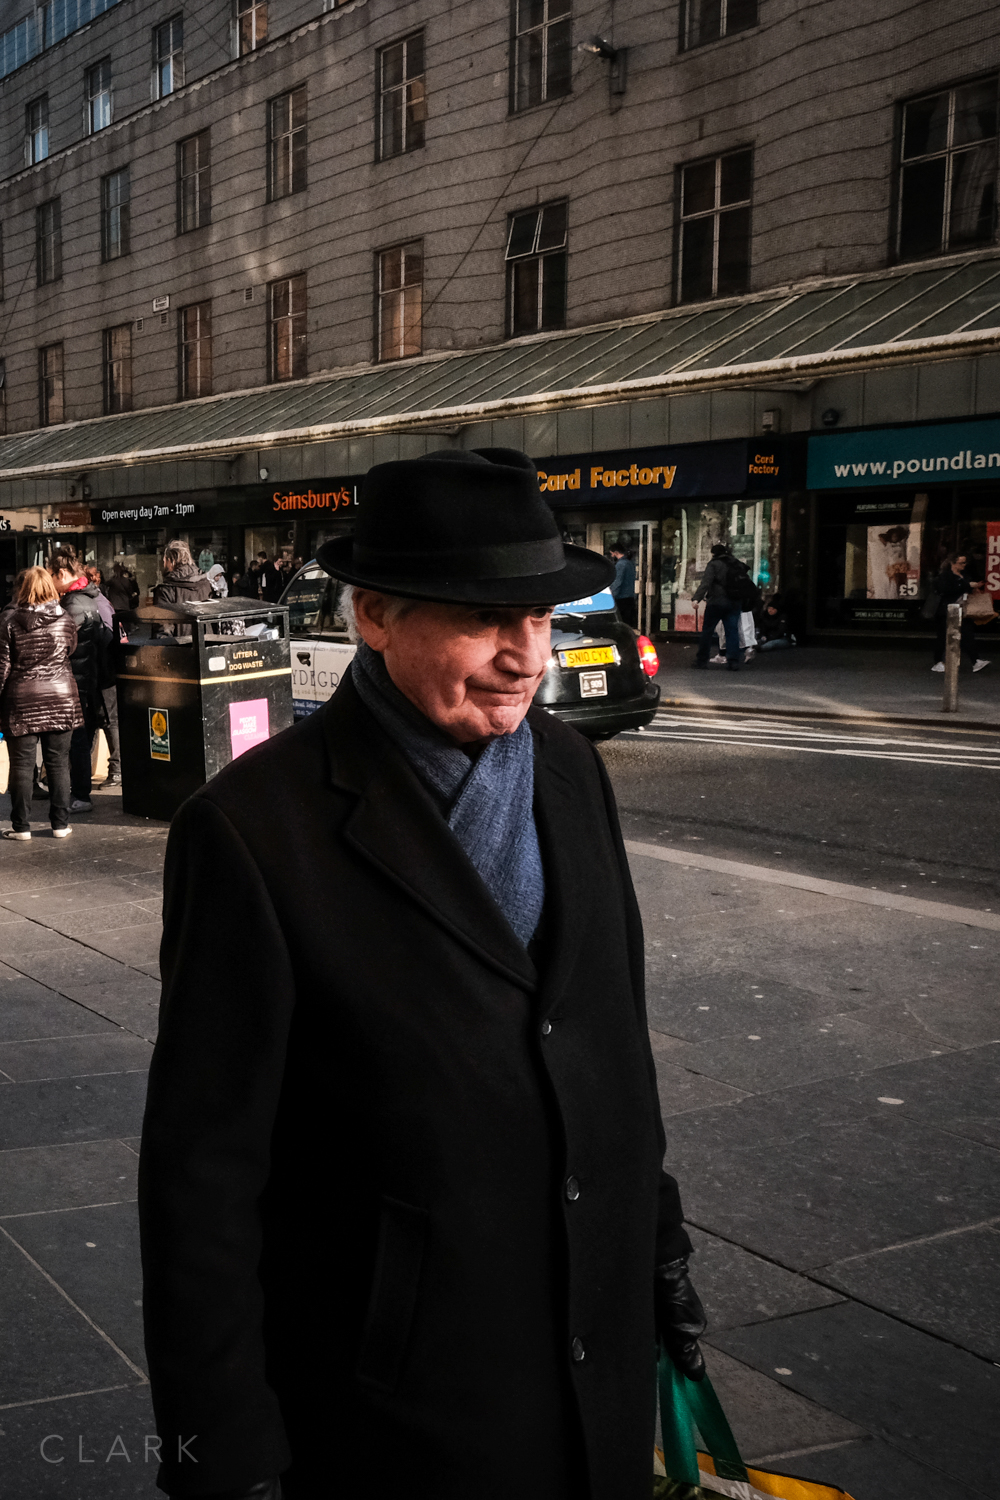
I haven’t had a lot of time to use the 16/2.8 due to shoots over the weekend that needed much longer lenses. But I managed a little bit at a jazz gig and a little bit of street photography. But I can say that this lens is not the sharpest wide open at 2.8 (especially at close focus) but is definitely sharp at f4. That’s how the 23/2 was when I had one from Fuji for a couple of weeks too. There is also a bit of chromatic aberration, but nothing major an it’s usually an easy fix in post. There is also a bit of distortion at the edges, but you would expect that on a 24mm focal length. If these few things are a deal breaker for you, you should definitely get the 16/1.4 instead. However; If you are looking for a small, lightweight and sharp (f4 and beyond) lens with super fast focusing and is water resistant, then the 16/2.8 is for you.

Just like the other Fujicron lenses, the 16/2.8 is extremely well built and has just the right of resistance on the focus ring and aperture ring. I’m really happy with it and look forward to using it on a few trips abroad this year. If you own any of the other lenses in this range, you already know what to expect. As long as this focal length is not too wide for you, I would highly recommend the XF16mm f2.8.
Check out my post Fujifilm 16mm f2.8: Too Wide? on my street photography blog for more pictures using the 16/2.8, but here are a few examples to wet your whistle.
You can buy the Fujifilm 16mm f2.8 at Amazon UK


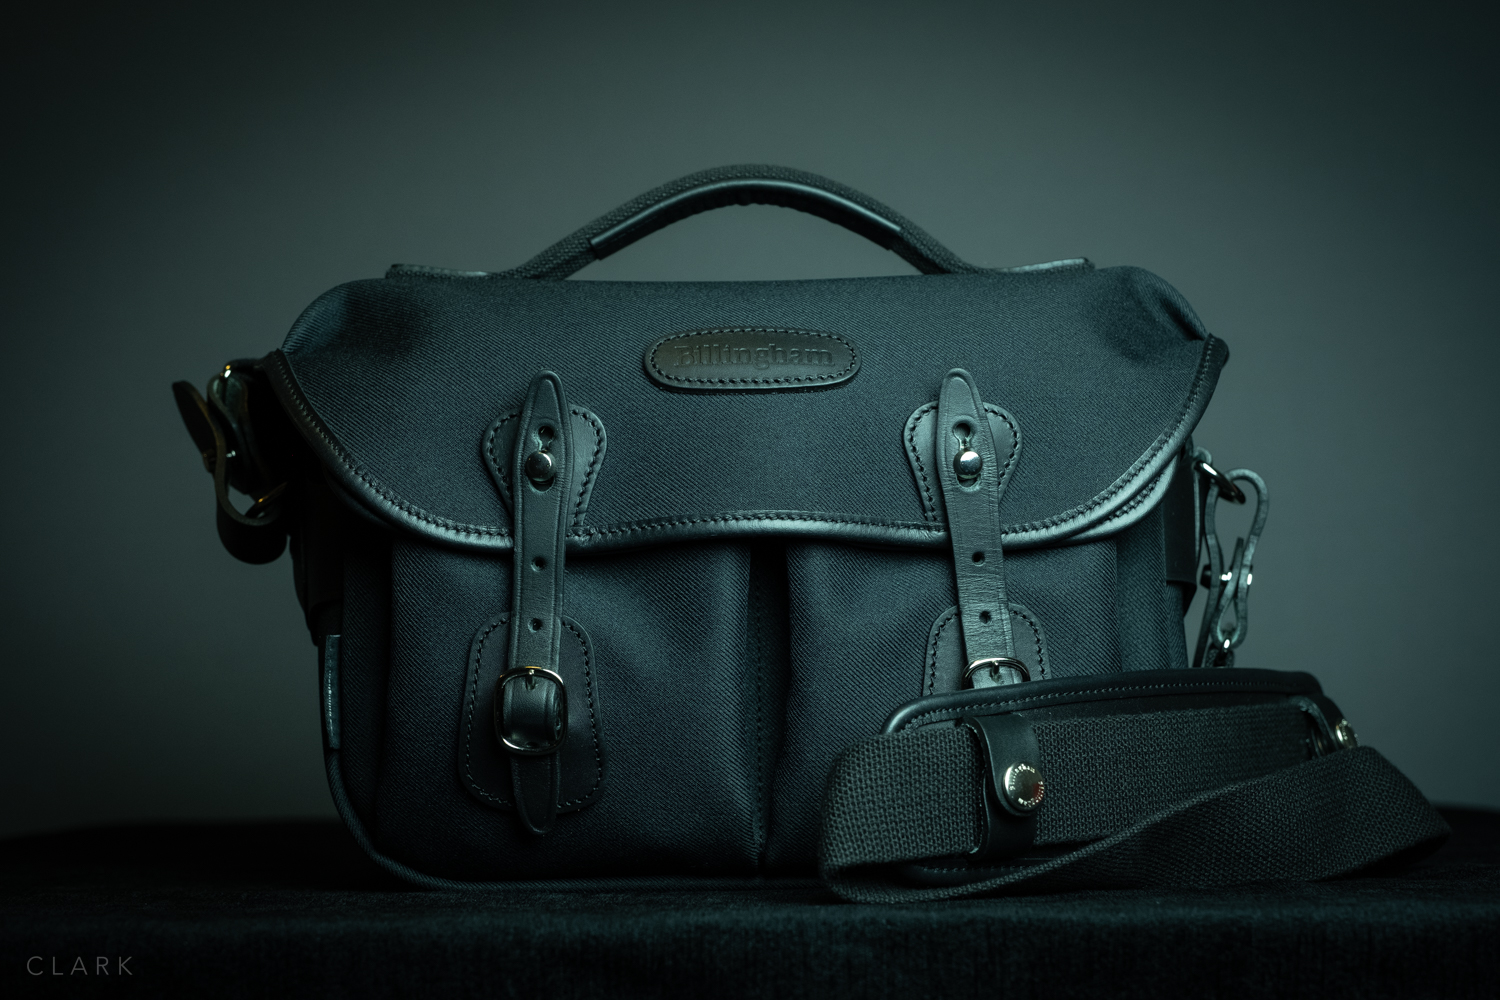
Billingham Hadley Small Pro Review
My day to day small walk around camera bag for the past two years has been the ONA Bowery in Dark Truffle leather. I also have the ONO Prince Street (also in Dark truffle) but my Hasselblad stuff lives in that one. I still really love the Bowery for the amount of gear I can fit in such a small space, but I felt like trying something new.
My friend John Summers had given me an insert for a Hadley Small a while back and I’ve used it in various bags, including the Christopher by Millican and recently in the F-3x by Domke. The size of that insert is perfect and almost identical to the Bowery. So after looking at various small bags from many different manufacturers, I kept coming back to the fact that I was looking for something that would either take the Hadley Small insert or have the same interior size. So being the genius that I am, I finally realised the bag I was looking for might just be a Billingham.
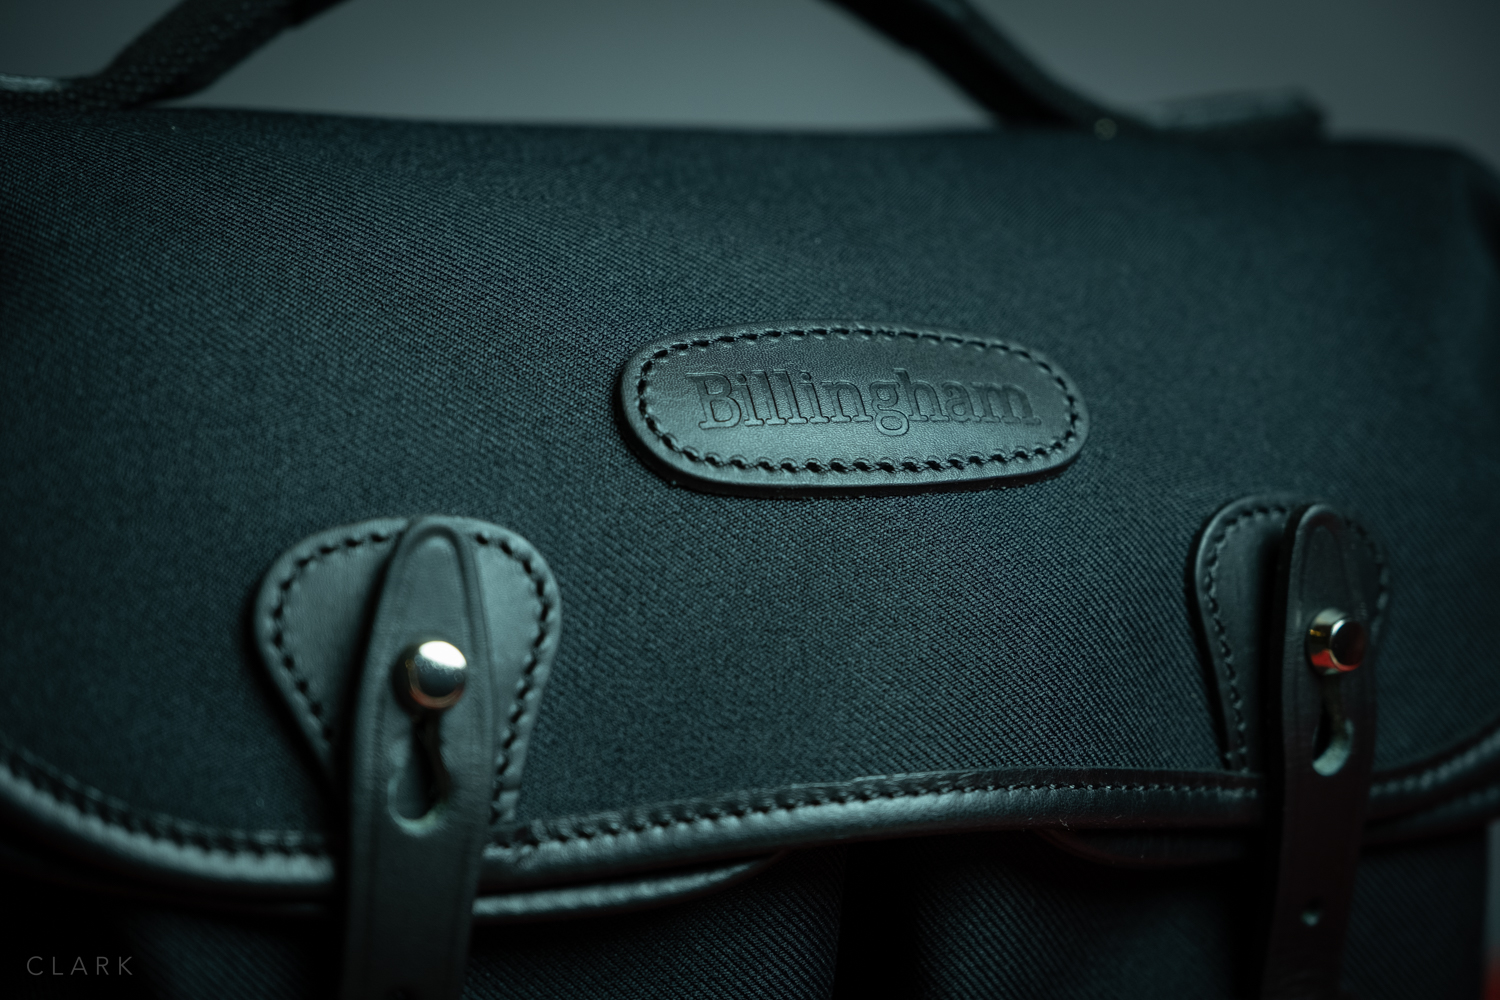


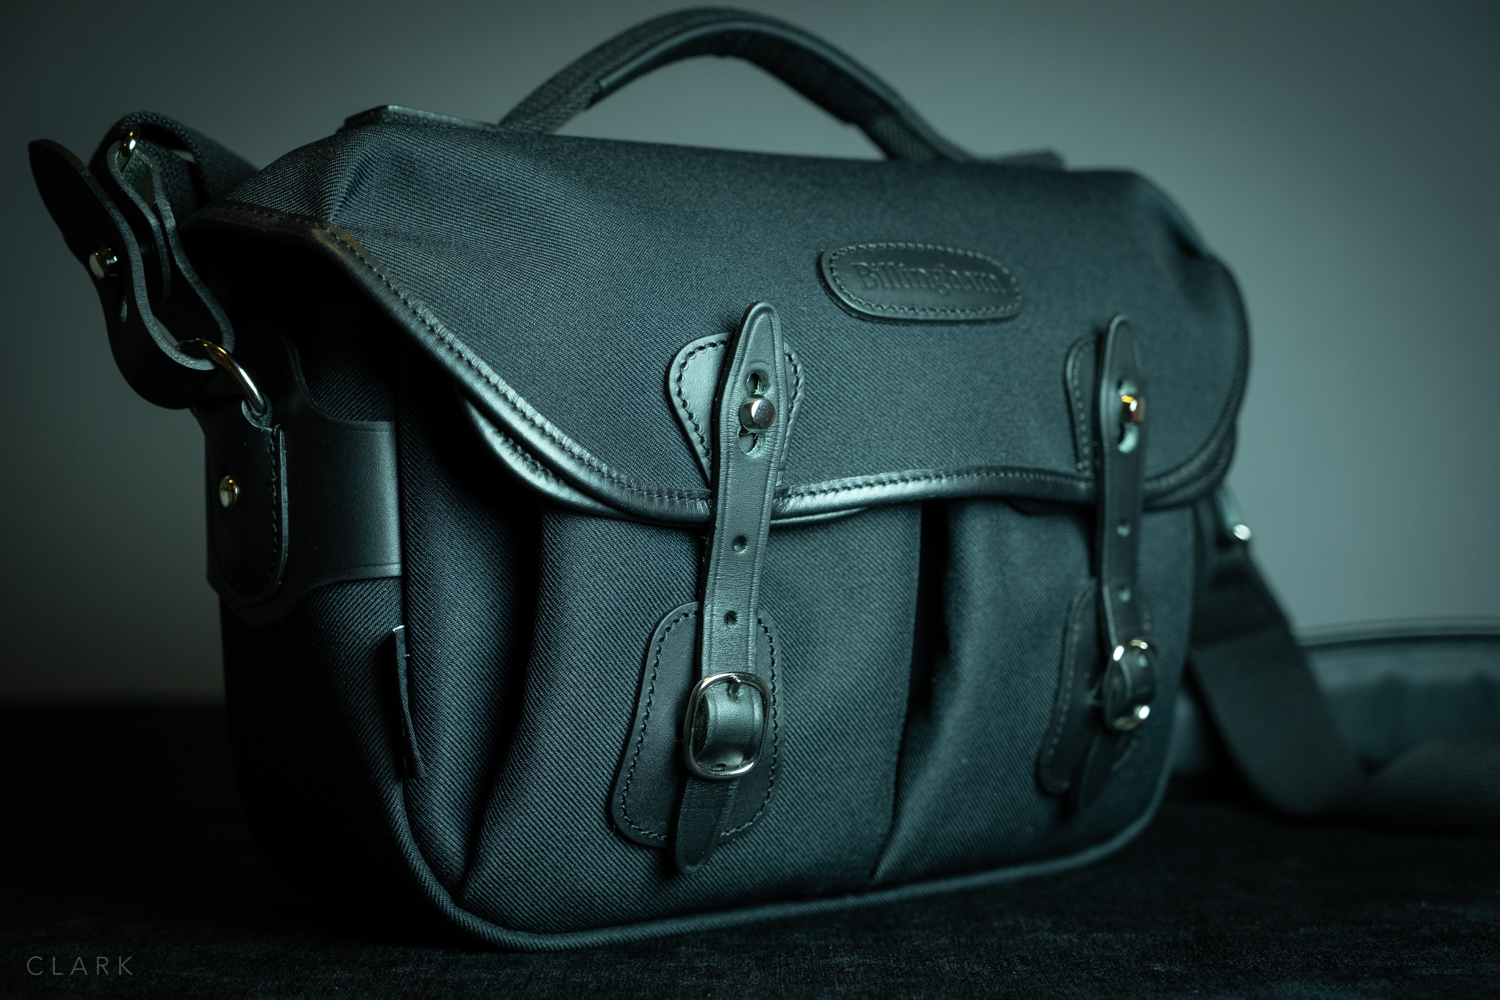
Not being too into the beige thing and wanting to be a lot more stealth; I opted for the black bag with black leather details. The original Hadley Small is still available (£159 in the UK), but the new Hadley Small Pro was released last year (£199 UK) and has some really worthwhile additions to the original bag (more on this later).
The Hadley Small Pro is made from Billinghams FiberNyte material, which has a layer of rubber sandwiched in the middle of its three-ply makeup. This makes the Hadley range permanently shower proof, no need to apply wax or use an additional rain cover when out in the rain. My bags always get soaked at some point, so this will be a really handy feature. The strap on the original Hadley Small was stitched to the side of the bag, but the Pro has a removable strap via leather fasteners. I would rather have the older method as I don’t trust straps that are removable. This is mostly due to the ONA Bowery strap coming undone loads of times as I lifted it from the passenger seat of my car. This resulted in the destruction of a Fuji X100F when the Bowery hit the deck. My Bowery now has zip ties holding the clasps on the strap permanently shut. Time will tell if the Billingham is more secure than the ONA, but it is absolutely solid right now and should stay that way as I won't be removing them, causing the leather to soften.

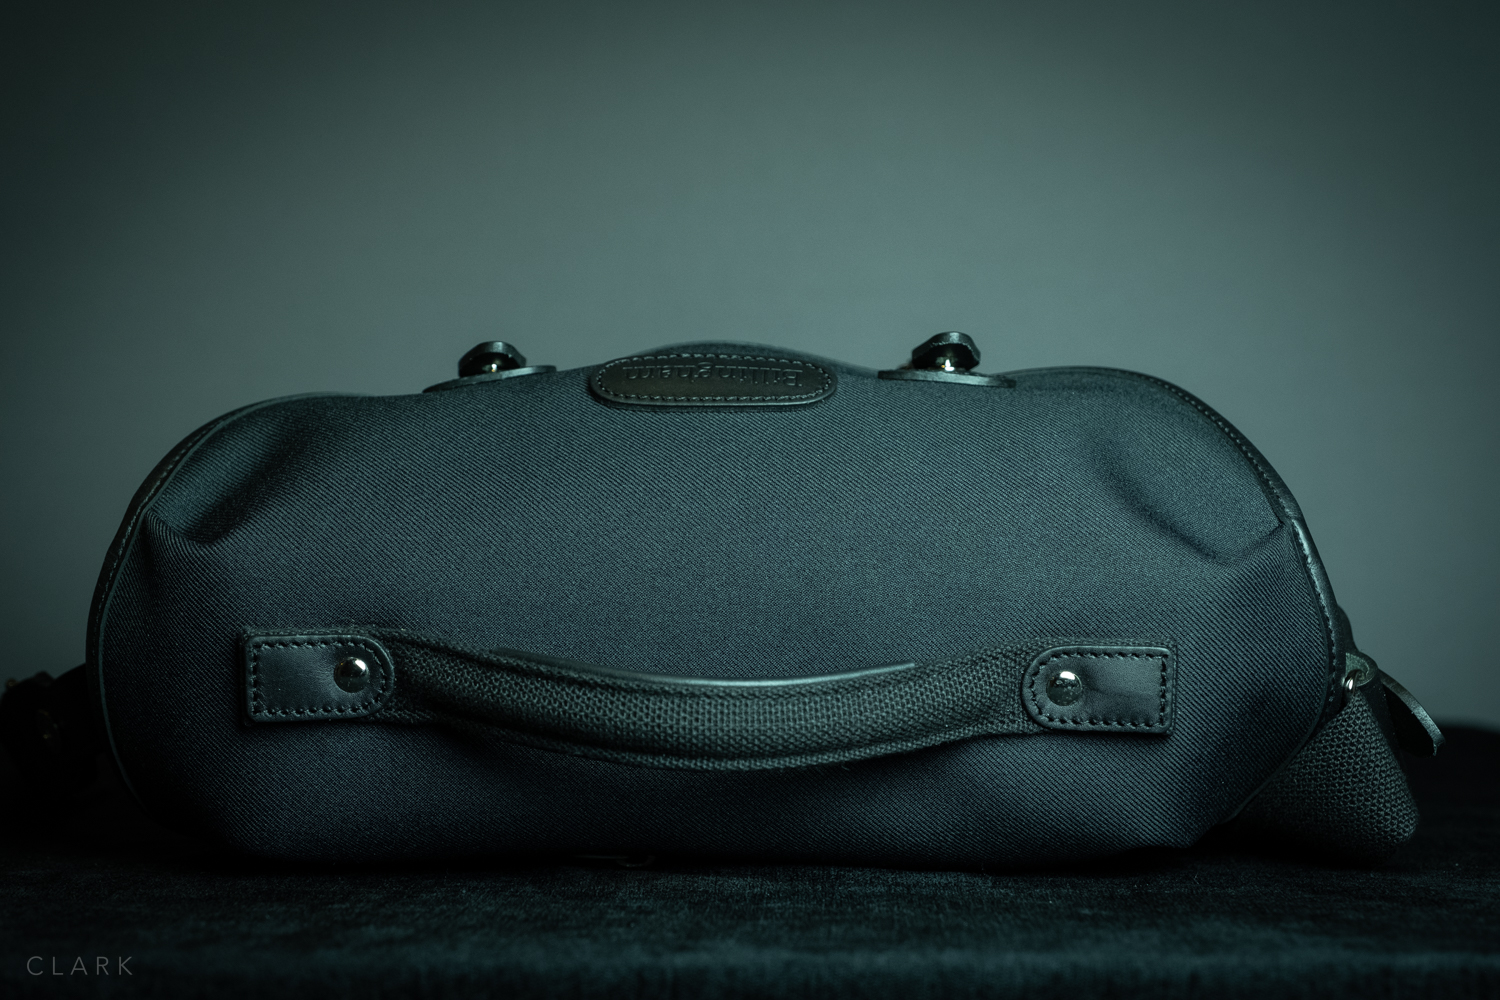
The handle is fairly rigid and easy to grab. It’s riveted and stitched to the top of the bag which has an internal support
Another new feature on the Pro is the addition of a handle on the top. This is ideal for that passenger seat scenario and a great feature to have. I would make sure the lid is secure before using the handle, but at least the Hadley Small Pro doesn’t tip over, spilling everything onto the ground. .
Two more new features on the Pro are found around the back. The first is the welcomed addition of a luggage strap so that it can be slid over the handle of a rolling suitcase. All bags should have this in my opinion.

Waterproof zip keeps iPads or documents dry and the luggage strap is really useful
Just above the luggage strap, you will find the waterproof zip for the rear document pocket. This is a super handy pocket that will keep documents or iPad Mini 100% dry. Well worth the price difference between the Pro and the older model.


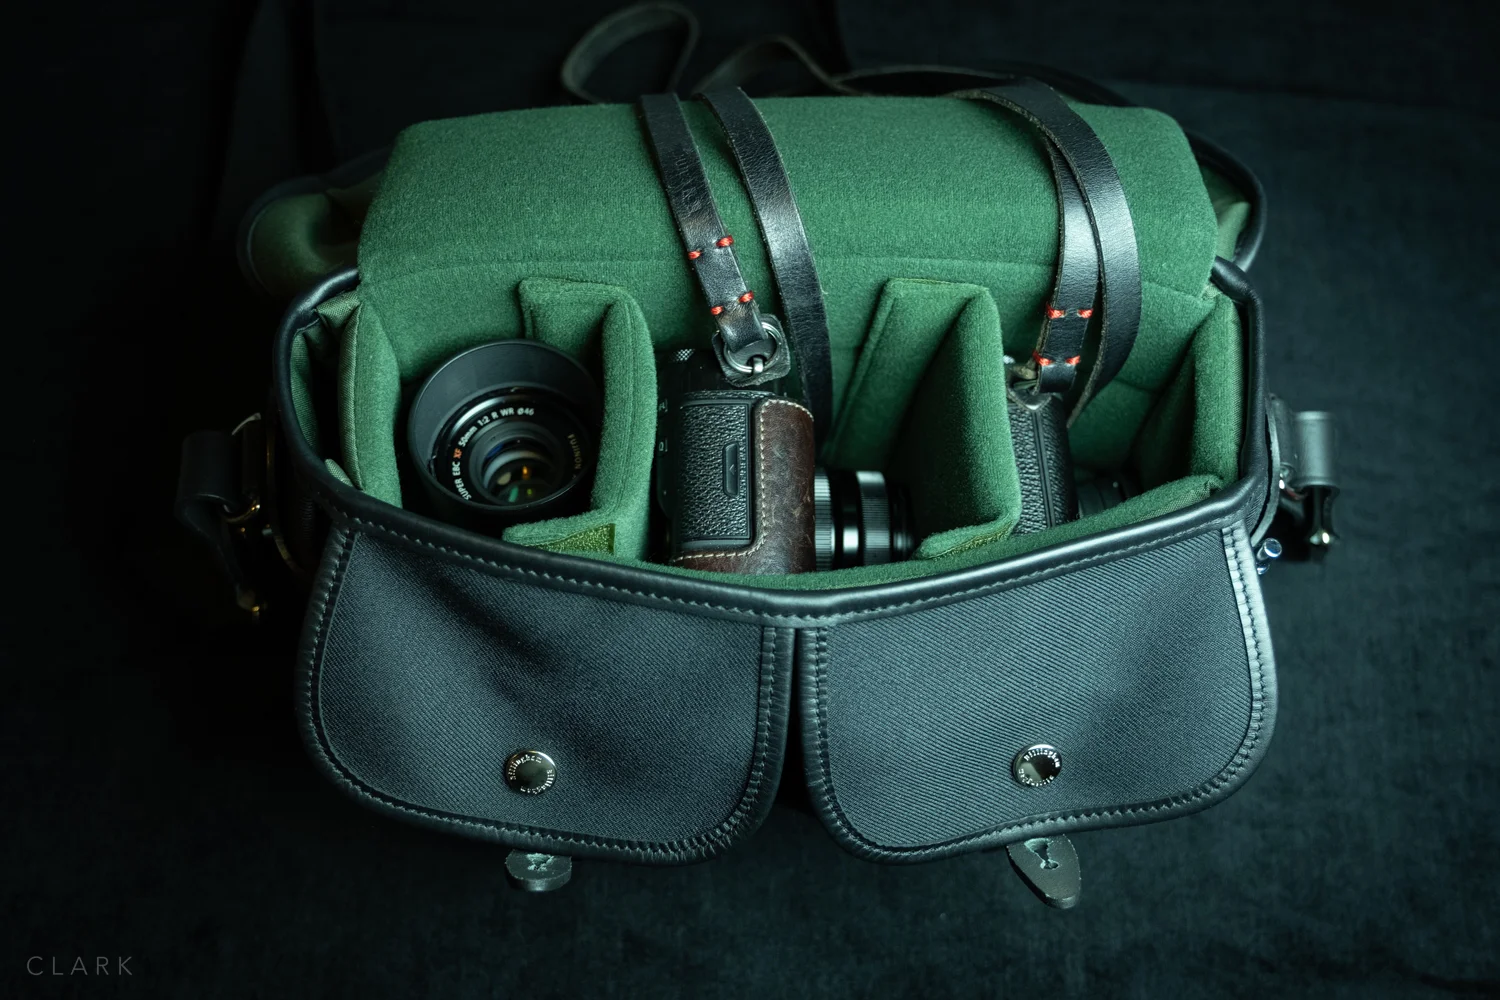
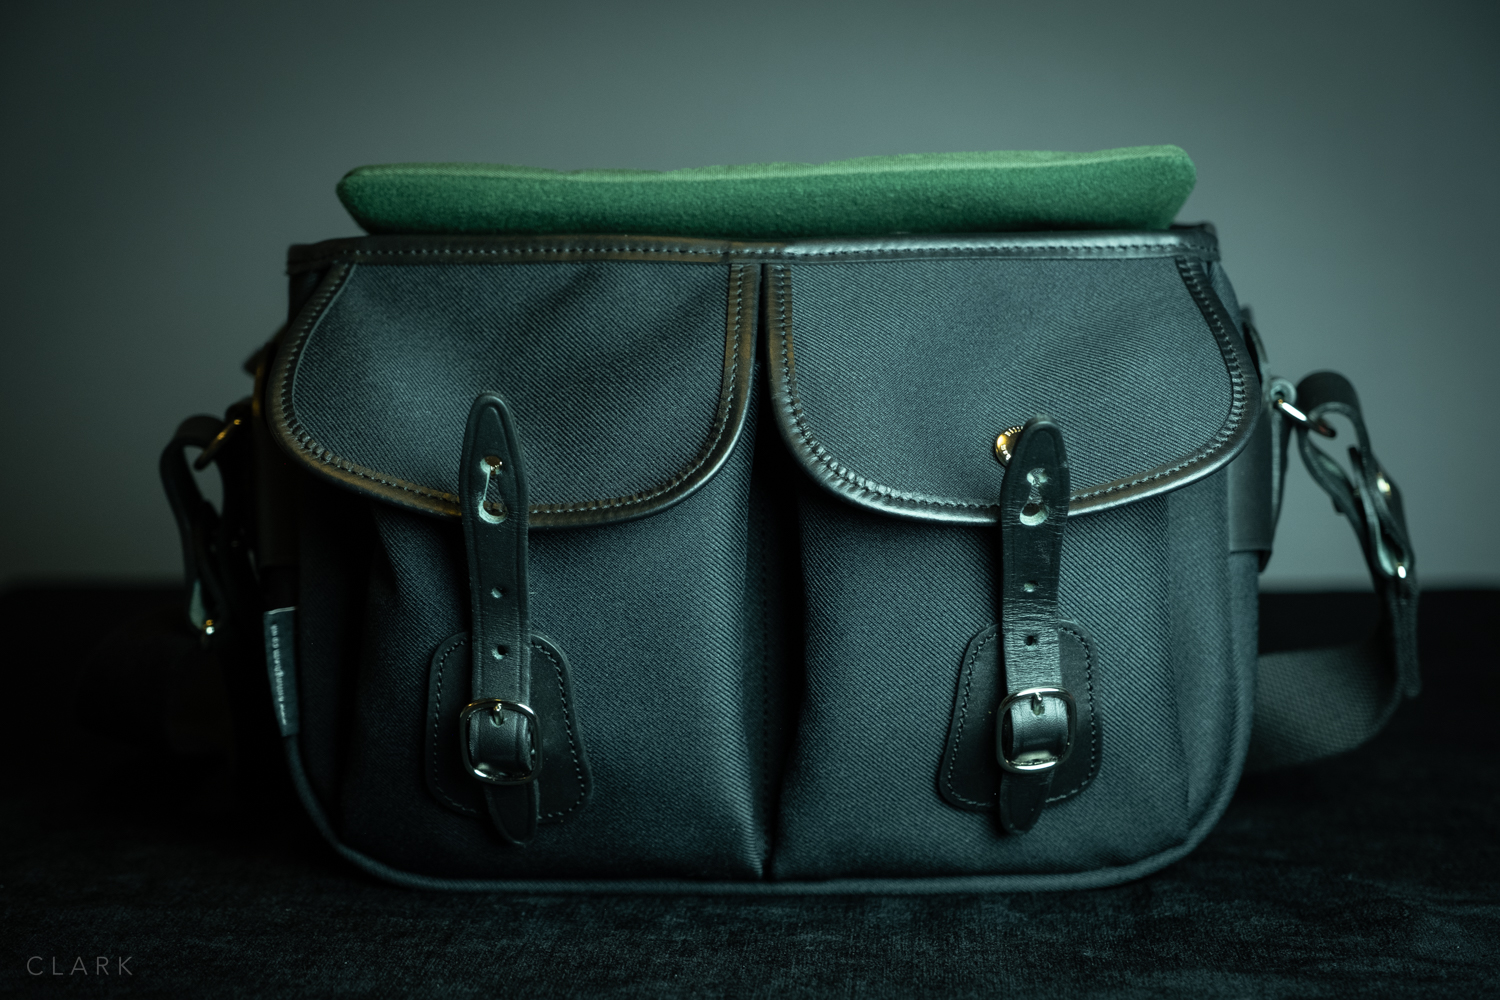
The main compartment of the Hadley Small Pro (and also the original Small) is one open space that can be used as it is, or with the included insert. This is one of those bags that feels bigger on the inside than it is on the outside. I can easily fit my X-Pro2 with the 35mm f2 attached, X100F with lens hood, and two lenses stacked in the third partition (I have the 50mm f2 and the WCLX100 wide angle converter lens). Two cameras and four focal lengths (28, 35, 50 & 75mm in FF terms) is fantastic in such a small bag and there’s even enough room in there to include the pancake 27mm too. Or I can leave the 50/2 at home and take my X70 for a bit of shooting from the hip. The insert is held inside the bag using a single stud fastener at the front. It has a padded hinged lid to protect gear from things falling on top..

This is everything I have in the Hadley Small Pro. The Fuji X70 gets swapped for the 50mm f2 sometimes


The front pockets are held shut with stud fasteners and are really great for a bag this size. Both are roomy and can be expanded or reduced in size by fastening a stud at the outer side. This also creates a makeshift pen holder. I can put my passport sized Midori Travellers Notebook, pens, wallet, memory card holder, phone, spare batteries, and Apple Airpods in there with space to spare.
The leather and brass fixings ooze quality and should last a lifetime. I opted for the black leather on a black bag, so the fixings are also nickel plated. It’s almost criminal to not show off the leather like on some of the two-tone bags, but I need something that doesn’t draw attention. I was almost tempted by the green version though as they always look really nice on the web.
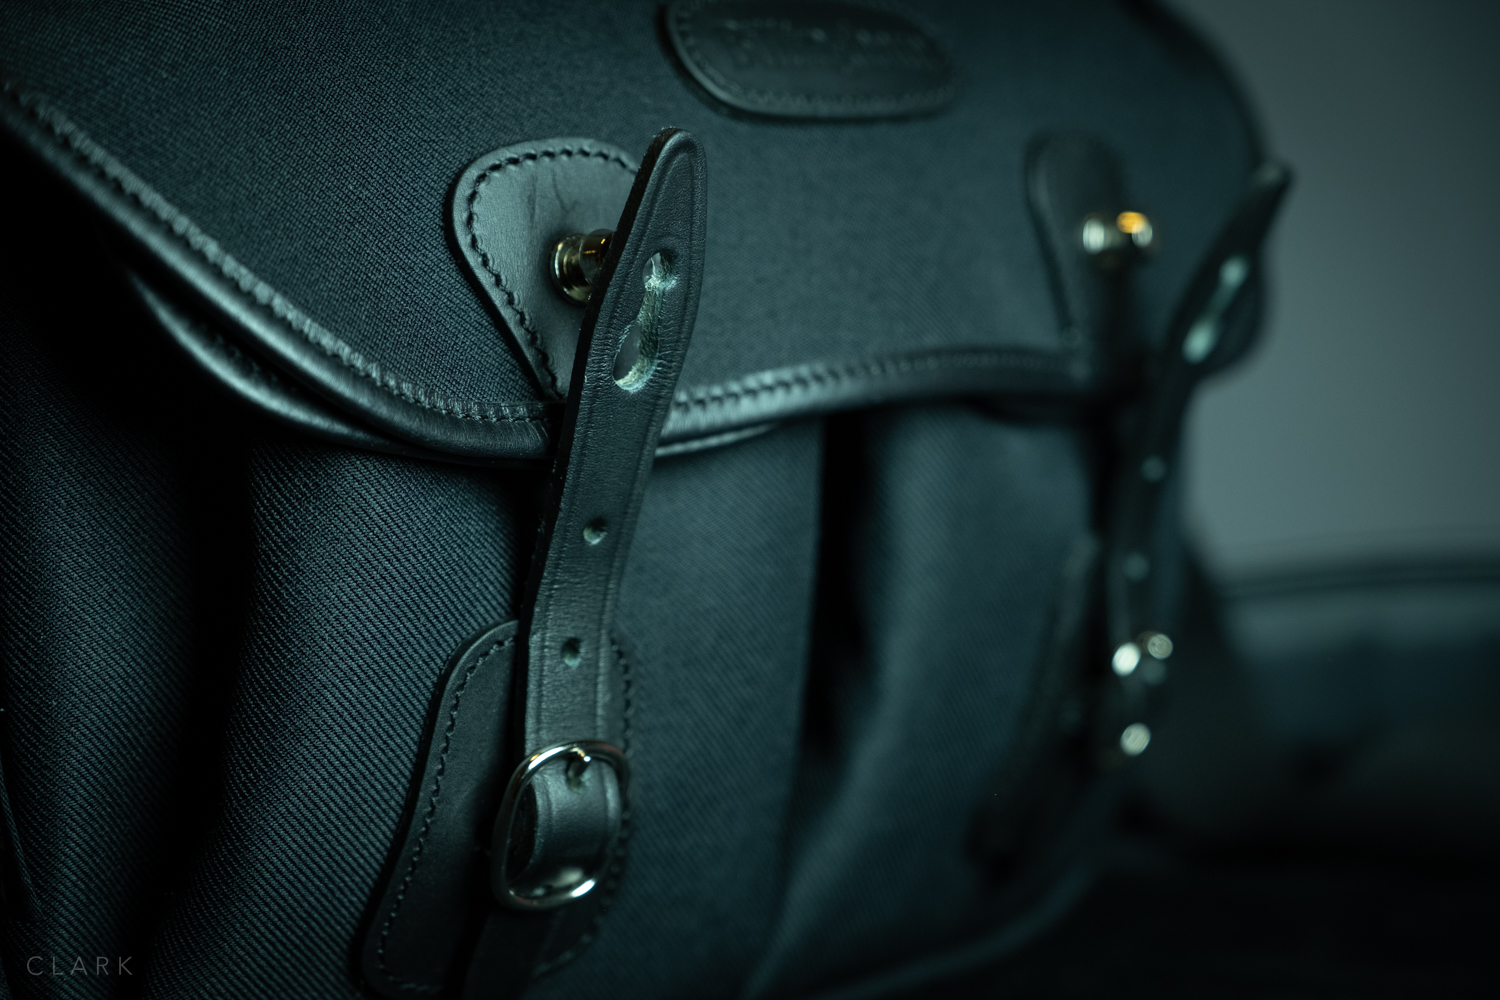
The front fasteners as extremely stiff due to the excellent quality of leather and can be awkward and time-consuming to open, but it should just take a short amount of time to loosen up to the point of opening the bag one-handed.


OPTIONAL ACCESSORIES
I opted to buy the SP40 leather shoulder pad at the same time as the bag. Not having tried the bag before, I wasn’t sure if I would even need a shoulder pad, but I thought it was better to be over prepared than have a sore shoulder. The pad is as well made as the bags and is easily attached or removed by two heavy-duty stud fasteners. The underside of the pad is grippy and curves around your shoulder perfectly due to grooves that allow it to bend without kinking.
CONCLUSION
The Hadley Small Pro is an ideal bag for smaller kits. Leica owners or mirrorless shooters alike will love it. I have a backpack for my more demanding shoots, which is where my X-T3, X-T2 and most of my other lenses live (including the bigger red label f2.8 zooms). But for day to day walking around documentary and street shooting, this is an ideal bag. It’s waterproof and versatile and I'm looking forward to using it on a few trips abroad this year.
I also have a Tenba Cooper 13 Slim that I use when I need to carry my 13” MacBook Pro with me. The Cooper has been a fantastic bag, but I might try a Hadley Pro or a Hadley One to see if it would work as my mid-sized bag. Life would probably be a bit easier using different sizes of the same bag...I think.
Pros.
Top Handle.
Luggage Strap.
Rear waterproof pocket.
Removable camera insert.
Good amount of padding.
A generous amount of dividers (unlike ONA).
Good sized and expandable front pockets.
Comfortable to wear on long walks.
Cons
I would have preferred leather on the base or some sort of wipe clean material.
Leather tabs are a bit short to get a proper grip when opening the bag.
Difficult to open one-handed (this might change as the leather softens).
Find out more at www.billingham.co.uk
But the Hadley Small Pro at Amazon UK
Touched-Up: A Fujifilm X-E3 Review
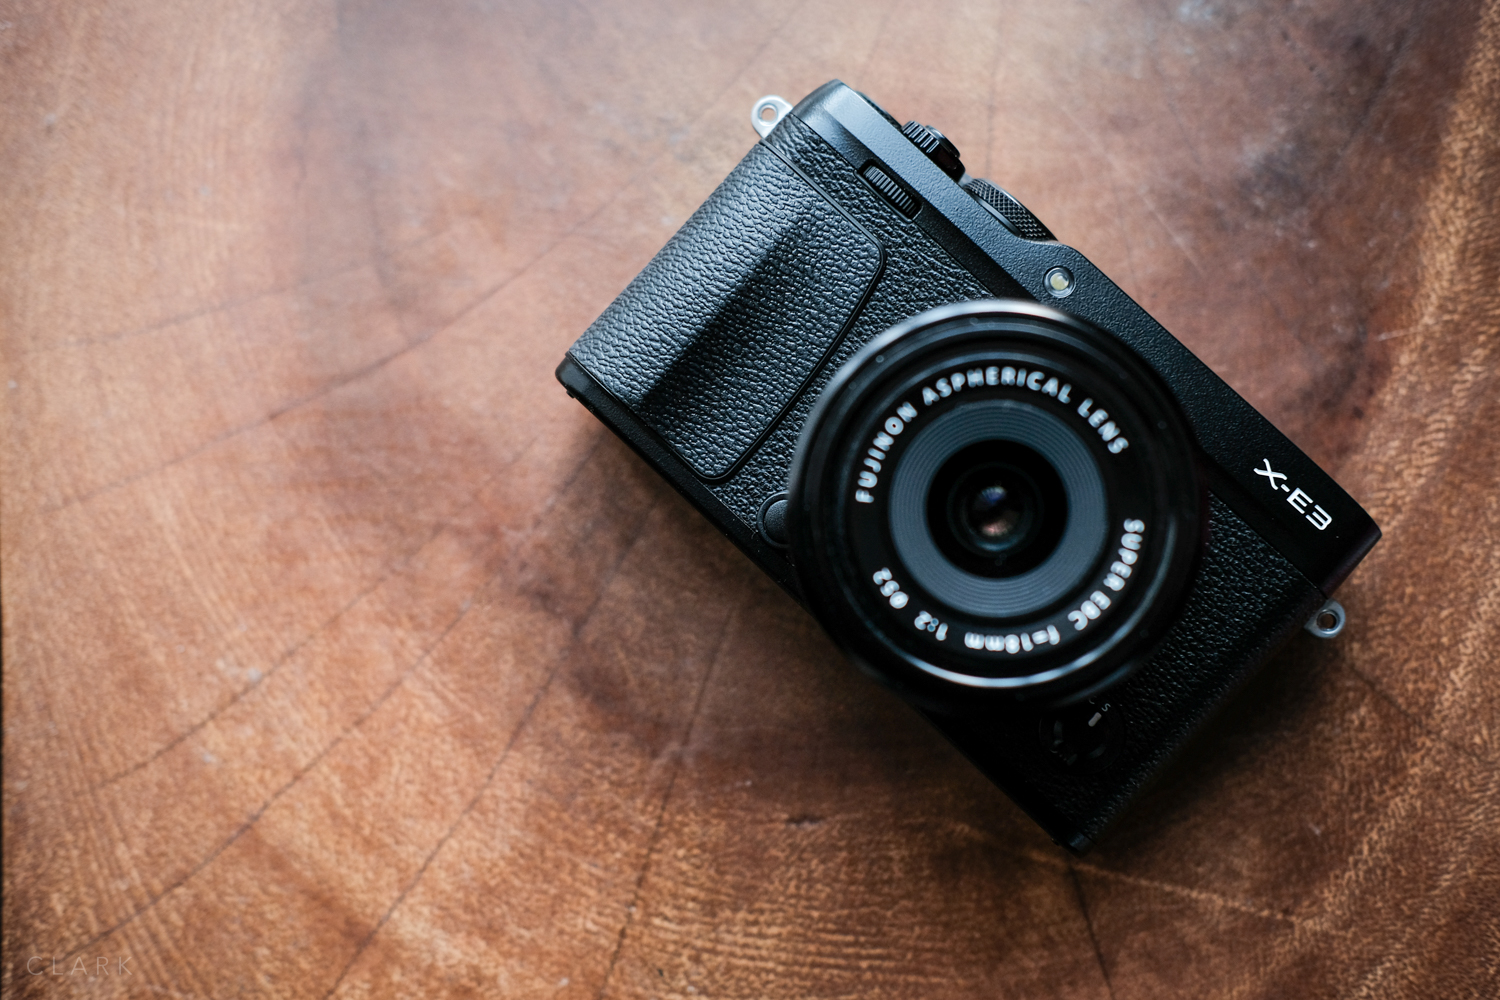
Small but perfectly formed (from the front), the X-E3 is a good looking camera
Back in the early days of the X-Series, I shot with the X-Pro1 and the X-E1 together (one on each side). Although their performance wasn’t even close to the super-powered X-100F, X-Pro2 and especially the X-T3 I shoot with now, they were so nice as a working pair. They were like the same camera in slightly different skins. As the X-Pro1 grew long in the tooth and the X-E2 came along, I started to use the X-E2 and the X100S (then the X100T) as a working pair. I was so into the X-E2 (and by that time the X-T1 had came along) that I didn’t think my setup had any room for the (then) soon to be released X-Pro2. That seems strange now because my X-Pro2 is always with me. Anyway, what I’m trying to say is that I’ve always loved the X-E cameras.
So when the X-E3 was announced I had that same feeling. My X-E2 was sitting in my desk drawer getting very little action and I was wondering if there was a space for this latest version in my current line-up. There’s only one way to find out. So I took one out for a week to see how it performed.


FIRST IMPRESSIONS
The first thing I noticed when I opened the Peli case, was just how small it looked and felt. It’s only slightly shorter than the X-E2, but it seems a good bit smaller in a few ways. The design on the front is a little cleaner I would say and the front grip is pretty much the same.

Not quite as wide as the X-E2 but it makes quite a noticeable difference
TOP PLATE
The top plate is almost the same as the X-E2, but the X-E3 doesn’t have a built in flash. There is no dedicated ISO dial, but the shutter speed dial is a little on the small side for an X-Pro2 style dial. The Fujinon logo has been left off, as it has on the X-Pro2, but I’d like to see a return of this logo on the top plates of all rangefinder style cameras.
MEET ME ROUND THE BACK
The back of the camera is where things get real (as the hip kids say). On the plus side, the thumb grip is perfect and results in the X-E3 being much more comfortable and safer to hold than it’s predecessors. The joystick has also been included. Fantastic! There are now three buttons along the back of the top plate (next to the viewfinder), like the X-Pro2. The diopter is to the left of the viewfinder, but recessed enough so’s not to get changed by accident.


IT’S NOT YOU, IT’S ME
Let's get the D-Pad touchscreen and button placement thing out of the way. As a photographer that owns and uses many X-Series cameras (often using two at a time), it drives me crazy that button placement has not become standard across all X-Series cameras. The X-E3 has the play button at the bottom, which is typically where the Back/Display button would be. For me, the Play Button should be at the top (below the joystick), with the Menu/OK button below that. Obviously different departments design each camera, but I wish all X-Series rangefinder style cameras could get a standard button layout.

X-E2 back with D-Pad and a much more tactile thumb wheel.
I love the D-Pad on all my cameras. It's basically 4 function buttons in a small space that I can control in the dark without taking my eye away from the viewfinder. I have the D-Pads on all my cameras set up (as much as possible) the same way. But the D-Pad has been omitted from the X-E3 (even though there's space for it). This is a deal breaker for me. I was worried that this would become the norm going forward, but I was happy to see a D-Pad on the X-T3.
I mostly hate touch screens, but I find the one on the X-T3 very useful for video recording. I would have left it off of the X-E3 though. Like the touch screen on my X70, I turned it off on the X-E3. But before I turned it off, I went out and shot some street photography. The touch screen function buttons, where you can swipe at the top, bottom, left and right side of the screen is the worst feature on any camera I have used. Every time I lifted the camera to my eye, something else had changed and it took me a while to work out it was that dumb touch screen. But it does have one useful feature…called OFF.

The Auto switch is so useful when shooting street photography, jumping from full manual to auto
I was super pleased that the X-E3 has an Auto button on the top plate. I use this often on my X70 as I tend to shoot street photography totally manual with the focus also set to a fixed distance (click HERE to see my post about zone focusing). But when I step inside a building and the light changes or if I want to grab a quick shot close up or far away without upsetting my settings, I simply switch to Auto, grab the shot and switch back to manual. Love it!

Image quality is exactly the same as the other X-Series cameras as they all share the same sensor
SIZE MATTERS
The X-E3 is very small, even smaller than the X-E2, but it feels so comfortable in my hand. Part of it is due to the front grip, but mostly to the rear thumb grip. Although this camera is a standard X-Mount and can take any of the XF or XC lenses, it is definitely better suited to the smaller lenses. I automatically attached the 18mm f2 straight away when the body arrived, and it's just perfect for it. Although the 18/2 could do with an updated mkII version with internal focusing and even weather-proofing (if that's your thing), it's still a great little lens and so well suited to the X-E3. But basically, any lens that is physically small, like the 27/2.8, 35/2, 23/2 will be great on this camera. Obviously, the larger X-Series lenses will work on this camera but will be very front heavy.
WHO IS IT FOR?
Where the X-E2 felt more like a backup for the pro photographer with the X-Pro1 or X-Pro2. I feel the X-E3 is aiming more at people that love shooting with smartphones but want to take it up a notch. It would be a fantastic little vlogging camera, but lacks the flip round screen of the X70.

I hate a smeared LCD screen but there's no escape with a touchscreen
CONCLUSION
The X-E3 is a damn fine camera. The performance in such a small body is stunning! And though It bothers me a that they omitted the D-Pad, I do think this camera will do extremely well for Fujifilm. New parents that want to document their kids life in very high quality won’t go wrong with this with a 35/2 lens attached. At the moment, I’m shooting with an X-T3, X-T2, X-Pro2, X100F and X70, so I don’t think the X-E3 has a place in my bag. But if I needed a small compact video camera, this would be the one. Which is the very reason my Kage Collective buddy Kevin Mullins bought one. More about that at www.f16.click
LIKES
Auto Button (like on the X70 and X-T20)
Joystick
24 Megapixel sensor
X-Processor Pro III
My Menu
Rear Dial Auto Focus (needed on the X-Pro2)
Front Dial ISO (needed on the X-Pro2)
Design (very handsome little guy)
Thumb grip
Trash /Drive dual purpose button
AF Mode ‘All’ (this should be on all X-Series cameras)
DISLIKES
Touchscreen function buttons (it’s just not my bag baby)
No D-Pad
No ISO Dial
Button layout different from the X-Series rangefinder style bodies
WISHES
ISO Dial
D-Pad
Top-plate Fujinon logo (on all Fujifilm cameras)
Front Fn Button
Domke Or An Ass? : The Domke F-3X Review
Watch any Hollywood films featuring photojournalists and chances are there will be a Domke in there somewhere. I rewatched an old documentary on YouTube recently called 'The Photographers (a film about National Geographic photographers) and all of them were using Domke. I've been using the F-3X for a couple of months now as my every day carry around camera bag and have also recently used it while traveling to the Czech Republic.
A Brief History Of Domke
You can download a free ebook by Jim Domke from the Tiffin website for an interesting and detailed history of the Domke company's beginnings, but here is my very short version. Skip this section if you have no interest in the past.
Jim Domke was a staff photographer for the Philadelphia Inquirer back in the '70's. Frustrated by the hard shell camera cases available at the time, which were made for setting down and working out of, rather than working out of while it was on your shoulder. Mr. Domke started using fishing bags, which although offered little to no protection, did allow him to work out of and swap lenses on his cameras. Fishing bags were also soft and adjusted to the shape of the user's body.
He then went to a manufacturer and showed them his fishing bag but asked them to make him a similar thing but with a few modifications to suit photo gear. The Philadelphia Inquirer liked the bag so much that they ordered the bags for the rest of the staff photographers. They even started to sell them as an add in the paper. This went well until advertisers started to complain because it conflicted with their own products. So the New York Times stopped selling the bags and Jim Domke was in business. Many photographers made requests for modifications, so the original version went through a few changes until the Domke F2 Shooters Bag as we know it today, was finalized. The F-3X is a similar style of bag to the F2, but a little smaller. Domke is now owned by Tiffen
Waxy As A Waxy Thing
My first impression of the F-3X was not exactly what I had expected. Having looked at many pictures on the web, I decided to order the Rugged Wear wax canvas version because it looked as though it would become really beat up looking very quickly. I had read various reviews and comments about the wax finish, with some saying it was too waxy (greasy) and some saying theirs had no residue problems. So when mine arrived I was a little disappointed that the wax was indeed a bit too heavy. Nobody wants to get wax all over their hands and then have to handle cameras and lenses. So I left the bag outside, hoping the sun would burn the wax off. The F-3X instantly looked wet. Over time the wax has worn off and I'm sure when I eventually give it a scrub in the shower (Domke recommends this rather than putting it in a washing machine), the wax feel will be gone. A tin of wax is supplied with all Rugged Wear bags, so it can be reapplied if required.
F-3X Build Quality
I was a little surprised when I first held the lid of the F-3X up to the light. The wax canvas material was much thinner than I had expected. I bought the bag from Amazon and my initial thought was that it might be a fake Domke (to shoot all that fake news). But on closer inspection, I noticed how well made the bag is. The single clip on the front to hold the lid of the bag closed is solid and with a bit of practice is easy to work with one hand. It's not always necessary to use the clip though as the lid also has Velcro.


One of the most impressive features in the build quality front is the shoulder strap and handle. The latter is a simple canvas strap that comes in really handy when lifting the bag to and from the passenger seat of a car. It can also be unclipped and reattached to a couple of D rings on the back of the bag. I think this is to allow the bag to be held onto the handle of rolling luggage. I managed to do this fine while the handle was in its normal position. In my opinion, the handle is a little longer than it needs to be.
The shoulder strap is impressive in a few ways. It isn’t noticeable because of the side pockets, but the shoulder strap actually goes around and under the bag, so it is actually supported from the bottom, rather than from the sides. That isn’t the full truth though, because the strap that goes under the bag and the one that hangs from your shoulder are two separate straps. The good news is that they are joined together by really tough plastic attachments. The underside of the strap has two strips of rubber to grip your shoulder and keep the bag from sliding off. This works really well. I also purchased the optional Post Office Pad which has a thick rubber padding and makes a huge difference in comfort when carrying a fully loaded F-3X. Jim Domke copied the shoulder pad used on the bags of US postal workers bags.
The F-3X In Real-World Use
The only way to really know how good a camera bag is and how well it functions in the field is to use it. So I've carried the F-3X with me every day for the last couple of months, using it for everything except for a couple of shoots where I needed to use more kit that would fit in the Domke.

This is the original Dome configuration. Great to work out of with a little amount of kit, but very little padding
The F-3X is a strange shapeshifter of a bag. It's happy with a little kit or a lot of kit and molds nicely to the shape of your body. I must admit that I haven’t used the bag in its usual setup, which is basically two thin canvas hoops that are sewn in the sides of the bag. These look like two lens pouches. A single lightly padded square with Velcro at either side is also supplied. This pad connects both of the side pouches and sets the bag up as a two camera and two lens configuration in the main compartment. The downside with this setup is that there is very little protection for the gear and the top half of the bag is wasted space. See the next section for my two preferred ways to set up the F-3X with optional inserts
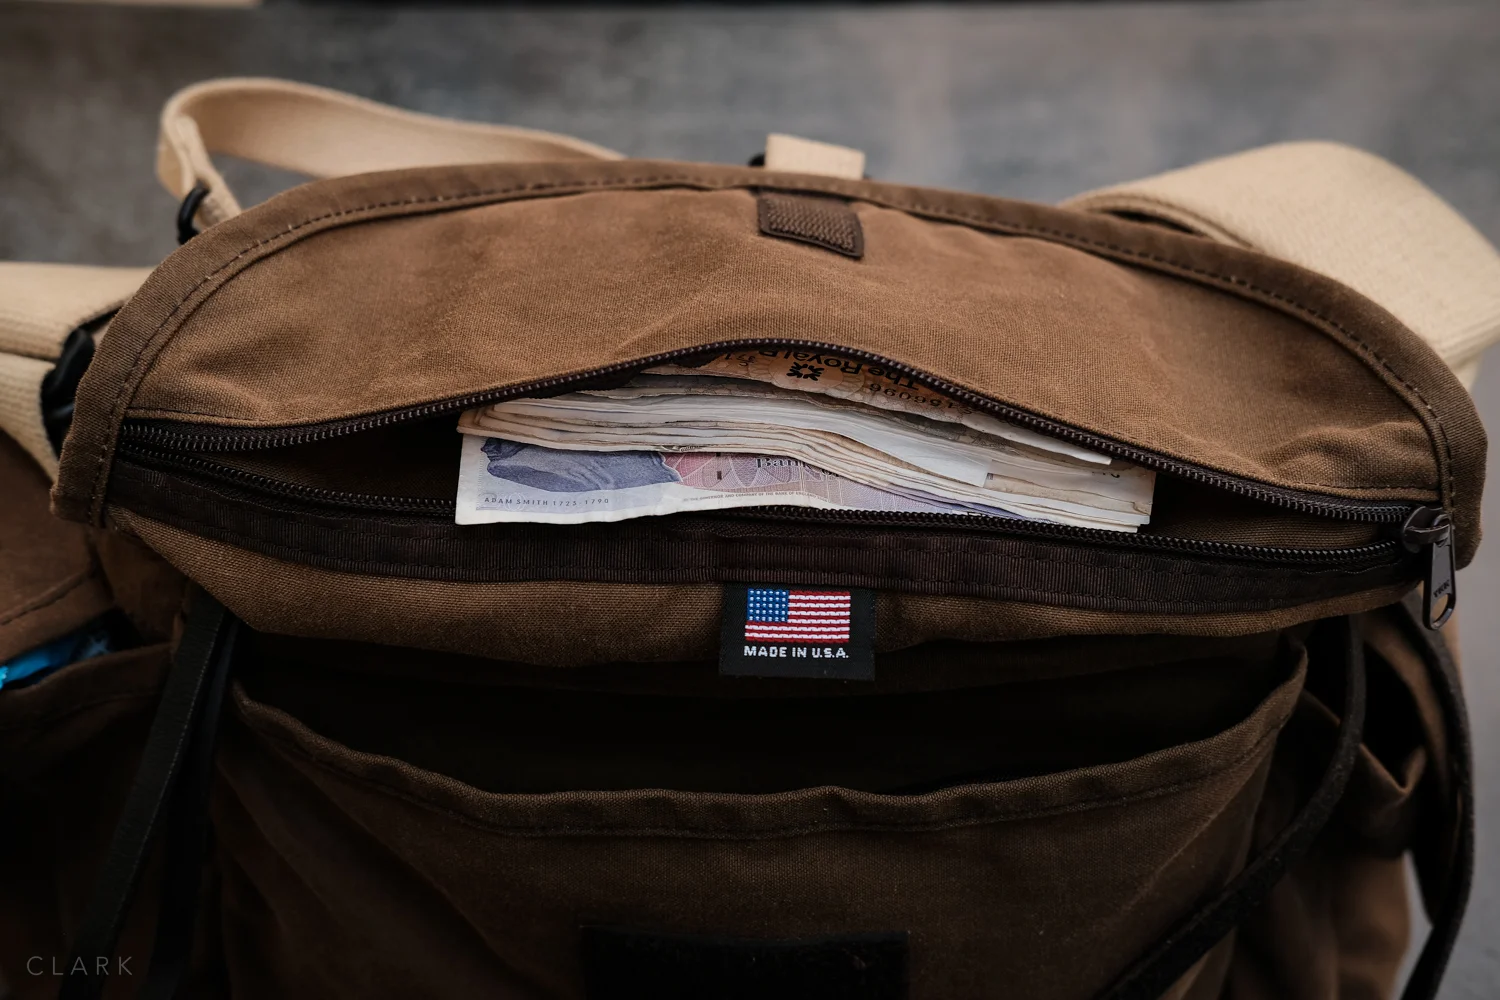
The F-3X has a good amount of pockets for storing all sorts of kit. The hidden one under the main flap is really handy to store cash and passports as it has a zip. I can only guess that this was the pocket Lindsay Addario used to store her passport when she was kidnapped in a war zone a few years ago. Although her kidnappers went through her Domke, they didn't find her passport and she was able to pass herself off as an Italian photographer (rather than an American one). Read Lindsay's great book called 'It's What I Do' for the full story.
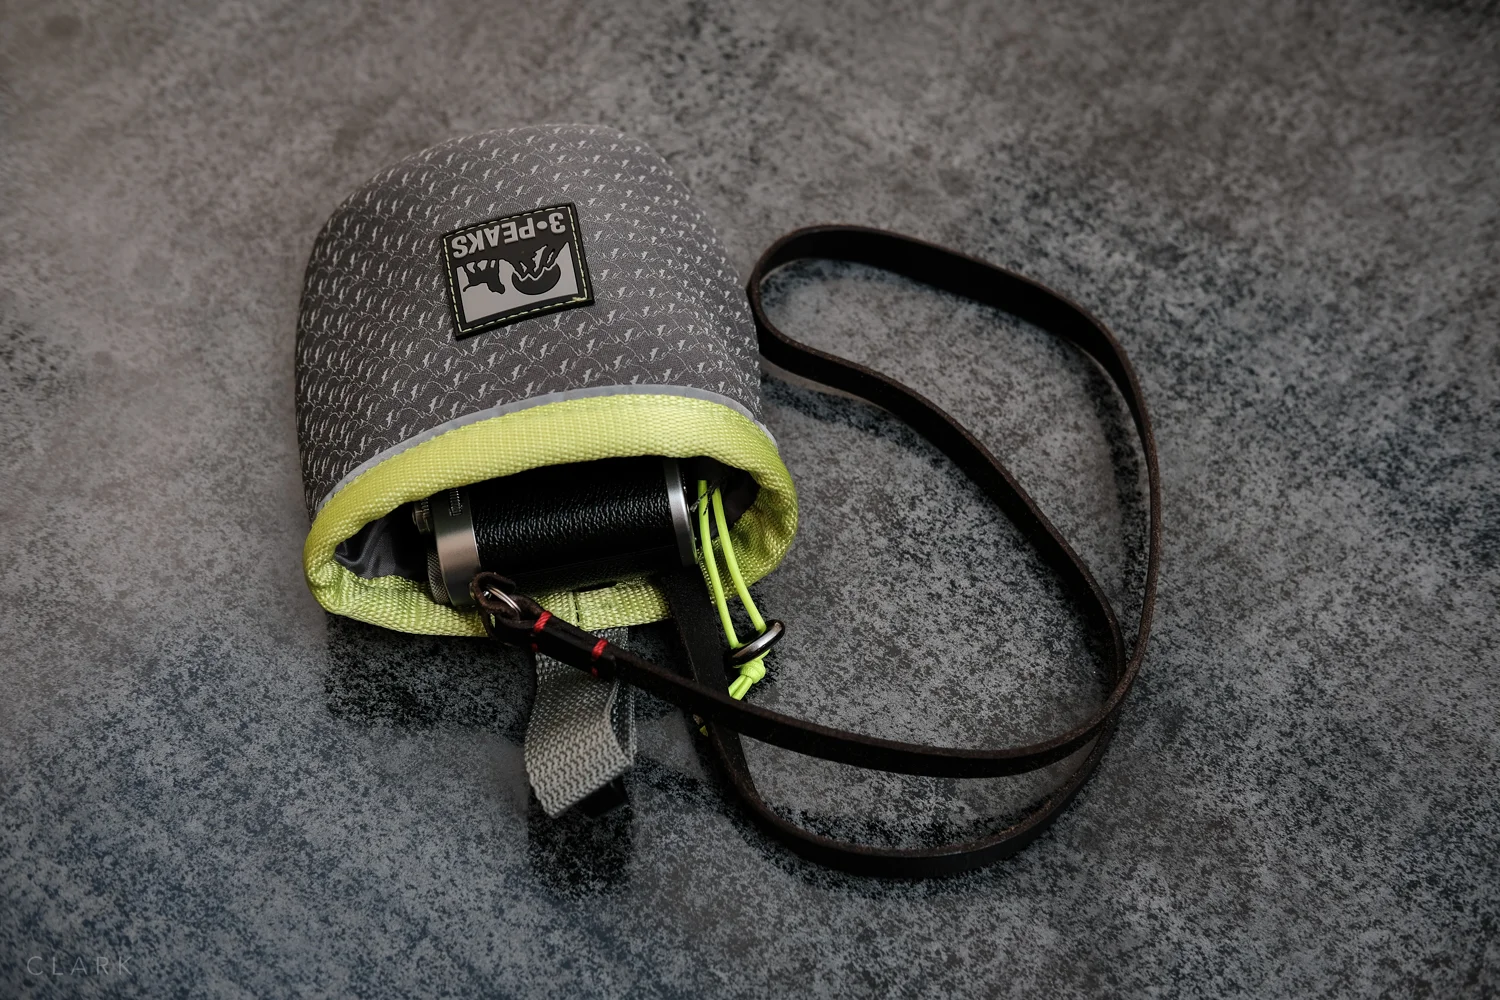


The front pocket is the large single space variety, rather than sewn up into two smaller ones. It functions well and is good for sunglasses and memory card wallets etc. But it's the side pockets that are the jewel in the crown. Two many bag companies either make the side pockets too tight or forget to include them at all. Not Domke. The side pockets on the F-3X are large enough to carry lenses or water bottles. I bought a pet treats pouch from the local pet store (beats me too), which holds any of my Fuji primes snuggly and with extra padding. A climbing chalk bag is basically the same thing.


One major flaw of the Domke Shooters Bags is the way they design the top lid and the lids on the side pockets. In both cases, the material is cut too narrow at the end that attaches to the bag. So the side pockets have gaps that rainwater could get in. Likewise, there can be gaps on each side of the top lid unless you take the time to pull each stretch the lid out over the bag. In the case of the lid, unlike other bags that have flat lids, the F-3X is stitched so that it forms a little roof.
Two Ways To Set Up The F-3X With Aftermarket Inserts
Like I said, the Domke setup doesn’t protect gear much and has a lot of wasted space too. Although the side dividers are sewn and can’t be removed, they easily fold flat against the sides of the bag leaving one large compartment. So I've been using two different aftermarket camera bag inserts depending on what my needs are.
The Dome F-3X with the Hadley Small Insert keeps the bag nice and slim. The centre space holds my X-Pro2 and 35mm f2 attached.
The Hadley Small insert (above) was given to me by my friend John Summers and is the same width as the main compartment on the F-3X. I can divide the insert up into three sections and get my X100F, X-Pro2 with the 35/2 attached and X70 with the WCL-X100 underneath. That leaves a bit of space in front of the insert for a book and still leaves all the pockets free for extra lenses and batteries etc.


The Koolertron (above) is an insert I bought on Amazon especially for the F-3X that is almost exactly the same size as the main compartment. I also have this one divided up into three compartments. This insert gives a little more room for longer lenses, so I can have my X-100F with the WCL-X100 attached and the X-Pro2 with anything up to the Fuji 90/2 attached. Again this leaves the other pockets for lenses or batteries etc. Click HERE for a link to the Koolertron on Amazon UK.
Traveling With The F-3X
I chose to use the Hadley Small insert for my trip to the Czech Republic. The Koolertron is great for holding lots of kit, but because it’s almost exactly the same size as the main compartment (and fairly rigid), it makes the F-3X a bit boxy and I wanted it to be soft and easy to carry. I wanted it to sit on my hip and mold around me, making it easier to move through crowded spaces and busy public transport. I made the right choice.
My Bose QC25 headphones fit in any of the end pockets and the hidden zipper pocket in the lid allows me to put my watch, cash, and passport in there as my bag goes through airport security. I don’t need to worry that someone will grab my cash if I get stopped at security. The rear pocket is ideal for my iPad mini and all the hotel and travel documents that I print out just in case I need them (I also keep digital versions in Evernote). I don't think the Domke is a bag that will attract the attention of thieves. It doesn’t look like, nor is it an expensive bag. It’s a really functional travel camera bag.

Conclusion
Domke bags may not be for everyone. Even if you like Domke, the Rugged Wear version may not be for you. I would say it's best to see them in the flesh at a proper camera store (if you can find one of those). The F-3X is a winner for me and I'll be using it a lot. This bag was never meant to be my every day carry around bag, so I'll be going back to my ONA Bowery for that. But my Domke is so versatile I can see this as my go-to bag of choice for a number of situations. Like ONA bags, the Domke bags just get better looking after lots of use and abuse. I can't think of a better camera bag for traveling either. My F-3X already looks as though it has been on the road for a long time. Maybe I'll do a follow up to this when it starts to get really frayed at the edges and has a few battle scars.
Positives
Shapeshifter
Large side pockets
Hidden pocket with zipper
Grab handle/luggage strap
Great for inserts
The strap goes under the bag
Rear pocket fits iPad Mini or paperwork
Negatives
Wax is too waxy
Flaps are too small to keep rain out
Very little padding
You can buy the F-3X at Amazon UK
JJC Square Lens Hoods For Fuji X-Series Lenses

If you're not a big fan of the supplied plastic lens hoods with some of the Fuji glass, you might be interested in the lower profile square ones available. I bought these ones by JJC on Amazon (U) for £28 each, which is less than half the cost of the Fuji versions. These hoods are metal and extremely well built. They fit on the lenses tightly so there's no chance of them coming off. They have flat covers on the front that slides over the lip at the front edge, which means your old lens caps can go straight in a drawer with the original hoods.
The JJC lens hoods are only available for the 16mm f1.4 and the 23mm f1.4, but the latter also fits on the 56mm f1.2 (as you see in the pictures here). Although the 90mm f2 has a 62mm filter thread like the 23 and the 56, the lens hood mount on the 90 is different so none of them fit that lens.

Unlike the original plastic hoods, the JJC square ones can't be reversed on the lens for storage. But these metal hoods are so small that I leave them on the lenses permanently. They fit all of my bags and have a smaller footprint than they would with the plastic hoods reversed. I'm not a fan of lens caps because they slow down the time it takes to remove my camera from the bag and shoot, so I tend to leave them off. But these flat JJC ones take up very little room in a pocket in my bag and are handy to stick on in dusty conditions.

JJC name and model number can be placed at the bottom of the lens or the top (as shown here).
Fujifilm X100F Review : Beauty And A Beast


Based On A Pre-Production FUJI X100F
This review is based on a pre-production camera after two months of using it, but the production model probably won't be much different. I'm an official Fujifilm X-Photographer and I have owned each version of the X100, plus almost all of the other X-Series cameras. I shoot exclusively with the X-Series cameras and haven't used a DSLR is years. This review is based on that. The pictures of the camera on this post were shot by me (they are not the official promo shots). I used my X-Pro2 with the brilliant 35mm f2 lens and a single overhead umbrella. For the close shots, I used the smallest of the Fuji Macro Tubes (11).


DESIGN AND LAYOUT
Your opinion may differ from mine, but I think the X100F is the most beautiful camera I have seen in my entire life! It keeps the look of the original X100, but the lines are cleaner, sharper and the top plate now slopes from the upper to the lower level. This, more than any other camera, has that thing where you just want to pick it up and hold it in your hands.
The X100F now has a front command dial, A front fn button (on the OVF/EVF selector lever) and the focus assist light has been moved up to sit alongside the flash on the front of the top plate. My first thought when I unboxed it back in November was that it felt a little chunkier in my hands than my X100T, which is a good thing in my book.
The rear of the X100F has a similar button layout to the X-Pro2 so it's been so easy to shoot with both these cameras together without having to think too much. I do wish Fuji had put three buttons next to the viewfinder instead of two (the X-Pro2 has three). It would also be nice to use the Delete key as an Fn button while in playback mode (like on the X70) and even be able to use the Q button as an Fn button and have Q assignable to any of the Fn buttons. The best new feature on the back of the the F is the joystick. I'm so used to this now that I find it awkward when I use any of my older X-Series cameras. It's also great that this frees the D Pad up to be used as 4 fn buttons now (Drive + 3 more).
NEW FUNCTIONS
The X100F has been brought up to spec with the two flagship Fuji cameras, the X-Pro2 and the X-T2, which is pretty impressive in this much smaller camera. It has the same 24 megapixel sensor and processor, which seems to be the new standard in X-Series cameras and one I hope will find its way into the next version of the X70.
THE ISO DIAL
The ISO dial has been brough over from the X-Pro2, which some will like and some won't. I like it, but it could have benefited from having a shutter speed lock button (like on the X-Pro2) because it is easy to move the shutter speed dial by accident if you don't pull the dial up far enough. I didn't find this to be too much of a problem though. But thanks to the next feature, you don't even need to use the ISO Dial if you don't want to.


ISO COMMAND MODE
This is a big one that has been brought over from the X-T10. You can still use Auto ISO in the usual way, but if set to Command in the Buttons & Dials setup menu and the ISO Dial on the top plate is set to A, the front command dial becomes the ISO dial. This is ideal if you want to lock your aperture and shutter speed and have ISO as the only variable. We Need this feature in the X-Pro2 and X-T2. It would be nice to be able to lock this by pressing the front Command Dial switch.


C = 5 STOPS OF EV COMPENSATION
Like on the X-Pro2 and X-T2, the X100F has the letter C on the Exposure Compensation Dial which extends EV Comp to 5 stops. Simply select C and then use the front Command Dial to scroll through 5 stops in either direction.
So what happens if both ISO and EV Comp are set to be controlled by the front command dial? In this instance the front command dial switch is used to toggle between ISO and EV Comp.
DIGITAL ZOOM AND CONVERSION LENSES
Both of the currently available conversion lenses, the WCL-100 (28mm) and the TCL-X100 (50mm) work with the X100F, but at the time of writing this review there is a second version of both lenses on the horizon. I have no idea how they differ from the ones I have, because both of the original conversion lenses perform brilliantly.
These lenses have apertures of f2 wide open (just like the fixed lens) and there's no loss of light like you would get with a teleconverter. But if you don't want to carry extra lenses (having a single fixed lens is after all the beauty of this camera), the X100F inherits the Digital Zoom function from the X70. By twisting the focus ring (in auto focus mode) you have the option of 50mm, 70mm and the cameras standard 35mm field of view. This is not an optical zoom, but there is some sort of magical upscaling going on that keeps the quality high. I'd still rather use one of the conversion lenses, but the Digital Zoom can be really handy sometimes. The viewfinder displays either 50 or 70 in a small box at the upper side, which changes when you have the camera set to Tele Converter Lens (72mm & 100mm using the digital zoom) or Wide Converter Lens (41mm & 58mm).
It's worth mentioning here that the Digital Zoom feature won't work in RAW, so you have to set the camera to JPEG only or the focus ring does nothing. Another point would be that when the camera is set to Manual Focus Mode, the focus ring obviously won't be used for Digital Zoom. The feature will still work, but you will need to with to AF adjust Digital Zoom with the focus ring and then switch back to MF.
There are 4 Control Ring Settings (focus ring). STD or Standard (changes the default option according to the shooting mode), White Balance, Film Simulation and Digital Zoom. Standard and Digital Zoom pretty much do the latter, but it would be nice to have a fifth option of OFF. A workaround for this is obviously to shoot in RAW+JPEG so that the control ring does nothing.


BATTERY
The NP-95 battery from the previous three X100 models has been replaced by the same NP-W126 that the X-Pro, X-T and X-E series uses, which is a great thing if, like me, you tend to cary more than one X-Series camera with you. I haven't noticed much difference in the amount of shots I get out of a single battery, but I have been using the F on high performance. Check Fuji's specs for more info on battery life.
CONCLUSION
I hate to state the obvious, but the X100F is the best X100 camera so far. The X100F, X-Pro2 and X-T2 have jumped so far ahead of all the other X-Series cameras that I'm now in the process of selling both my X-T1's and probably my X-E2, in favour of the X100F, X-Pro2 and X-T2. I'm not sure what the fate of my X100T will be yet.
If you own any of the X100 cameras, from the original to the S and the T, it is a no brainier. Buy the X100F (if you can afford to) and you will not be disappointed. F is for Fourth, but it could just as well be for Fast or even another F word :o)
I think the X100F is of close to perfection. Obviously we all have our own preferences to how we setup our cameras and Fuji have made their cameras super customisable, from the Q Menu to My Menu and lots of Fn Buttons. But if Fuji are reading this post, I would be doing them a miss service if I didn't mention a few firmware updates for the future that would make this camera out of this world.
MY WISH LIST FOR FUTURE FIRMWARE
- Q Button as an assignable Fn button.
- Delete button as an Fn button in shooting mode (like the X70).
- Pressing the front command dial to lock ISO in Command Mode.
- Ability to toggle ISO Auto & Command Mode on any of the Fn buttons (not just in the menu).
- Ability to put ISO Auto & Command Mode in My Menu
- The ability to disengage the Control Ring function.
- Be able t use the front Fn button to toggle between digital zoom settings with each press 50 -70 -35 -50...
- More options for assigning things to the front command dial (on all Fuji cameras).
- Swap the functions of pressing the rear command dial and the joystick (i.e. put Focus Check on the joystick).
LAST WORD FROM ME
The X-Pro2 and the X-T2 are the dual flagship models, but I personally see the X100F as a 3rd flagship. The flagship of the compacts.
LINKS TO OTHER X100F POSTS
- Kevin Mullins Review
- Patrick La Roque Review
- Shooting Portraits With The X100F
- Info On My X100F Video
- Kage Collective
ONA Bowery Bag In Dark Truffle Leather
I've had an ONA camera bag on my wish list for a while. It was originally the Street Prince in Dark Truffle Leather that I had in mind, but I couldn't get one in the UK at that time. I asked a friend to pick me one up in the US last year, but the dealer was too far from where she was staying. I ended up buying a Tenba Cooper 13 Slim instead, which I'm still using and love, especially for travelling as it has a sleeve to fit over the handle of rolling cases and it has a pocket at the front big enough for my Bose QC25 headphones.
So when a trip to London appeared on the horizon, I found out that The Classic Camera stocked a selection of ONA bags in various styles and finishes. I still liked the Street Prince and even considered the Berlin II, but I've been on the look out for something small that would force me to carry less gear on a day to day basis. I have a backpack for shoots where I need a lot of kit, but for street photography or just a go anywhere bag, I was in need of something smaller, but with enough space to hold a few accessories as well as two or three X-Series cameras with lenses attached.


I kept coming back to the Bowery and was drawn to the leather versions especially. The Antique Cognac looks good (it looks much better in the flesh than it does on the internet actually), but I loved the look of the Dark Truffle leather version. I liked the Tan canvas version when I was looking at them at Classic Camera, but I knew I wouldn't get it out of my system unless I bought the leather one.
I paid the £219 at The Classic Camera and resisted buying a Leica M6 (for now) while I was in the shop. I ended up carrying the Bowery around in it's box for six hours that day while I shot some London Street Photography with the X70 and X-Pro2.
BUILD QUALITY:
The leather ONA bags are made to wear-in really quickly, so if you want one to stay looking as new as the day you bought it for many years, leather ONA bags are not for you. But if you want your bag to look as though you've been using it for years, even though it's fairly new, then look no further because ONA is definitely what you're after.
Build quality on ONA bags is fantastic, in fact I would say it's the best I have seen on any bag! The leather versions especially look as though they would last for many years, possibly out lasting me. The leather is thick and tough and the rivets and buckles are chunky and already look aged, which is in keeping with the rest of the bag.
WHAT FITS INSIDE THE BOWERY:
The Bowery can hold a lot of kit for such a small bag. The leather version is a good bit heavier than the canvas one and as I said earlier, the purpose of this bag for me is to travel lighter on a day to day basis when I don't have a shoot that requires larger lenses. But I can basically get all of the following into the Bowery. I don't always need this amount of gear, but it's good to have the option.
- Fuji X-Pro2 with the 35mm f2 attached
- Fuji X100T (with lens hood)
- Fuji X70 (with lens hood)
- GoPro (under the X70)
- Moleskine (Evernote edition) Notebook
- Parker pen
- Apple Earbuds (headphones)
- A couple of spare batteries
- Short iPhone cable
- 2 spare SD cards (in their cases)
- Business cards and bank/credit cards
- Lens cloth
Here's a short video showing how I fit all this inside the Bowery.
CONCLUSION:
This Bowery is a really cool bag. It feels great over my shoulder and has that rare quality of feeling lighter than it actually is. I was tempted to buy the wax version because it was a good bit lighter and felt and looked great, but I knew I would still have had gear lust over the leather version, so I'm glad I bought this one. The Dark Truffle is the one for me, even though ONA are now doing a black leather versions too.
These bags are not inexpensive by any means, but will last for years, and even though they will get scuffed and worn very quick, they will look as cool as an old Leica that's worn down to the brass. I would highly recommend paying a visit to The Classic Camera store if you happen to be in the London area, I know I'll be back there on my next visit to London. If you're on the fence about buying an ONA bag, just take the plunge. You won't be disappointed.
Fujifilm XF 35mm F2 R WR Lens

What is the point of the 35mm f2? We already have the 35mm f1.4, one of the three original XF lenses that were released alongside the X-Pro1. Not only that, the 1.4 version is one of the best 50mm equivalent lenses produced. Ever! It's beautifully smooth but super sharp picture quality is truly stunning and even after the long list of first class lenses released over the last few years, the 35mm f1.4 is still one of my favourite Fuji lenses.
So what about the new 35mm f2 with it's tapered front end? Well it's not quite as good looking or bright as it's older brother, but this scrawny lad is quicker & less shifty. Lenses that taper in at the front end always look a little strange to me and I actually think this one looks better in silver (more like an old Leica lens). Don't get me wrong, it's a cool lens and feels a lot smaller than the f1.4 version. Where that tapper comes in handy is with the optical viewfinder of the X-Pr1 (and hopefully it's successor). If you press your eye right up to the viewfinder, you can barley see the lens just at the corner, but it's nowhere near the frame lines. The supplied plastic lens hood is very small and there's even an optional one that is more like the X100 hood.
Performance wise this new 35/2 is way ahead of the older lens! Focusing is way quicker, smother and quieter. Focusing is also internal, so no front end popping in and out like your Granny doing the Hokey Cokie. Aperture ring is tight and is the way all Fuji lenses should be. In fact, if you shut your eyes you would swear you're cracking a safe. The focus ring is also tight and smooth and has just the right amount of travel IMO. It's a shame that the focus ring is continuous and doesn't stop at either end like the 16mm or 23mm does. It's also a real shame that it doesn't have the push/pull clutch focus ring like the 14, 16 and 23mm lenses have. Oh and as this is a great lens for street photography, a hyper focal distance guide at the front end of the lens would have been great. I would much rather the front of the lens were bigger if it meant we had those features of the wide angle lenses.


So if I already own a 35mm f1.4, why would I buy the slightly slower f2? I have a few reasons. The first is that I think this will be a fantastic lens for street photography. The Aperture ring is tight enough that I can set it and be fairly sure it won't be knocked off. The focus ring is really smooth when using manual focus. Speed wise, I very rarely shoot street wide open, so there won't be a problem with this being an f2. The tapered front end is also even less threatening to people on the street.


I tend to have one of two bags with me at all times. I have my small every day walking around and street photography bag and I have my working bag with two X-T1's and five or six lenses (I'll do a post on what's in each bag in the coming weeks). I like to have a 35mm lens in my walk around bag, but I constantly forget to put it in my working bag and only realise when I reach in there for it, and usually when I really need that focal length. No room to back up for the 56mm, so I end up shooting a portrait with the 23mm. Not ideal! But now I can keep a 35mm in each bag. Nice!

So if you don't already own the f1.4 version, which 35mm should you buy? It's quite an easy answer really. If you don't need that extra stop of the f1.4 then the f2 is the one to buy. Apart from losing that one extra stop of light, the new 35mm f2 has everything going for it and that's coming from a guy that absolutely loves the original 35mm f1.4.