Photography

The Vanguard Heralder 38 :: Bag Review

If you are in the market for a large modular camera bag that holds a lot of equipment and is easy to work from, then the Heralder 38 from Vanguard deserves your undivided attention. The 38 is not a bag you would carry around with you everyday, it's a bag you would take on a shoot, especially if you need everything but the kitchen sink. This review is a little overdue, but I really wanted to give the 38 a proper field test to see just how good it was. When Vanguard sent me this bag, I was a bit surprised how big it was. I had expected something smaller, but as soon as I opened the box I was impressed with both build quality and features.

Exterior The outside surface of the bag is made of a tough black nylon that should wear well through the years. The zips have heavy duty black tabs with a single orange stripe on each that means seeing the zippers in the dark won't be a problem. The rear of the bag has a zipped pouch that contains a rain cover tethered by an elastic cord. The rain cover struck a chord with me as I recently had a shoot in heavy rain and the bag I was using got soaked right through. The 38's rain cover pouch is also big enough for an iPad. Another welcome feature on the back is the built in strap that allows the bag to be slipped over the handle of larger rolling camera bags or suitcases. There are also ICS compatible D rings and loops to tie the bag down.


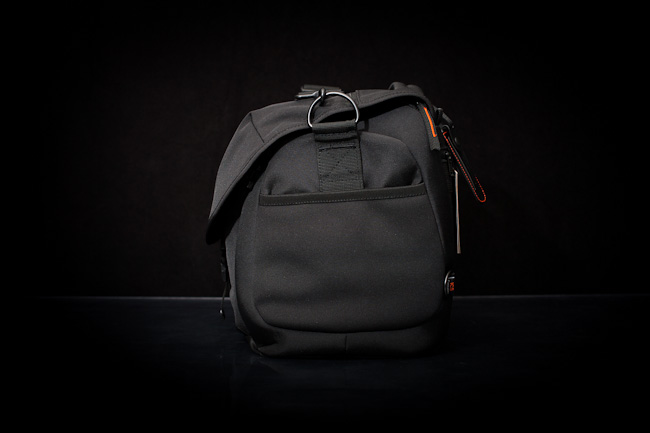
On one side of the bag there's a large neoprene pouch that could easily be used to store accessories or a place to keep a water bottle. I found it to be most useful as a lens pouch for swapping lenses on the go. Round the opposite end there are three handy straps that can take lens pouches with slip lock attachments. I tried attaching a couple of mine and they were very safe and secure. I would recommend lens pouches with double velcro locking. I'd love a slip lock attachment for my Zoom audio recorder so that it could hang it on the side of the bag and collect ambient sound.

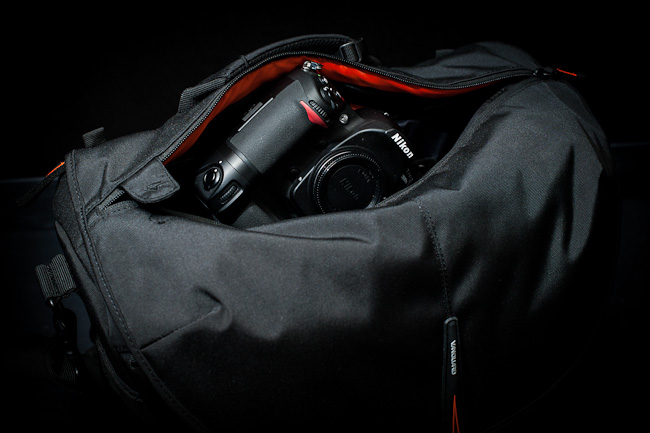
The top lid functions in two ways. The first is a zip that runs across the length of the bag and is used for quick access and probably the one that you would use most when shooting with the bag on your shoulder (see photo at the top of this post). There's also a magnetic flap to secure the zip when closed (photo above). The second way the lid functions is to lift it right over, which gives complete access to everything inside. To open it this way, you unclip the plastic fastener and then open the zip that runs from the back of one side to the back of the other side. The zip is also under the flap of the lid, which although makes it a little awkward to find, it does add a large amount of weather proofing. I tend to use the clip when I'm shooting but also close the zip when the shoot is complete.

One of the best features on the outside of the bag is a tripod holder that tucks away when not in use, in fact you wouldn't know it's there. My tripod is old, large, chunky and heavy, but the 38 carried it without any problem. This feature alone would make it a great bag for landscape photographers.

Interior Inside the Heralder 38 is a four section memory card storage pouch on the underside of the lid. There is also a section at the front that would take an iPad, some pens and some odds and ends in a transparent zipped pouch. The rest of the inside consists of two padded sections that can be removed if you need to utilize as much space as possible. I would liked to have seen more padding on the bottom of the bag when the inserts are removed, although to be honest it can't say I'd ever use it without inserts.

The insert at the rear is big enough to take a 15" laptop and also has a flap that can be closed and secured by Velcro, so you could easily use this as a separate carry around case for your laptop. The main insert can be divided into eight sections that are deep enough for a 70-200 f2.8 lens. The padded dividers Velcro to the sides of the insert, so the configurations are vast. My one gripe with this bag is that if you shoot with primes (as I do), a 35mm and a 50mm could fit stacked in one compartment. So my one wish for this bag would be for Vanguard to include eight small square dividers and two oblong ones. Then smaller lenses could be stacked on top of each other with these smaller inserts attached by velcro between them without the risk of scratching or denting. I tried it out with pads from another bag and it let me pack even more lenses. Similarly, oblong pads could be used to sit on top of camera bodies to allow light items to be placed on top.

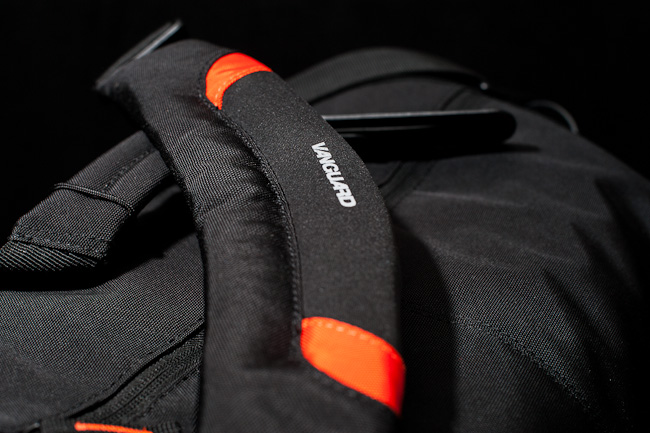
It's amazing how much equipment the Heralder 38 can hold, but it's also amazing how comfortable it is to carry. This is mostly thanks to the heavily padded shoulder strap. There's obviously a lot of thought went into designing and manufacturing this bag. If you're a wedding photographer, it's a great bag to keep all of the days kit in the back of the car and use it to feed a smaller bag for different parts of the wedding.

The photo above shows the gear that I was carrying in the Heralder 38, but it was by no means full. The 70-200mm f2.8, 85mm f1.4 and the 35mm f1.4 are quite chunky lenses. In fact I have a couple of bags that won't accept the 85mm because of the diameter. So to come back to where I started. If you're in the market for a large camera bag, The Heralder 38 is definitely worth checking out. You can see more of this bag and others like it at the Vanguard website and you can buy it from Amazon UK or from B&H in the US.

Fuji X-Pro1 & Nikon DSLR Wedding :: Part 1

I have a wedding on Saturday and will be taking the Fujifilm X-Pro1 along with my usual Nikon DSLR kit, well minus the 2nd DSLR. I'm not sure how this dual kit set-up will work, but I hope it's smoother than packing my camera bag. I'm using my trusty Lowepro CompuTrekker AW, which has been my main bag for the past 3 years and I've never had the urge to change it. As you can see from the photo above, the Fuji kit is much smaller than the Nikon kit...but will it be up to the task? I guess I'm about to find out and so will you in part 2.

My bag is pretty full and there's even more stuffed in the front pocket and inside pockets, including BlackRapid straps, Gels for the Speedlights, Flashbender, chargers, memory cards...etc. Although not in the photo, I've decided to take my X100 along for the ride too, just incase I run out of battery power on the X-Pro1. I'm trying not to take too much gear as I'll be traveling by train for 3 hours either way and I'll have to carry this stuff all day. It will be interesting to see how this set-up works out. I'm wondering if it would be possible to shoot with two lenses for each body, with the spare lenses in a couple of Lowepro lens cases on my belt. I'm thinking 35mm equivalent focal lengths of 27mm (Fuji), 35mm (Nikon), 53mm (Fuji) and 85mm (Nikon). A nice selection of focal lengths which would give me something wide for each body and also nice portrait lenses for each too. Another plus point would be the apertures, one f2 and three f1.4's...nice!

Loweprow Event Messenger 150 :: What's In My Bag

I've been on the look-out for a small messenger style bag that can also take an iPad. There are a few out there that do the job size wise, but are awkward, because you need to remove camera gear to get to your iPad. I received the Lowepro Event Messenger 150 in the post the other day and loved it as soon as it was unpacked. Not only does it have a separate compartment for the iPad, it has a two tier system with dividers that attach to the side of the bag using velcro. It can take everything you see in the video above and there is still enough room in the bottom section at the left of the bag for the 60mm f2.4 lens for the X-Pro1.

The built quality is fantastic (as you would expect from Lowepro) and although I wasn't sure about the colour when I first saw it on the web, it looked perfect when I saw it in the flesh. Four of my other other five Lowepro bags are black, so this is a welcome change. Another feature that's very welcome, is the silent velcro system. As you can see near the end of the video, you simply pull the velcro tabs from one side to the other to either have the velcro function or not. The front section has good sized pockets for phones and general accessories and there is even a dedicated pouch with a velcro lid for memory cards, which after my recent disaster, I like to put SC cards inside the supplied plastic containers before putting them in my bag. Price for this bag is very reasonable and is available at Wex in the UK for £39.95 or from B&H in the US for $59.95

As you can see from the video, the Event messenger packs a lot of gear for such a small bag. There is also a smaller 100 model and the larger 250 model available. The latter holds a laptop, but is obviously a bit bulkier. I'll be sticking to my trusty Computrecker for weddings and portraits, but for street and documentary work, the Event Messenger 150 is absolutely perfect for me and will be my bag of choice for my upcoming trip to Italy.

Fujifilm X-Pro1 :: Review

The X-Pro1 arrived a few days ago with the 35mm f1.4 and 18mm f2. I haven't ordered the 60mm f2.4 at this point, but I might add it later as the buzz on the net states that it's very sharp. I'll review the lenses in a separate post as this one will be long enough with just the camera. I would also like to use each lens exclusively for a few days, to get a real feel for them individually.

I have included a star rating (out of 5) for each section of this review.

All photos in this post are straight out of the camera (except for a little blurring on the 3rd photo) and shot in standard (provia) mode.

PACKAGING **** The packaging for the Fujifilm X Series is really nice and certainly gives the impression of quality before you even open the box. The box for the X-Pro1 is similar to the X100's, but not quite as classy on the outside or the inside. The X100's was more like a jewellery box with a silk lining. The X-Pro1 box is nice, but doesn't have the same finish and has cut-out foam for the camera (which probably provides more protection). The lenses have similar boxes and are really well padded, with slots in the foam for both lens and hood. Soft bags are included for each lens, which would protect against scratches, but not dents. The X-Pro1 body felt light when I lifted it out of the box, but it feels about right when a lens is attached. After walking around with the body and lens in my hand for half an hour, I came to the conclusion that I wouldn't want it any heavier.

BUILD QUALITY **** Like the X100, the build quality is very high. The dials all have that nice old school click that is so fantastically 1970's. The leather-like finish on the body feels really good and the grip for the right hand is non-slip rubber. Everything feels tight and well made. If you equate weight with quality, you might think it feels a bit cheaper than you would have thought.

VIEWFINDER **** The X100 wins in the viewfinder stakes hands down. it's bigger and brighter than the X-Pro1. Looking through the X100's viewfinder for the first time is a memory that is permanently etched in my brain, it is simply gorgeous! The X-Pro1 is not bad by any means, it's just not as big when you look through it. I don't know why there hasn't been much said about this on the net so far. I assume the reason it's a smaller affair is something to do with the magnifying lens that slides in place when different focal length lenses are used.

CONTROLS **** The buttons on the back of the camera are much improved and are now flatter. Their new positions are a big improvement, I'll need more time before I can use them without thinking as my fingers are going to where the X100's would be. The bulge at the right hand side on the back stops accidental movement of the exposure compensation dial and is a nice grip for your thumb. It also has the Q button and the AF-L/AE-L button, but the later is not ideal if you are a back button focus kind of shooter as the button is almost at the edge of the camera, rather than under the thumb. The focus mode switch is on the front of the camera and is similar to the one found on the X10. This is much better and has the two most common focus modes (manual & single) at either end of the switch, with continuous in the middle, which saves you from having to look at the switch when shooting.

FOCUS *** Manual focus is much much better than the X100 (even after the latest X100 firmware). It's still not fantastic, but it takes less turns. The problem with using the focus ring is that the amount of turns it takes seams to be determined on how fast you turn it. This makes it hard to judge how much to turn the ring, so it can never become intuitive. In my opinion Fuji should abandon the 'by wire' electronic focus and implement a traditional mechanical approach. If you're a manual focus kind of shooter (under the age of 40 with good eyesight), then you would probably be better of with the Leica adaptor and either Leica glass or the new SLR Magic's 50mm f0.95.

Auto Focus has some issues that will hopefully be addressed in future firmware upgrades. I like to use the focus correction option in the OVF, which has two focus boxes that sit diagonally to each other. As you get closer to a subject the focus area gets nearer the bottom right box and vies versa. The problem is that even if you are in the exact same spot, the camera can change it's mind each time you half press the shutter. It doesn't do it a lot, but it does do it. Fuji is probably working on fixing this glitch and hopefully it will be improved. I first tried the AF in a cream room under Florissant light and I wasn't impressed. In fact I gave it a real bashing when writing this section, but after shooting out on the street last night at 11pm, I deleted my original text as the AF performed fantastic in very dark conditions. The focus can hunt sometimes in areas where there is little contrast, but otherwise focus is faster than it's little brother. Focus outside in daylight conditions is pretty good, although it's still very much Fuji's weakness. I hope I'm not being too hard on the focus as like the X100, it will probably take a bit of time using the camera to adapt. The two cameras are less alike than I had expected.

Continuous AF is fairly useless as the focus point is stuck in the centre of the frame.

SENSOR *****+

Waw waw waw! This is the most awesome sensor in the history of anything below the size of medium format! The colours are just fantastic and and the resolution is stunning! Fuji have created a masterpiece. That stuff I just wrote about the focus...eh, who cares about that trivia? Did I mention the sensor is jaw droppingly spectacular? As a Nikon shooter, I tend to envy some of the tones from Canon sensors, especially skin tones. But not anymore. The X-Pro1 triumphs them all. This is the first digital camera I have owned that I would be happy to use the files without any computer work. Just think how much time this could save in post. You could select your best few to make into art pieces in photoshop, but the rest could be left as they are. This is the way forward, we're losing years of our lives to computers!

SHUTTER ***** One of my favourite things about the X100 is silent mode. It really is silent and you don't even know if you have taken a photo (if you're weakening it from sleep mode you probably haven't). As the X-Pro1 has a focal plane shutter instead of a leaf shutter, it can't do silent. But...the shutter sound is fantastic. It not only has a nice fat mechanical sound, you can feel the thud coming through the camera. The shutter sound is not a daft recorded tone, it's the actual real old school sound and it's gorgeous!

HIGH ISO PERFORMANCE ***** The X-Pro1 has fantastic low light performance. I thought the X100 did well at 3200 ISO, but the X-Pro1 does it even better. I've no doubt that there's some secret sauce magic going on in the camera and I would't be surprised if it was based on the noise reduction in Lightroom 3 or 4. The X-Pro1 has that same soft creamy look, which isn't a bad thing, in fact it was a big leap forward for Adobe. Shooting at 3200 ISO is something that you won't think twice about.

CONCLUSION The X-Pro1 is a different beast from the X100. The strange thing is that the strengths of both cameras are complete opposites. The X-Pro1 is more versatile due to it's ability to change lenses, but the strength of the X100 is it's fixed lens. Sometimes the less things to think about when shooting, the better, not having the option to change lenses can be liberating. On the other hand, there have been times when I haven't bothered to take a shot because I new I couldn't get close enough to the action. Having both these cameras will give me the best of both worlds. The X-Pro1 does have the most accurate auto white ballance I have ever seen!

I was slightly worried that the X-Pro1 would take over and make me neglect the X100. Not so, in fact having the new beast has made me appreciate the X100 even more. Shooting with X-Pro1 is a joy to use and it's almost everything Fuji claims it is, but the viewfinder on the X100 is magical!

Can the X-Pro1 be used as a pro camera?...yes! Can it replace a DSLR?...yes! (unless you shoot fast action). Does it replace the X100?...no!

I think this camera will shine more in a documentary style. War photographers should welcome it with open arms. I'd rather run for my life with one of these cameras than a big DSLR and matching bulky lens. It's also a great portrait camera. I'm sure it will be great for street photography, but I wasn't feeling it as much as the X100. To be honest though, I went out on the street yesterday, but couldn't really get in the zone, which happens sometimes.

The sensor alone makes the X-Pro1 worth buying, but even if it had the same sensor as the X100, it would still be a great camera and I highly recommend it. If you had an X100 and sold it because you didn't like the auto focusing quirks, then do not buy this camera. It does focus faster in both auto and manual, but it also has some quirks. If on the other hand you are like me and thousands of others that own and love the X100, and you want the ability to go to a longer focal length, or need even better low light performance, then buy the X-Pro1 as soon as your finances allow. If you are are thinking of changing your X100 for an X-Pro1, I would highly recommend saving up the extra cash to allow you to keep both. You won't regret buying the X-Pro1, but you will regret selling the X100.

I'll be posting more shots here over the next few days, months, years, so please come back now and then or follow me on twitter for updates @derekclarkphoto. I will also be posting black and white street photography to my other blog at 35mmStreet.com. My documentary website DerekClarkPhoto will be shot almost exclusively with the X series cameras.

I will review the lenses in a future blog post.

I have just received a fantastic bag from Lowepro, so if you are in the market to buy a great bag that's suitable for the X-Pro1, X100 or just system cameras in general, check back here for my review next week.

Fujifilm-X-Pro1 Officially Announced

The Fuji X-Pro1 has been officially announced the and it's pretty much the same specs as the leaked info at the weekend. It's pretty much the same size as the Leica M9 The main feature with this camera is a brand new sensor technology that lets the low-pass filter be removed and allow image quality like a full sized sensor. The Fuji Guys will fill you in on the rest.

Nikon SB700 Review

20110725-070103.jpgThe arrival of the SB700 brings my Nikon Speedlight arsenal up to a total of five. I also have an SB900 and three SB800's. But before I get to the new kid on the block, I need to talk about the SB900.

The SB900 is Nikon's flagship flash, but it's also their iPhone 4. Just like when Apple made the perfect smartphone with an antenna that didn't work (or was it because millions of us were holding it wrong...yeh right!), Nikon gave us the perfect flash, except that it overheats and shuts down doing the same job as the SB800 does standing on it's (flash) head. My SB900 has shut down on a few portrait sessions and it has shut down on almost every wedding that I have shot in the past year. When it shut's down, it stays down, until it cools down. The annoying thing is that the interface on the SB900 was a huge leap forward, it's brilliant! The SB800 is a more reliable flash, but it's not the most user friendly. It's buttons are not very intuitive and it can be slow to switch functions when you have to press and hold a button for a few seconds, but at least none of my three SB800's have ever shut down on me. So I've put-up with the SB900 and swap it for an SB800 when it shuts down. I shoot weddings with two cameras, so I either move to the camera with the SB800 on it, or I switch the flash's around to suit the body/lens combination that I need. But a flash that won't fire is as much use as a phone that can't make calls!

The SB700 is an iPhone 4 with an antenna that works. Although it's billed as the replacement for the SB600, it's more like an SB800 with a great interface. It has more in common with the 800. Size and weight are similar and it can be used as both a remote (slave) and a master for your CLS wireless set-up. What it doesn't have though, is a power socket and a sync cord socket. None of these missing features are a deal breaker for me as I never use external power on my flash guns and my TTL cord is the hot shoe type. But if you need these functions, you might want to go for the SB900 or a secondhand SB800. Its great to see that the infrared eye on the side of the flash has been moved up and is less likely to be covered up by a VAL (Voice Activated Light-stand).

The interface is probably even better than the SB900's as it has the addition of two switches. The one on the left selects TTL, Manual and GN (the guide number position also acts as an A/B selector). The AB selector is a nice feature that works in Master (commander) mode, and allows you to change the ratios of flash A and B buy simply pressing Select to highlight A/B and then spinning the selector dial in either direction. One flash goes up in power and the other goes down in power. This is a fast and easy way to set-up your flash ratios in a small shoot where you're time is limited. The switch on the left selects the Illumination Pattern to either Standard, Centre Weighted (narrow beam of light) or Even (wide beam of light).

The head on the SB700 feels solid and takes maybe even more effort to press in the button and tilt than it's big brother does. A lot of people I talk to don't know that the heads on Speedlights are in the normal position when they are one click up. That extra click down is for macro shots. Another good feature over the SB800 is that the head rotates 180 degrees in both directions. The SB700's zoom goes from 24mm - 140mm, which is not as good as the SB900's 24mm - 200mm. The battery cover has changed too, and you now have to press a centre button on the door before sliding it open.

Supplied accessories are a square soft case with compartments for the very useful foot/stand and the Soft Diffuser Dome, together with two correction filters. The later are hard plastic CTO and Florissant filters that are similar in shape to the SB900's Filter Holder, but are already tinted orange and green (no need for gels). The Soft Diffuser Dome can also be fitted on over the filters. My one and only negative with the SB700 is that the Diffuser Dome can be awkward to get on and sometimes you think it's on and it falls back off. But when you finally get that big click, it's a solid fit and can stay on forever. My flash guns have a compartment each in my camera bag and the Diffuser stays on, so unless I need to use the filters, I'm not that bothered.

Another plus point with the SB700 is that it feels more solidly built than the flagship model. The first thing I noticed when I unboxed the SB900, was that it felt cheaper and less solid than my SB800's. The new model also has the fastest recycle times, so this one will go on the camera I use most at weddings.

So which flash should you buy? If you need enough power to frazzle your subjects eyeballs, zoom in to 200mm, or need to use external power or a PC Sync cord, then the SB900 is the one to buy, but make sure you have a back-up! If however, you need a solid and reliable workhorse that is fast, easy to use and quick to recycle, then the SB700 is the one to go for. If you shoot weddings or events, then you defiantly need an SB700 or a second-hand SB800...the SB900 will let you down! The Nikon SB700 is available from Warehouse Express in the UK or B&H in the US

FilterStorm:: The Best App For Photographers?

20110704-094044.jpg There's a lot of great photography apps out there, but most of them are geared toward one or two features. Some lean toward shooting and uploading straight toTwitter, Facebook etc, some do tilt/shift and some only do black & white. Thanks to Apples camera connection kit, I can now take the SD card from my Fujifilm X100 and import the photos straight onto the iPad 2. I needed an app that could then resize the files to my blog sizes. I tried PhotoResizer, which did the job, but was a little sluggish and again a one trick pony.

FilterStorm is what the Photoshop app should have been like. It does a huge amount of different things and it does them really well. Apart from Settings, Load Photo Star Rating and Automations, The app is split into 4 sections, which are in the form of tabs - Export, Metadata, Filters and Canvas. Export does what you would expect, like saving back to your photos folder of sending by email, Flickr, FTP or Dropbox. You can also choose size and quality options here too. The Metadata tab is set for viewing meta and renaming photos by default, but click on Settings and you get whopping great 31 switches that let you turn on features like Keywords, Captions, Subject, Category, Location, Copyright, Usage, Contact Details...etc. The meta section really is a wolf in sheep's clothing. Canvas is where you can crop, scale, rotate, flip,straighten, Scale and add borders. This is another huge section. Filters is the place where we pixel pushers all like to be. It has Brightnes/Contrast, Curves, Hue/Saturation, White Balance, Sharpening, Blur, Black & White, Clone, Tone Mapping, Text, Noice Reduction, Noise, Redeye Brush, Colour, Vignette, Posterize and Add Exposure. The great thing is that it does them all really well.

This is the best i photo editing app that I have ever used, and I've tried plenty. The thing is, I've just checked on the Apple App Store so I could wright the price (2.39 UK) and saw that there is a pro version (8.99 UK) with even more features. My one gripe would be that if you have already bought the standard version, you shouldn't have to pay the full price for the pro version. That goes for apps that are different on the iPhone & iPad, if you buy it on your iPhone and the iPad is a more expensive & more powerful app, then you should only have to pay the difference and not the full cost. But all that aside, Filterstorm is the best app for photographers I have came across to date. It was made with photojournalists in mind (although photojournalists shouldn't need a clone tool). I'm going to buy the Pro version now, as there are a few features that I quite fancy (batch editing being but one). Filtersorm (iPod, iPhone & iPad) & Filterstorm Pro (iPad only) are available on the App Store. The photo above is from the Pro version.