BLOG
Workflow Wizard 2:: The ExpoDisc
 Back on the workflow challenge again, trying to speed things up. After watching the excellent course by Zack & Jody Gray on Creative Live last week, I was amazed at how little time they spend on post production. Start to finish, from importing the images to album design takes them just five and a half hours. Now that's fast, really fast!
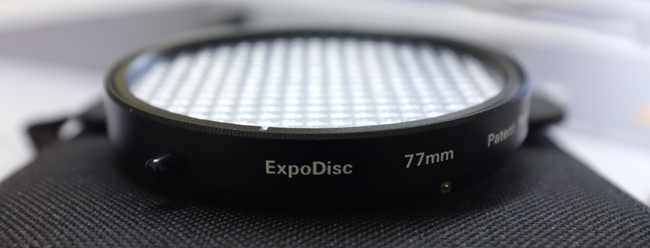
So what's the secret? Zach & Jody say it's all down to getting white balance and exposure consistent and accurate in the camera using an ExpoDisc. So I thought I'd give it a go and happily handed over my cash to the nice man at Warehouse Express. So two days later and £79+p&p lighter, I received a 77mm ExpoDisc in the mail. The first thing I noticed was that it didn't have any threads to let you screw it on to a lens. It just stuck on the front of my 85mm 1.4 as if by magic (it might actually be magnets). Buy the size for your largest lens and then just hold it over the front of your Smaller ones. It even works on the tiny X100 lens.
 The ExpoDisc works by using your camera Custom White Balance function. Canon users get the short end of the stick here, as there are more steps involved in setting a custom white balance and you need to either put the camera on manual focus, or get used to using back button focus. But as I don't own a Canon DSLR, I can't go into detail about how to go about it here (please check your manual). I'll be using a Nikon D300s for this test, but you can apply it to the method your camera uses.
You need to have your camera set to Manual Mode and Custom White Balance. For most Nikon cameras, you would press and hold the WB button on the top left of the camera, then turn the thumb dial until the display reads 'Pre' (right hand side).
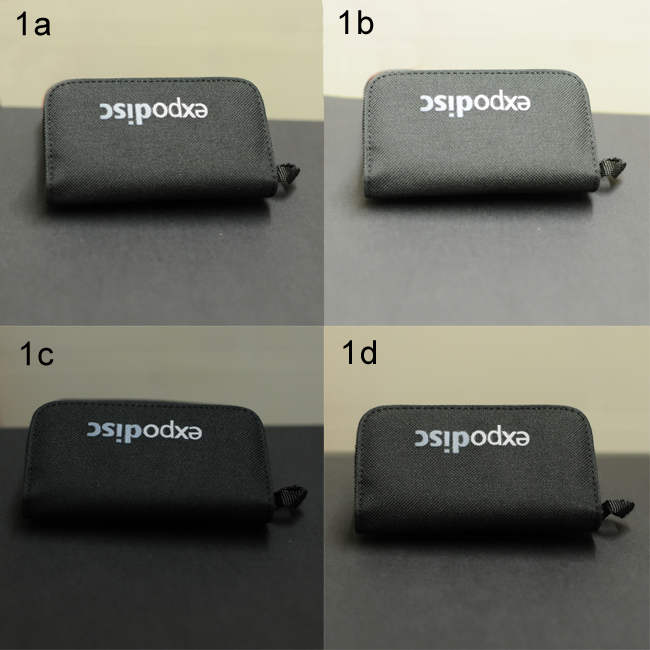
Now before I go any further; getting the correct exposure is not an exact science with the Expodisc, and even more so with a Nikon. To get an exposure reading and set custom WB, stand where your subject is and either point the lens back to your shooting position, or toward the light source (as you would with a light meter). Which one you choose will depend on the lighting conditions, but mostly it will be back toward your shooting position.
 Please note that the exposure reading you get from a Nikon differs by 1 stop when the camera is set to grab a custom WB (flashing 'Pre').
1a. Camera pointing back toward shooting position, and exposure set before entering into custom WB capture mode (flashing 'Pre').
1b. Camera pointing back toward shooting position, and exposure set after entering into custom WB capture mode (flashing 'Pre').
1c. Camera pointing toward light source, and exposure set before entering into custom WB capture mode (flashing 'Pre').
1d. Camera pointing toward light source, and exposure set after entering into custom WB capture mode (flashing 'Pre').
NIKON D300s: Setting custom WB.
- 1. Place the ExpoDisc on the front of your lens with the white side facing the lens.
- 2. Hold the camera in front of your subject and point it back toward your shooting position (see above).
- 3. Adjust your ISO to suit the lighting conditions.
- 4. Set the aperture to what you want to use.
- 5. Set your shutter speed making sure it's at least one over focal length (50mm = 1/60).
- 6. Make sure your meter readout is centre (correct exposure).
- 7. Press and hold the WB button until 'Pre' flashes.
- 8. Press the shutter button to fire a shot (it won't show up on your memory card).
- 9. The camera display should be flashing 'good' to confirm success.
- 10. Remove the Expodisc and shoot. Adjust shutter speed if you need to adjust exposure.
*
The steps above look a lot, but it actually only takes a few seconds to do.
The following examples of different light types are shot as follows. Left image. Aperture Priority and Auto WB. Centre image. Manual mode with exp/WB taken toward shooting position. Right image. Manual mode with exp/WB taken toward light source.
 DAYLIGHT (from window on a cloudy day)
'
 INCANDESCENT
'
 FLUORESCENT
'
 The shot on the left is auto WB and the shot on the right is using the ExpoDisc (cloudy windo light).
***
I'm pleased with the ExpoDisc and I'm looking forward to trying it out on a proper job with different lighting conditions. If it can save a lot of time in post it will be worth the money. If your exposure and white balance are consistent and correct, a preset in Lightroom or Aperture could be applied at import to add a bit of contrast. That should de-flatten RAW images and give you files that are spot on.
ADDENDUM-----------------------------------------------------------------------------------------------------------------------------------------------
My friend Patrick LaRoque asked in the comments, if there was much difference between the ExpoDisc and a regular grey card? So I tested a few options and to be honest there isn't a lot of difference. I think the ExpoDisc is a little more user friendly when it comes to shooting on the go. Even the Colour Checker Passport has a small grey card which is handy, but doesn't fill the frame. Being able to use the ExpoDisc to set exposure is a bonus to. Have a look at the results below or click here for a larger version.
FilterStorm:: The Best App For Photographers?
 There's a lot of great photography apps out there, but most of them are geared toward one or two features. Some lean toward shooting and uploading straight toTwitter, Facebook etc, some do tilt/shift and some only do black & white. Thanks to Apples camera connection kit, I can now take the SD card from my Fujifilm X100 and import the photos straight onto the iPad 2. I needed an app that could then resize the files to my blog sizes. I tried PhotoResizer, which did the job, but was a little sluggish and again a one trick pony.
FilterStorm is what the Photoshop app should have been like. It does a huge amount of different things and it does them really well. Apart from Settings, Load Photo Star Rating and Automations, The app is split into 4 sections, which are in the form of tabs - Export, Metadata, Filters and Canvas. Export does what you would expect, like saving back to your photos folder of sending by email, Flickr, FTP or Dropbox. You can also choose size and quality options here too. The Metadata tab is set for viewing meta and renaming photos by default, but click on Settings and you get whopping great 31 switches that let you turn on features like Keywords, Captions, Subject, Category, Location, Copyright, Usage, Contact Details...etc. The meta section really is a wolf in sheep's clothing. Canvas is where you can crop, scale, rotate, flip,straighten, Scale and add borders. This is another huge section. Filters is the place where we pixel pushers all like to be. It has Brightnes/Contrast, Curves, Hue/Saturation, White Balance, Sharpening, Blur, Black & White, Clone, Tone Mapping, Text, Noice Reduction, Noise, Redeye Brush, Colour, Vignette, Posterize and Add Exposure. The great thing is that it does them all really well.
This is the best i photo editing app that I have ever used, and I've tried plenty. The thing is, I've just checked on the Apple App Store so I could wright the price (2.39 UK) and saw that there is a pro version (8.99 UK) with even more features. My one gripe would be that if you have already bought the standard version, you shouldn't have to pay the full price for the pro version. That goes for apps that are different on the iPhone & iPad, if you buy it on your iPhone and the iPad is a more expensive & more powerful app, then you should only have to pay the difference and not the full cost. But all that aside, Filterstorm is the best app for photographers I have came across to date. It was made with photojournalists in mind (although photojournalists shouldn't need a clone tool). I'm going to buy the Pro version now, as there are a few features that I quite fancy (batch editing being but one). Filtersorm (iPod, iPhone & iPad) & Filterstorm Pro (iPad only) are available on the App Store. The photo above is from the Pro version.

