Review

Fujifilm XF 23mm f1.4 :: Mofo & Mopho

Fujifilm23mmf1.4-DerekClarkPhoto-2 The XF 23mm f1.4 R is probably the most eagerly awaited lens of the X-Series (or is that just me). I'll get out and about shooting with it soon and post more real world photos soon. But due to a heavy editing schedule and the need to get this post out, I thought I'd just grab a few of my instruments and fire off some shots. First up is the Mopho from Dave Smith Instruments, a fantastic little old school mono synth from the original designer of the legendary Prophet 5 back in the day. This little synth is as creamy and buttery as the 23mm f1.4 (see how I pulled it back on track:o).

Fujifilm23mmf1.4-DerekClarkPhoto-6

I'm sure you've read elsewhere that the build quality is superb on this lens and it absolutely is. But it's one of those products that you need to hold in your hands to get just how pukka it is. Lenses for the X Series have moved into a version 2.0 phase. The original three lenses (and the two zooms) are fantastic (the 35mm f1.4 is a modern day classic) and the built quality is very high, but the 14mm was a higher quality build and the 23mm is definitely from the same mould. The mould for this one is definitely bigger though, and the 23mm dwarfs the other lenses in girth. It's one fat beehatch of a lens and all though not as large, it reminds me of the Nikon 85mm f1.4G, short and fat.

Fujifilm23mmf1.4-DerekClarkPhoto-1

Fujifilm23mmf1.4-DerekClarkPhoto-3

Like the 14mm, this too has the push pull focus ring to switch from Auto to Manual Focus. It's worth mentioning something here that I haven't read about the 14mm or 23mm (though I might have missed it). If you're a back button focus shooter, things are a little different now. On the other X Series lenses, if you put the camera into Manual Focus the AFL/AEL Button would act as auto focus and then you could tweak with the focus ring. Things have changed with the new style of lenses and it's one more thing you have to get your head round when shooting on the go.

Fujifilm-XF-23mmThe focus ring on the 23mm (and 14mm) is not continuous like the other lenses, it travels from one end to the other and stops (just like old school lenses). It's still fly by wire, but this new glass works like a lens should, which means you don't keep turning the ring after you've reached minimum focus distance or infinity. But here's the thing; if you switch to manual focus on the camera body, you can use the back button to focus, but the focus ring is locked. If you work it the other way and instead of switching to manual mode via the camera body, you pull the focus ring back, the AFL/AEL button doesn't work as a focus button. I shoot in manual focus a lot and I really miss the ability to flick the back button to get the focus close and then tweak it with the ring. But the up side to this new design, is that the Manual/AF selector on the camera is a quick way to switch between trigger finger focus and back button focus (as long as the focus ring is pushed forward into the AF Mode).

Fujifilm23mmf1.4-DerekClarkPhoto-7

Fujifilm23mmf1.4-DerekClarkPhoto-8

The 23mm feels perfect in your hands, especially on the X-Pro. But the quality of this lens is just stunning and Fuji has done a fantastic job in producing a lens that is more than the sum of it's parts. The 35mm f1.4 has always had the edge over the other X Series lenses, but the 23mm has a look that is just as special and I can't wait to use it on a real shoot. I'm a documentary photographer and this is a lens to tell stories. You get a great perspective with an old school 35mm, just the right amount of foreground to background without a load of distortion. It's also a lens that you can move in close and still get a great look without peoples faces getting all bent out of shape. The 18mm f2 can be a little wide for my liking, but this new 23mm foots the bill.

So the 23mm f1.4 has been worth the wait. The 56mm f1.2 should be out early 2014 and if it's in the same league as the 23mm it will be stunning. I shoot with two bodies a lot and the 23mm on the X-Pro1 and 56mm on the X-E1 will be a great partnership. I'll have more photos from the 23mm in the next few days on this blog as well as Twitter and Facebook. I'll also shoot some street photography and post them on 35mmStreet. I'll leave you with the horn, or rather, two horns. My Selmer Tenor and Yanagisawa curved soprano, two amazing saxophones. If you've got the horn and still not satisfied, take a look at Project Jazz on this here site.

Fujifilm23mmf1.4-DerekClarkPhoto-11

Fujifilm23mmf1.4-DerekClarkPhoto-9


McCullin :: DVD Review

20130302-130317.jpg"War is partly madness, mostly insanity and the rest of it is schizophrenia!"
Don McCullin

McCullin is a feature length documentary film by Jacqui & David Morris on the life and work of photographer Don McCullin, who is most known for his hard hitting photographs of the conflicts in the 50’s, 60’s, 70’s & 80’s. This film mostly covers Don's war photography, but also features a great deal of his work on poverty in post World War II Britain.

The first thing that stands out right from the opening titles, is the haunting score by Alex Baranowski. Music can make or break a documentary and this beautiful soundtrack does for McCullin what Antonio Pint's score did for the fantastic Senna documentary. I was glad to find the soundtrack for McCullin HERE on iTunes.

Another thing that struck me, was the amount of unseen film footage from the various conflicts featured in the film. There's no doubt the team that made McCullin did a huge amount of research and they should be congratulated on such a fine job of putting this together. The whole film is woven together with Don's superb black and white photographs, video footage and interviews with Don McCullin and Sunday Times editor Harold Evans.

Although the scenes of war are very graphic and show many mutilated bodies, including people flattened by tank tracks, I found the most harrowing scene was of a group of starving Biafran children. One trying to drag a smaller sibling up a concrete step by his or her skinny arm, the tiny body twisting as it's head bumps off the step.

McCullin is out now on DVD and Bluray and is unmissable! If you are a human (I'm assuming you are if you're reading this), then you need to watch this! In my opinion, this film should be used in schools to show the horrors of war!

[embed title="McCullin official UK trailer - in cinemas & Curzon on Demand from 1 January"]http://www.youtube.com/watch?v=7VWjo5XUIfw[/embed]

Trigger Happy :: Flashwave III Radio Triggers

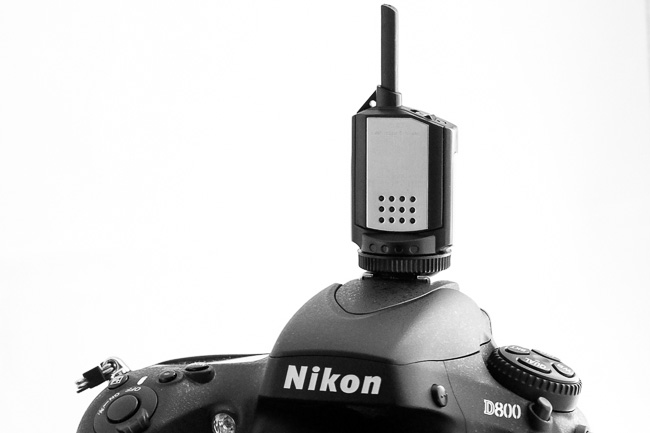
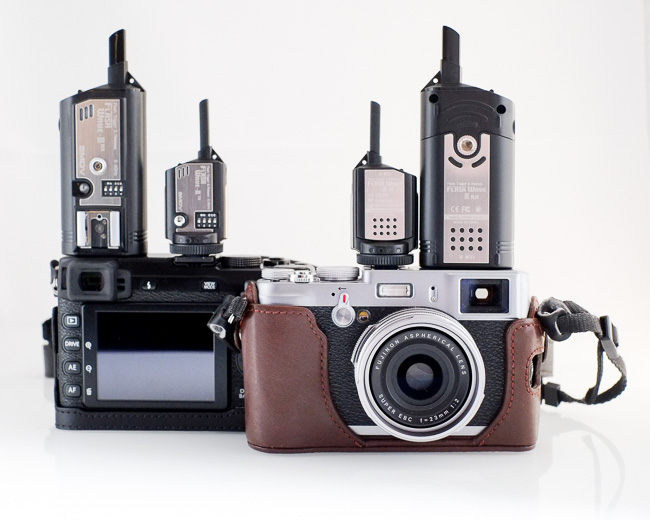
I've been a heavy user of Nikon's Creative Lighting System for the past few years and it has worked well for me...if I'm shooting Nikon. But these days I need a radio system that would work equally well on the Nikon and the Fuji X-Pro1, X100 and now the X-E1. The latest pocket wizard plus iii's were looking like the direction I was going to go, but the system was a bit messy as the transceivers needed to be hung from the lights by lanyards. The Pocket wizards were also working out pretty expensive as I would have needed six units.

I was turned on to the Flashwave III system after reading that Billy 'the Fuji Guy' used these units and recommended them for the X cameras. I ordered two sets from Warehouse Express to try before buying the rest of the receivers that I required. A set consists of one very small transmitter for the camera hotshoe and one receiver to trigger a flash. One of the plus sides of the Flashwave system is that the receiver has it's own hotshoe that a strobe can be mounted on, plus because it has a flat base, the receiver also doubles as a Speedlight stand. These units can also be mounted on light stands via a threaded socket on the base.  A set of Flashwave III's also come with an impressive array of cables and adapters that most companies would charge as extras.

Built quality is pretty good and although the units are plastic, they have stainless steel plates on the flat areas that give them a quality feel. I get quite a few miss-fires with the Nikon SU800 commander unit (probably due to it being infrared line of sight), but the Flashwave's fire every time. Channels are controlled by 4 dip switches on all units, which gives a total of 16 channels. So if you do events with other photographers, both of you can select a different Channel and avoid firing each others lights.

It's great to use two cameras with a Flashwave transmitter on each! With a 50mm on one and an 85mm on the other, I can get through a full portrait session without having to change a lens. I used to either switch lenses or switch off cameras and move the SU800 from one to another.

The downside of using generic radio triggers is that you can't change power from the transmitters, they simply trigger and nothing more. But on the up side, I find that my lighting is more consistent when I come to editing a shoot, as I'm less likely to try to micro adjust power settings. Which of course means that photos can be adjusted in batches as the exposures are all the same.

Nikon D800 :: It's Not You, It's Me!

I've had a strange relationship with the D800 ever since it was first announced. I bitched about all those megapixels right from the start and feel that I've been forced into an arranged marriage that I should hate!. The trouble is, it's the best DSLR I've ever shot with! I still say that 36mp is too much (for me), but after having a hands on with the D600 and being unimpressed by it's lack of pro feel and features (great sensor though) I had only three options, D800, D700 or 5Dmkiii. If Nikon had put the D600 in a D300s body, I would have bought it right away!

The D700 is a fantastic camera, but lacking in two features that are crucial to me, dual card slots and quiet mode. Canon came so close to having another The 5Dmkiii user. It's a fantastic camera in the hands, so comfortable to hold, but the draw backs for me were just to many. I use custom white balance all the time and Nikon have a really easy way to handle this feature and is so quick. Canon on the other hand, use a reference photo (that you have to move to manual focus to take when using an ExpoDisc) that you then have to delve into the menus to find. It's just to many steps! Moving focus point is done by pressing a button first, a small thing, but one step more than Nikon. What it came down to in the end was that I have worked my way up to owning the best prime lenses that Nikon produce and I am so deep in Nikon's CLS lighting system that it would have been crazy to move. It was always kind of obvious, but sometimes you just don't see the woods for the trees! My friend Patrick LaRoque took the chainsaw out and made a small clearing...just enough to see the Nikon forest.

So the D800, the camera I said I wouldn't own is the body that I now think is pretty awesome! I've shot portraits and product shots with it and have been blown away by the quality and sharpness. My 85mm f1.4G is outstanding on the D800! In fact all my Nikon Primes have suddenly shown their true potential. My big problem with the D800 will be when shooting weddings. I probably shoot less pictures than a lot of photographers at weddings and I'm always trying to be selective on the day by composing as carefully as possible and definitely not praying and spraying! I'd rather spend my time in post editing, rather than wading though hundreds of images that won't make the cut. But at around 103 raw photos per 8gb card, my workflow will have to be adjusted. The up-side is that I actually shoot more shots at a wedding on the Fuji X-Pro1, so that takes a lot of the pressure of my hard drive.

Click on the photo above to see the full size jpeg and then the one below to see the full size of the crop.

So as you can see from the shots above, the D800 is a camera with amazing resolution. It's also the DSLR with the biggest files.  The  Raw file for this photo was 43.3mb and the jpeg was 12.6mb. I've been shooting  jpeg with the Fuji X100 and X-Pro1 and never once wished I had a Fuji raw file, so I'm thinking of shooting  jpeg on the D800 for weddings on one card and raw on the other. I'll import the jpegs into Lightroom and unless I need to recover any blown highlights (vary rare), the raw files might never get used.

The Fujifilm X-E1 :: Hands On Review

There's more similarities between the X-E1 and the X-Pro1 than not, so I won't go over old ground here. You can find plenty on both the X-Pro1 and the X100 elsewhere on this blog, so I'll just give a brief roundup of the few differences and how this new camera feels.

I chose the black version for one reason...stealth! I recently tried to take photos at a murder scene and only had the X100 with me. Although it was dark, I was we'll aware that the silver body would be noticed by the police around the area far more than a black camera would, so for me, the X-E1 had to be black. I will probably put black Gaff tape over the front name plate of the camera to cover the white letters too.

First reaction when I unboxed the camera was that the packaging was a big drop down from the X-Pro1 (which was a drop down from the X100’s). The second thing I noticed was how light the camera was. I've had this initial feeling with all the X's, but like the X-Po1, when you add the battery and a lens, it starts to feel quite nice! I'm eagerly awaiting a Gariz half case to be made available, which will not only protect the body, but add a bit of weight and make it a bit more comfortable in the hand. The X-E1 is almost identical in size to the X100, but feels a bit easier to grip, thanks to the front rubber grip and the raised section that houses the Q button. Like the X-Pro1, I feel that the AE-L button would have been better placed to the left of the thumb wheel (where the View Mode button is). I would have liked the play button to have stayed in the same place as the X-Pro1 (just for consistency between cameras).

You notice the OLED viewfinder is obviously much higher resolution as soon as you look through it! The addition of a diopter is great too, but the one big thing that annoys me (apart from the lack of minimum shutter speed setting in auto ISO) is that unless you are using the rear LCD screen for shooting (why would you?) when you press the Q button or Menu button, you have to look into the viewfinder to see the display. This is a bit un-natural. For me the viewfinder is for shooting and the LCD is for menus. I know I'm not alone in this as I've read the same thing on blogs about the X-Pro1 when using the EVF.

The X-E1 is a cracking little camera and in my opinion the best in it's class! A firmware updates could sort out a couple of niggles, but there's nothing that should prevent anyone from buying this camera. If I didn't own any X cameras, I would buy the X-pro1, but if you're looking for something smaller, lighter, less expensive or to compliment an X-Pro1 or X100, then this is the one to buy. I have the 35mm f1.4 on the X-Pro1 and the 18mm f2 on the X-E1 right now and it's a pretty sweet setup. I'll buy the 23mm when it comes out next year as I love the 35mm point of view, but for now, this is a s good as it gets! Fuji are on fire right now and there commitment to existing products and customer feedback is unmatched by any other brand in my opinion.

One thing I should point out is that although the shutter sound is as awesome as the X-Pro1, there is an extra noise as the shutter closes that sounds almost like a rapid wind on of film, very short, but I wasn't sure if it should be there. I checked with Fuji UK and they confirmed that it was the sound it should make.

Second Shootr v1.2

In March 1976 Francis Ford Coppola started filming a little movie called Apocalypse Now. Filming was set for five months, but due to all sorts of problems and delays it was three years before a version was first shown, a version that wasn't quite what anyone involved in the movie expected or the promised end result. In the end, it's arguably one of the best Vietnam Movies to come out of Holywood. So what does this have to do with an iPad app?

Second shooter is an iOS app that helps photographers get and stay Organized? It has been available for the iPhone and iPod touch for a couple of years now and it's a very useful app and the best of its type I have tried on the iPhone. Second Shootr 1.1.1 was released back in June 2010 with version 2.0 being mentioned on the SS blog as far back as Feb 2011. But there has been long gaps with only the occasional blog post to reassure users that v2 was on it's way and that it would include an iPad and desktop version that could all be synced together...it sounded perfect.

An update to Second Shootr has now been released and is available on the App Store, but it's not the promised v2.0, it's v1.2. The great news is that it's now made to work on iPad as well as iPhone and iPod touch and it takes advantage of the Retina Display. The iPad version is really nice and it's very tempting to start using it exclusivly. Entering data is so smooth and intuitive that you acctually enjoy typing in new client data.  Sadly there is no desktop version, but the apps makers say that SS v2.0 is still in the pipeline and will be coming in the near future. In fact their photography business Plinkk Photography has been put on hold so that more time can be spent on the big SS update.

So the big dilema for me and I expect for a lot of other uses now, as iPad & iPhone/iPod Touch versions can't be synced, is to go with one of three options.

1. Start using the iPad version, which is much easier to input data.

2. Ignore the iPad version and stick to the iPhone, as the phone is the device that goes everywhere with you.

3. Input data twice and use both devices.

Well done to the people behind Second Shootr for getting this great app finally on to the iPad, but please please give us the ability to sync between OS devices. A Desktop version would be the icing on the cake!

If you haven't tried Second Shootr yet, go to the app store download it...it could make your life easier! Well worth £4.99 (uk).

The Vanguard Heralder 38 :: Bag Review

If you are in the market for a large modular camera bag that holds a lot of equipment and is easy to work from, then the Heralder 38 from Vanguard deserves your undivided attention. The 38 is not a bag you would carry around with you everyday, it's a bag you would take on a shoot, especially if you need everything but the kitchen sink. This review is a little overdue, but I really wanted to give the 38 a proper field test to see just how good it was. When Vanguard sent me this bag, I was a bit surprised how big it was. I had expected something smaller, but as soon as I opened the box I was impressed with both build quality and features.

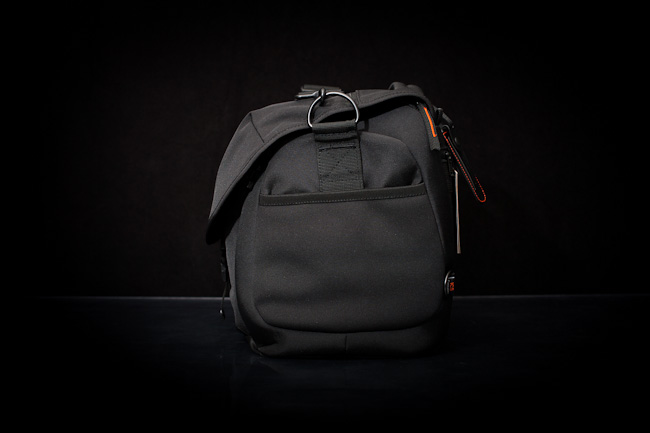
Exterior The outside surface of the bag is made of a tough black nylon that should wear well through the years. The zips have heavy duty black tabs with a single orange stripe on each that means seeing the zippers in the dark won't be a problem. The rear of the bag has a zipped pouch that contains a rain cover tethered by an elastic cord. The rain cover struck a chord with me as I recently had a shoot in heavy rain and the bag I was using got soaked right through. The 38's rain cover pouch is also big enough for an iPad. Another welcome feature on the back is the built in strap that allows the bag to be slipped over the handle of larger rolling camera bags or suitcases. There are also ICS compatible D rings and loops to tie the bag down.


On one side of the bag there's a large neoprene pouch that could easily be used to store accessories or a place to keep a water bottle. I found it to be most useful as a lens pouch for swapping lenses on the go. Round the opposite end there are three handy straps that can take lens pouches with slip lock attachments. I tried attaching a couple of mine and they were very safe and secure. I would recommend lens pouches with double velcro locking. I'd love a slip lock attachment for my Zoom audio recorder so that it could hang it on the side of the bag and collect ambient sound.

The top lid functions in two ways. The first is a zip that runs across the length of the bag and is used for quick access and probably the one that you would use most when shooting with the bag on your shoulder (see photo at the top of this post). There's also a magnetic flap to secure the zip when closed (photo above). The second way the lid functions is to lift it right over, which gives complete access to everything inside. To open it this way, you unclip the plastic fastener and then open the zip that runs from the back of one side to the back of the other side. The zip is also under the flap of the lid, which although makes it a little awkward to find, it does add a large amount of weather proofing. I tend to use the clip when I'm shooting but also close the zip when the shoot is complete.

One of the best features on the outside of the bag is a tripod holder that tucks away when not in use, in fact you wouldn't know it's there. My tripod is old, large, chunky and heavy, but the 38 carried it without any problem. This feature alone would make it a great bag for landscape photographers.

Interior Inside the Heralder 38 is a four section memory card storage pouch on the underside of the lid. There is also a section at the front that would take an iPad, some pens and some odds and ends in a transparent zipped pouch. The rest of the inside consists of two padded sections that can be removed if you need to utilize as much space as possible. I would liked to have seen more padding on the bottom of the bag when the inserts are removed, although to be honest it can't say I'd ever use it without inserts.

The insert at the rear is big enough to take a 15" laptop and also has a flap that can be closed and secured by Velcro, so you could easily use this as a separate carry around case for your laptop. The main insert can be divided into eight sections that are deep enough for a 70-200 f2.8 lens. The padded dividers Velcro to the sides of the insert, so the configurations are vast. My one gripe with this bag is that if you shoot with primes (as I do), a 35mm and a 50mm could fit stacked in one compartment. So my one wish for this bag would be for Vanguard to include eight small square dividers and two oblong ones. Then smaller lenses could be stacked on top of each other with these smaller inserts attached by velcro between them without the risk of scratching or denting. I tried it out with pads from another bag and it let me pack even more lenses. Similarly, oblong pads could be used to sit on top of camera bodies to allow light items to be placed on top.

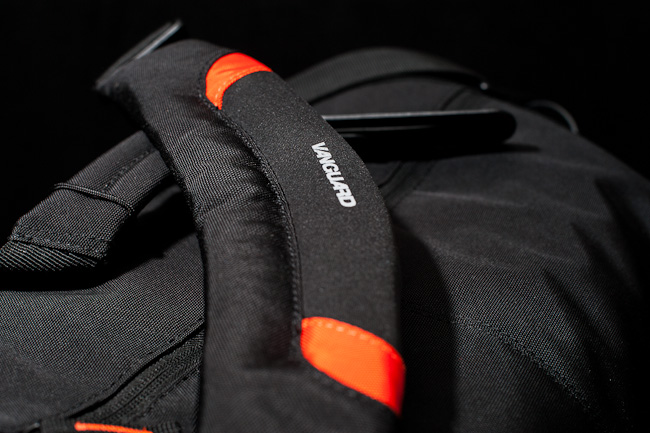
It's amazing how much equipment the Heralder 38 can hold, but it's also amazing how comfortable it is to carry. This is mostly thanks to the heavily padded shoulder strap. There's obviously a lot of thought went into designing and manufacturing this bag. If you're a wedding photographer, it's a great bag to keep all of the days kit in the back of the car and use it to feed a smaller bag for different parts of the wedding.

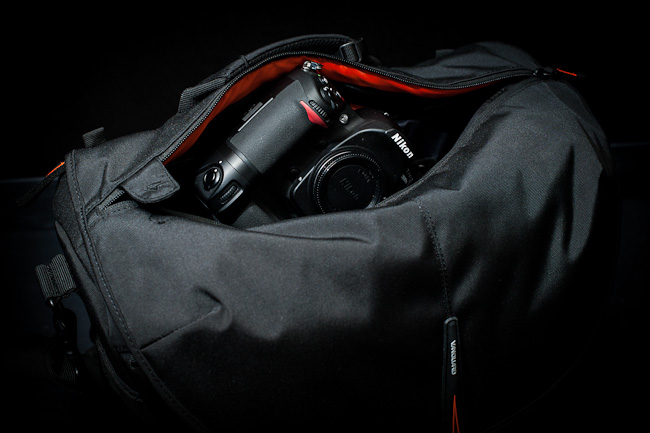
The photo above shows the gear that I was carrying in the Heralder 38, but it was by no means full. The 70-200mm f2.8, 85mm f1.4 and the 35mm f1.4 are quite chunky lenses. In fact I have a couple of bags that won't accept the 85mm because of the diameter. So to come back to where I started. If you're in the market for a large camera bag, The Heralder 38 is definitely worth checking out. You can see more of this bag and others like it at the Vanguard website and you can buy it from Amazon UK or from B&H in the US.

Gariz Leather Half Case For Fujifilm X-Pro1

I just received the Gariz leather half case for the X-Pro1 and I have to say it's pretty cool. The orange one looks awesome but doesn't really fit in with the cameras stealth looks. So I opted for the black one and I'm really pleased with it.

The half case attaches to the Base of the camera via a small screw that fits into the tripod mount. There's been a lot of criticism on the web because the tripod mount on the X-Pro1 is off to one side (it has to be as the lens mount is so close to the bottom of the camera) so those people will love that Gariz have put a tripod mount in the centre. Another great feature is that the battery and SD card are both accessible without removing the case, thanks to a hole in the metal base plate. Speaking of the base plate, the brushed metal looks fantastic and the engraving adds a touch of class.

The top part is all leather with holes cut out for the focus selector switch (front) and the pc sync flash socket (side). The back part is completely open with no leather strap above the LCD screen to get in your way (unlike some eBay knock-offs). There's also an embossed logo on the side that stops it from looking bland and also provides a bit of grip under the right palm. As the case attaches via the tripod mount there are no annoying straps wrapped around the strap hooks, so the strap is able to move freely.

If you're in the market for an X-Pro1 half case, then this is probably the one. Before you even see it, you can tell from the packaging that it's a quality item and for those that think the camera is a little Iow in weight, this adds just that little bit of heft and even makes it feel more solid. I would be quite happy to buy another Gariz half case for my X100, although I do like the ability to quickly snap on the top part of my Fuji case. But the fact that I need to remove the bottom part of my present case to change battery or SD card means that there's a good chance of a second Gariz coming my way.

The Gariz XS-CHX1PM Half Case for the X-Pro1 is available on eBay from Gariz and is the best way to buy it as their website is in Korean. I paid £75 and opted for the paid for postage, rather than the free one as I wanted to protect my X-Pro1 as soon as possible. I bough mine on ebay HERE and it was delivered within a few days.

Fujifilm X-Pro1 In The Studio

The X-Pro1 is an awesome camera for natural light portraits, but how about portraits with strobes? I ordered the camera back in January, when it was first announced, but the thought of it being a studio camera never crossed my mind. But I quickly became curious when I saw the results of portraits I had taken on the streets. I know that my photog buddy Patrick La Roque is also waiting with interest to see how the X-Pro1 does in a studio environment. Maybe this will be the final nail in his wallet's coffin? Check out Patrick's blog for loads of great X100 & X-Pro1 stuff.

THE SET-UP & EQUIPMENT I went old school for this test by using a PC sync cable (long one) and a light meter. I do loads of stuff with Nikon Speedlights, so I was really interested to see how or if they would work with the X-Pro1. My background was a collapsible Lastolite Black Velvet 6' x 5' and I also used a Lastolite Easybox Hotshoe softbox and stand. I placed an SB800 in the softbox and connected it to the camera via the PC sync cord. My second flash, an SB900, was set as an optical trigger (SU4 mode) and lay on it's back on the floor tilted up at 45 degrees to light the background and give separation between it and the subject. I set the front light to 1/8th power, the X-Pro1 to 250th of a second and ISO to 200. I should have read the manual as the maximum sync speed is actually 1/180th sec (see CONS). I sat in position and took a meter reading (taking the PC sync cable from the camera and plugging it into my Sekonic light meter) from in front of my face which gave me f4 which was fine. I usually shoot strobe stuff about F8, but I wanted a shallower depth of field for these shots.

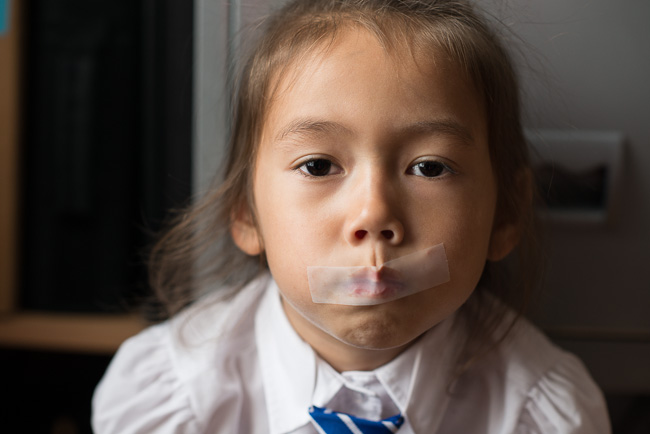
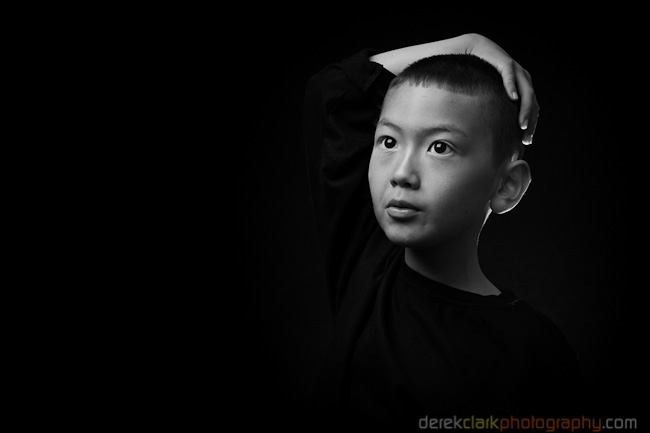
THE MODELS The most difficult models to shoot are my own kids. With other peoples kids, I'm the stranger with the camera and they tend to sit still and behave. When you shoot your own kids, they don't sit still and they don't want to spend time being photographed when they could be outside playing with their friends. My son Teo can't sit still for more than 5 seconds, so the best way to keep him in front of a background is to let him do what he loves, tell stories. His actions become very animated and can look like poses (like the photo at the top of this post). My daughter Janel walks away everytime the flash fires and announces "that's us done". So this is a good test for the X-Pro1's auto focus.

THE CONS (or my stupidity) The SB800 would go into sleep mode if there was a gap between shots and would not fire when the shutter was pressed, but would be back on for the next. I'm pretty sure this is just a matter of switching off the sleep mode in the Speedlights.

The main con is that you get the odd shot where half the frame is black (see left) due to the flash firing when the curtain is half way across. I shot all these photos at 1/250th of a second, but the maximum flash sync speed for the X-Pro1 is 1/180th of a sec. So rather than this being a con, I'm amazed that only a few of my shots have the dreaded black line across them.

EVF is not very good for this type of shoot as the camera ups the brightness of the viewfinder to the point where it's mostly blown out. This could turn into a plus if your scene was just too dark to see.

THE PROS The OVF is actually really good for studio shooting and I was really surprised at just how few shots I got out of focus. In fact almost all of them were because the kids were moving so much. Another great thing that I hadn't thought about, was how little you have to chimp due to the viewfinder display giving a 2 second view of the shot. This really is a big deal, as you can easily lose the rap-ore with a subject if you're constantly looking at the back of the camera.


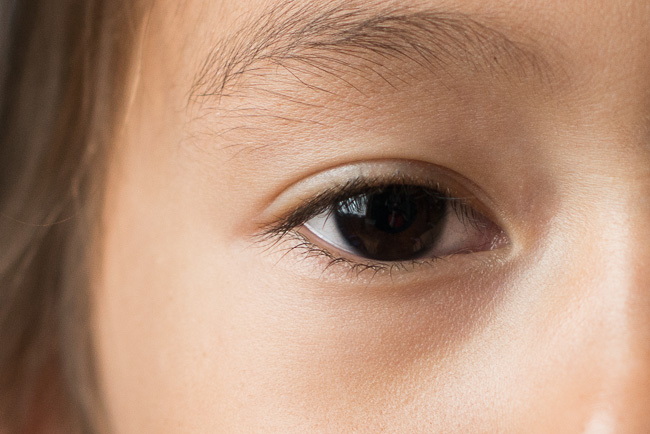
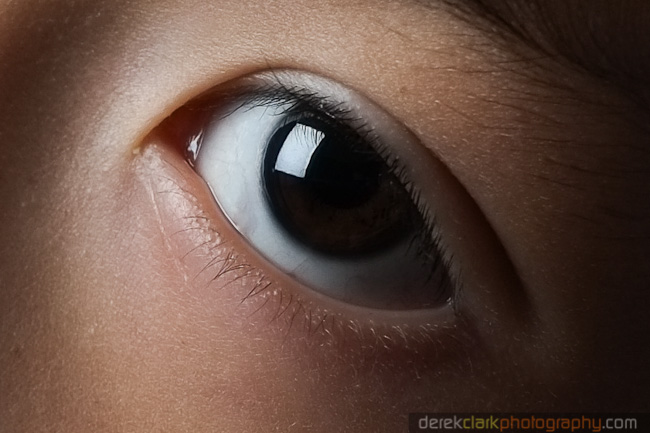
IF YOU'RE WONDERING HOW SHARP THESE PHOTOS ARE, HERE IS A CROP ON THE EYE OF THE PHOTO ABOVE

I was shooting with the 35mm f1.4 and it is absolutely, positively, one of the best lenses I have ever used. It is razor sharp and renders colours perfectly (the colours in these photos are untouched). Just look at the red Chinese dress below. I don't know how much is down to the sensor and how much is down to the lens, but there's something magical that happens with skin tones from the X-Pro1...It's beautiful!

CONCLUSION The X-Pro1 is without doubt a fantastic studio camera and I'm going to be torn as to what I use for portraits, my Nikon gear or the X-Pro1. If I'm using Nikon Speedlights for a location portrait shoot, the SU800 Commander Unit is really great as you can set each light individually from above your camera. Maybe it's time to think about the new Pocket Wizard Plus III's? Or maybe a set of Elinchrom lights with Skyport transmitters?

So one of the questions that I see on the web a lot is "Can the X-Pro1 replace a Canon 5DmkII, mkIII or a Nikon D4? Absolutely! It's not great for shooting fast moving subjects (especially sport), but for everything else, the X-Pro1 is proving to be a very capable camera and in some cases it out performs DSLR's. Fuji made a great move by releasing 3 prime lenses at launch, which shows the stunning image quality. I won't be buying any zooms when they're released as I love primes and would rather zoom with my feet to get the sharpest images. I thought I knew what the X-Pro1 was going to be like before it even arrived...it's an X100 with a jacket on, right? But the X-Pro1 surprises me almost on a daily basis. I'm looking forward to getting more creative with this camera.

Fujifilm X-Pro1 Lens Review :: 18mm f2 & 35mm 1.4

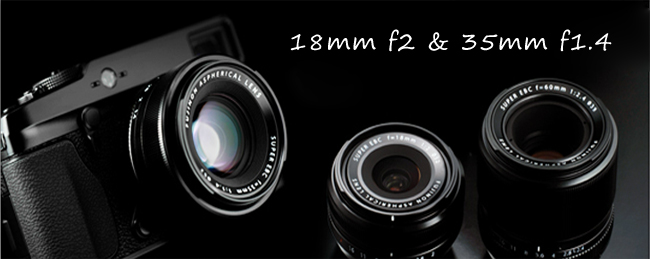
The lens choice's for the Fujifilm X-Pro1 at the moment are 18mm f2, 35mm f1.4 and the 60mm f2.4 Macro, or in 35mm terms they would be 27mm, 53mm & 90mm. More glass will be available nearer the end of 2012 and I have included a lens roadmap at the bottom of this post. At the moment I have the 18mm and the 35mm, so I can only speak of them, but the finish will be the same across the range. Although light in weight, each lens is well built with all metal body, flange and lenshood. They have a black satin finish with plastic aperture and focus rings. I have read a lot of reviews on the web that say each lens is made of plastic...not so! Even if they were, high end Nikon glass have plastic bodies and cost 3 time the price of the Fuji glass, so plastic doesn't always equate to cheap. The lens caps for the squared off lens hoods are made of rubber and come off easily, but I would recommend using them when your camera is in the bag, but not when you're walking around. You will loose them! Each lens is also supplied with round centre pinch caps too, but they're a bit fiddly.

TAKEN WITH THE 18mm f2 at 1/45th sec , f9 and 200 ISO DESATURATED IN LIGHTROOM

The 18mm f2 is nice and sharp with only a very very minimal amount of softening at the edges. I have seen more softening on Nikon and Canon glass at similar focal lengths, so there's nothing to complain about here. Bokeh is very good with almost circular highlights and buttery smooth out of focus areas. The aperture blades chatter when the amount of light passing through the front of the lens changes. If you remember Skippy the Bush Kangaroo, it,s like a tiny Skippy inside your lens. The same thing happens in the X100, but it's tiny blades are almost silent and nowhere near as noticeable. I'm not sure why these cameras have to do this, but I'm sure it's one of the reasons why battery life is so bad in the X100 and X-Pro1. Even if the camera's aperture, shutter speed and focus are all set to manual, skippy still chatters away inside the lens. The focus ring is smooth when turning, but a rubber grip would have been better as the plastic can be a bit slippery.

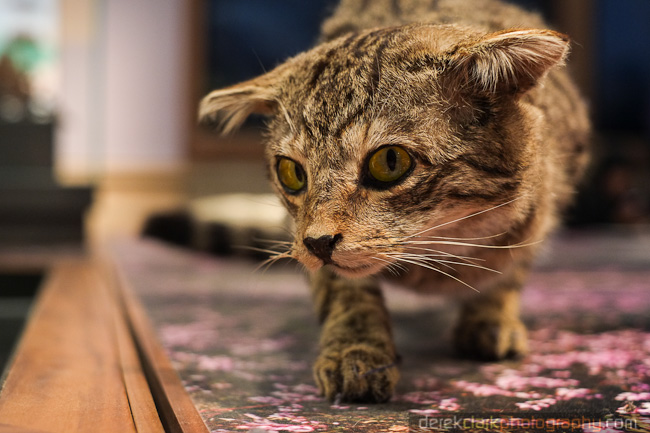
THIS SHOT OF THE DEAD CAT WAS TAKEN WITH THE 18mm f2 at 1/30th sec, f2 and 400 ISO

THIS SHOT OF THE DEAD CAT WAS TAKEN WITH THE 35mm f1.4 at 1/50th sec, f2.8 and 1250 ISO

The 35mm f1.4 is an amazing little lens. On the down side, it's aperture chattering is a little bit louder than the 18mm, but in every other way it's a stunning piece of glass. It's as sharp as a tack, even wide open at f1.4 and the bokeh is as smooth as butter. The focus ring on my copy doesn't feel as smooth as my 18mm's, but I'm sure they all feel that little bit different copy to copy. The length of the lens with the hood attached is quite a bit longer than the dumpy 18mm, but it's not to bulky. The back element is much deeper set into the lens than the 18mm too. The aperture ring on my 35mm has a bit less resistance than the 18mm, but I have shot with the 35 more, so the 18mm might loosen up (I hope it doesn't though). In short, the 35mm f1.4 is an amazing bit of glass that in my opinion, Fuji couldn't have done a better job on.

TAKEN WITH THE 35mm f1.4 at 1/50th sec , f4 and 1600 ISO

A lot of people have complained about the high cost of the X-Pro1, but each X mount lens is actually very affordable, in fact three times more affordable than the two main manufactures, but with no less quality. The chattering is a bit annoying, but you do get used to it...a bit. I was going to hold off for the upcoming 23mm (35mm equivalent), but I needed something wide. I'm really pleased I got the 18mm and as I have the 23mm on the X100, I might not even bother buying one for the X-Pro1. I am keen to see the super-wide 14mm when it arrives near the end of 2012. I'll list the X-mount roadmap bellow (apertures may change when the lenses finally arrive).

I think Fuji may have made a mistake in allowing pre-production lenses to be tested and samples from them to be posted on the web. It worked fine for the 35mm f1.4 and I don't think I have read a single review that slates that lens. Unfortunately the 18mm f2 pre-production lenses suffered from both soft edges and purple fringing. The photo at the top of this post is the type of shot that you would find purple fringing on the tree branches due to the bright sunlight coming from behind. So far, I haven't had any issues with the purple pests, but I haven't shot loads of photos outdoor in conditions that would force the issue.

So I'm really happy with the two lenses I have. I haven't felt the need for a longer focal length so far, but I probably will get the 60mm f2.4 at some point. Although it's said to be slower at focusing, it is known to be super sharp. It's also handy to have a macro lens in your bag. If you have watched my video on the Lowepro Event Messenger 150 camera bag, you might have noticed I still have a space at the bottom left of the bag for the 60mm. The X-Pro1 realy shines as a tool for shooting portraits. The skin tones and bokeh are really really great, so the 60mm is maybe a must, but I'll wait a bit longer.

Lens Roadmap

14mm 2012 18-72mm f4 IS 2012 28mm f2.8 Pancake 2013 23mm f2 2013 70-200mm f4 OIS 2013 12-24mm f4 OIS 2013